Whether you’re tight on budget or just can’t keep up with the rapid-fire holiday changes, this fall wreath is cheap, easy, and will last through November.
Last week I was eating corn dogs and watching the big wheel at the state fair, now suddenly it’s pumpkin spice and oversized scarves and my door still has spring white flowers on it! That’s so last season, literally! Haven’t you heard you can’t wear white after Labor Day?
Don’t fear. No fashion faux pas for your door. Not if you’re prepared to spend under $20 and about an hours worth of time.
That’s right, this fall wreath is cute, simple, and it won’t break the bank!
Step One: Gather the Goods
A number one tip for sticking to a tight budget for crafting is to use up everything. So before you hit the store, raid your stash and find anything from an old project that might transition into this one. If you find anything, keep that in mind when you’re out so you can re-use scraps.
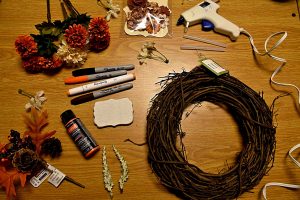
Once prepared, head to your favorite craft store with your color palette generating, but since wreaths are so customizable, there are many ways to decorate. The bare necessities are the wreath frame, hot glue and a gun, and filler.
The Base
For the base, opt for the nature vine style because this allows you to show the wreath frame (unlike the foam bodies) and has a built-in rustic style for the season. Depending on your budget, choose your diameter. The bigger the body, the more filler you’ll need and the bigger the price tag.
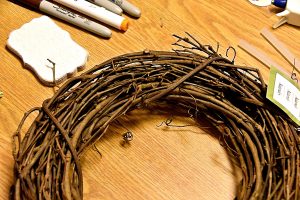
Once you’ve got your body picked, if you don’t already own a or you don’t have enough glue, get that so you don’t forget! Then it’s onto the fun stuff: the filler.
Filler
The filler is what adds the personality and style to your wreath. Based on when you’re shopping, check for sales and scour through the entire store (not just the fall themed things) because you can find items to fit your color palette and aesthetic outside the display items and they might be cheaper or fit with a coupon.
The main filler items are picks, these come in a variety of styles ranging from under $1 to over $12 for a bundle. Start with your main color (mine is a classic, deeper orange hue) then add in a few accents and build from there, constantly referencing both the size of your wreath and that original color.

Besides picks, to fill space, especially on a larger wreath, consider a ribbon. Ribbon can add another layer and depth to your wreath without needing vast amounts of picks. For a more rustic look, pick out a burlap style rather than satin.
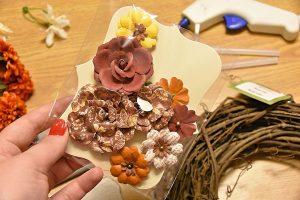
Lastly, look for your statement items. These might be miniature pumpkins, a bow, or some sort of sign. I chose to add lettering to my wreath so I needed a plaque as my statement item along with some unique paper flowers to contrast the pick-style florals. Browse the entire store for that unique item to fit your theme and complete the vision.
Then, check for coupons and check out!
Step Two: Layout
Contrary to some DIYs, the hard part is done. Developing that theme was the main bulk of this challenge, now it’s all about eyeing it up.
Prepare the Space
Start by prepping your space, clear off a table big enough to spread out keeping in mind that deconstructing the picks can get messy.
Then, take apart those picks by pulling off the heads (the flowers or decor pieces) as the actual pick part isn’t needed. Don’t discard any of the extra bits as those might come in handy!
Heat up the glue gun and unpackage everything. Then, you’re ready to sketch it out!
Sketch it out
Before you glue down anything, you need to envision the wreath. Start with the biggest pieces and lay them down until you have a rough feel for how the wreath will look.

Then, glue down the base items. I find it’s best to glue by first finding how the item fits into the vines of the wreath body, then removing it, adding glue into the vine and sticking the item back in to hide the glue.
Layer it Up
Once the biggest items are down, repeat the sketch step with the smaller bits before gluing them down.

Fill in any visual gaps with the small leftover bits. Experiment with tiny bits of leaf or petal left on the table until it looks complete.
Secure everything, add any last statement pieces, and let it dry!
Step Three: Hang it Up!
Once it’s completely dry, add a bit of ribbon or just find the right notch in the natural vine pattern and hang it!

Then, get yourself a pumpkin spice latte, sit back, and admire that bad boy.
- Lemon Balm Tea Recipe - 11/03/2024
- Are Geraniums Annual or Perennial? - 09/21/2024
- DIY Home & Garden: Featured on ApartmentGuide - 09/21/2024

