What is food dehydration, and why would you choose to dehydrate foods?
Food dehydration is simply the removal of water from food to aid its preservation.
Essentially, the process works by reducing the product’s moisture content via evaporation—to adequate levels, limiting microbial growth and other reactions.
Though among the oldest food preservation methods, dehydration is by far the easiest and simplest way to prolong your foods’ shelf life, as it also retains the products’ quality aspects like flavor and nutritive value.
Table of contents
Why Should You Learn to Dehydrate Foods?
The primary benefits of food dehydration include the following:
Save on food costs:
Buying food in bulk (especially at discounted prices) and then dehydrating it will save you the regular expenses you’ll have to incur when you exclusively rely on store-bought items all the time.
Plus, it will last longer, saving you the store-trip-related costs.
Faster cooking times
It will take you less time and fuel to prepare your meal. This also implies less rehydration time for foods like legumes, grains, and vegetables.Saves on storage space
When you dehydrate your food, it dramatically reduces in weight (to almost a fraction of the same food preserved by freezing), allowing you to maximize the storage space available.
Easily portable, especially for outdoor activities like hiking
Dehydrated foods weigh less and occupy less space; therefore, they are ideal for traveling occasions.Reduces waste
Dehydrated foods stay longer, and so you won’t worry about them going bad.
No added chemicals
Dehydrating your food at home implies you have control over it; you decide what to add and what not to include. And since you’re drying it, you won’t need any additional chemicals.
Three Easy and Safe Methods to Dehydrate Foods
There are several food dehydration methods you can use; however, some are more effective than others, largely due to technological advancements.
Here are the most common three:
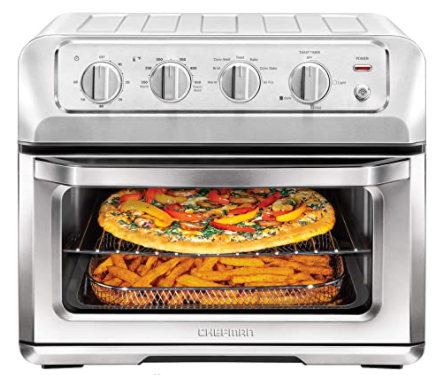
1. Air Fryer
Quite different from your regular oven, air fryers are small countertop convection ovens with high-level heat and strong fans, which circulate the hot air around (at high speed) to crisp up vegetables, fruits, and other foods you may want to fry.
They’re the popular alternatives to the use of a deep-fat fryer.
Unlike deep-fat fryers, an air fryer requires only a few spritzes of oil to crisply bake your food.
Most people use it for cooking. However, you can also use it to dehydrate food.
Note:

It’s important to understand how your air fryer works and whether it can perform the dehydration task. To establish that, firstly:
- Your air fryer should have a provision for a low setting.
Anything above 45℃ will cook up the food instead of dehydrating it, thus compromising its preservation.
- The air venting system should also be good enough to effectively release the water—to avoid condensation and the reabsorption of the moisture by the food.
- If possible, use a shelf or steam rack—to allow adequate air circulation underneath the food and above it.
- Consider dehydrating in small batches if your air fryer isn’t spacious enough to allow for the thin spreading of food.
- Also, ensure that the appliance can withstand long usage. As you well know, dehydration can take anywhere from 4-30 hours, depending on the type of food you’re dehydrating.
2. Oven drying
If you don’t have a dehydrator, you can try an electric oven, provided it can effectively sustain the low temperatures ideal for food dehydration.
And with that said, not all modern ovens feature a low-temperature setting; however, the oven’s warmer drawer can still work. To be sure, test the temperature using an accurate thermometer before utilizing the warmer drawer or the oven itself to dehydrate foods.
Blanch your foods, then take the cooling rack, and place it on a cookie sheet.
Put the food on the rack in a single layer to ensure even heat distribution.
You won’t need to turn the food once you begin the drying process because the rack helps lift off the food from the sheet—therefore, enhancing good airflow.
Go ahead and place your cookie sheet in the oven or the warming drawer section preheated to 140℉ OR your oven’s lowest setting. Prop open the oven door—a few inches—to further enhance air circulation.
Oven drying—though an easier way to dry most foods—it’s not that energy efficient. And so, you may want to consider an electric dehydrator, especially if you love dehydrating food.
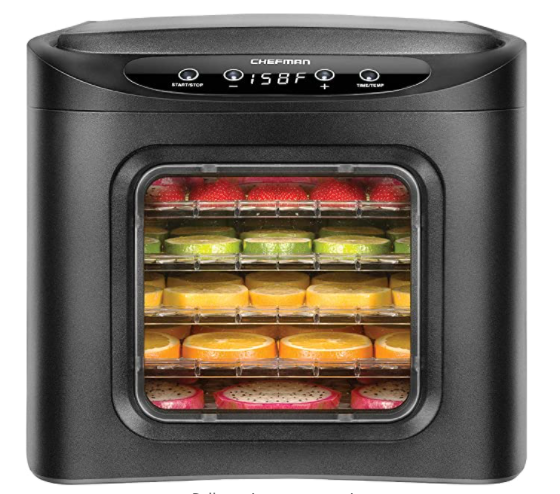
3. Electric Dehydrator
This is a self-contained food-drying appliance. It features a heat source, a robust fan for circulation, and several trays for drying different foods at one time.
High-quality dehydrators also feature temperature controls, thermostats, and double-wall designs for more energy efficiency.
Though not the most convenient (budget-wise) for most people, acquiring an electric dehydrator is a worthwhile investment that you would consider making if you intend to embrace food dehydration as your way of long-term food preservation.
In addition to energy efficiency, it’s also easy to maintain temperature control.
And so, to use your electric dehydrator, first blanch your fruits and vegetables.
Then, spread your food on the drying trays in a single layer, making sure that the dryer thermostat is set at 140℉.
Turn the food every other few hours to ensure that it dries evenly.
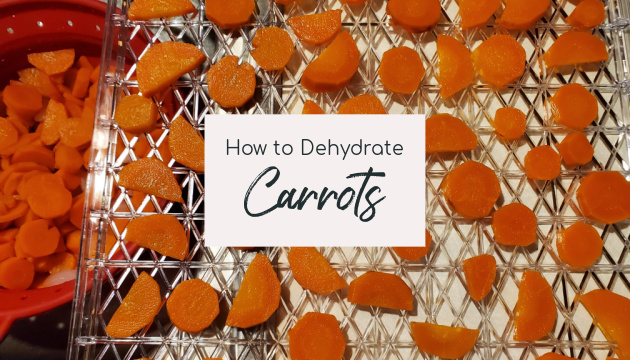
Best Foods to Dehydrate
Most foods will dehydrate well and still retain their nutritional values.
They include vegetables, fruits, herbs, Low-fat meats, legumes (like lentils and beans), rice, pasta, and grains.
However, foods high in fats (such as avocadoes, fats, olives, and nut butter) won’t dehydrate well, considering that the dehydration process is mainly via evaporation—and fats don’t evaporate.
You also don’t want to dehydrate your eggs and dairy products because doing so increases the chances of food poisoning.
And so, what is the perfect dehydration temperature to use for the various food categories?
The Dehydration Temperature Guidelines
Not all foods will dehydrate properly under the same temperatures, which is why you need to ensure the temperature isn’t too low or very high at any point in time.
A very high-temperature setting will most likely lead to case hardening—whereby the exterior of your food dries out too quickly, creating a tough layer on the outer surface, thereby preventing the interior part from drying completely.
The trapped moisture inside, therefore, creates a conducive environment for the molds to thrive, spoiling your food in the storage process.
The same applies to the low-temperature setting, which will also encourage bacteria growth and survival.
To avoid all the danger, ensure the temperature is at the right setting.
For instance, for vegetables, use 125℉…
- Fruits—135℉
- Legumes (lentils and beans)—125℉
- Poultry—165℉
- Grains—145℉
- Meat—160℉ for pre-cooked meat, use 145℉
- Herbs—95℉
Five essential tips to remember when dehydrating your foods
Whenever drying your foods, keep these tips in mind:
Ensure you’re working with the right temperature
This will greatly vary depending on the type of dehydrator you decide to buy, plus the type of food you’re drying.
In most cases, the temperature and time guideline will be available on the dehydrator label or included in the instruction manual.
The foods should achieve at least a 95% dehydration level.
Always strive for 100% food dehydration; however, 95% dryness will still store well.
Factors like breezes, high indoor humidity, and air conditioning may at times alter the time required to dehydrate foods. And so, be sure to set your dehydrator in a warm, dry place, away from windows and air vents.
Never attempt to dry your foods quicker.
The best way to speed up your food dehydration process is not to increase the temperature but instead to thinly slice the food and spread them out (on the drying rack) as much as possible.
Elevating your temperature setting will only seal the outside of the food—leaving moisture inside—which, ultimately, will lead to food spoilage before you get the chance to eat it.
Prepare in advance
Wash all the foods thoroughly before anything else.Steam the low-acid vegetables for four or five minutes, then pat dry them before putting them into the dehydrator.
Be sure to spritz your apples and bananas with lemon juice to prevent browning.
Ensure efficiency
Similar to when you’re using your oven, make sure you switch on the dehydrator a few minutes beforehand to allow it to heat up to the required temperature—after which you add in the food.
Prepare all food items that require the same dehydration temperatures—making sure to slice them evenly—and then dry them simultaneously.
The Takeaway on Making Dehydrated Food for Long-Term Storage
You may have properly dehydrated your food; however, it will still waste if you don’t store it properly.
And so, once you dehydrate, ensure the foods cool completely before you transfer them to the storage containers. This helps prevent condensation (inside the storage medium), inhibiting the growth of harmful microbial-like mold.
Also, be sure to store the foods in airtight containers, and place them in a cool, dark, dry place with adequate ventilation.
To rehydrate your foods, place a cup of food in a cup of cool water; then allow up to 3 or 4 hours for rehydration. Incorporate it into your recipe as you would normally do.