If this fruit is the “apple of your eye” (pardon my horrible pun), then this is a must-read blog post for you. And, the reason for the bad pun? Today’s discussion is all about apples.
We will cover the following:
- The vital nutrition in apples
- Storage of apples to keep them fresh
- Dehydrating apples in the oven or an electric dehydrator
- Making apple jelly for the canner
- Making homemade applesauce in your electric pressure canner
- Canning applesauce (pressure cooking method)
- A delicious recipe for apple pie filling for canning
We have so much to cover. Shall we?
Nutrition in Apples
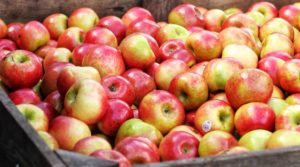
This fruit is a nutritional powerhouse. Whether you choose green or red varieties, you’ll reap the benefits that come with this delightful treat.
Here are some nutritional facts per the United States Department of Agriculture.
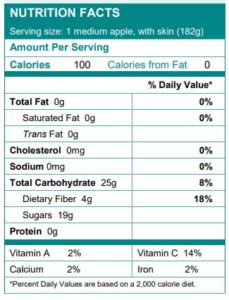
Note that when consumed raw, you’re taking in a measly 100 calories or so. Plus, you are taking in no sodium, fat, or cholesterol.
While they do have 25 grams of carbohydrates (therefore, not generally preferred by those on a ketogenic diet), some of those carbs are offset by the 4 grams of fiber. That fiber makes you feel full for a long time, making this a super snack for those who desire to lose weight but are not on keto.
Additionally, you are taking in a healthy 14% of your recommended amount of Vitamin C.
But, you may ask, why is that important? Vitamin C contains powerful antioxidants that can cause health concerns. Antioxidants assault your body from many sources, including
- Air pollution
- Car exhaust
- Chimney smoke
- Cigarette smoke
- Industrial gasses
They attach to your healthy cells and drain them of their nutrients. Thus, your cells grow weak, and you become susceptible to many illnesses, including some types of cancer. So, take advantage of those antioxidant benefits every chance that you get!
Other vital vitamins and minerals, although in smaller amounts, include:
- Vitamin A – 2%
- Iron – 2%
- Calcium – 2%
Storage of Apples
Fortunately, we have the tools today for the long-term storage of apples outside of the cold storage method alone.
Cold storage is excellent when you live in a cool climate. Or, if you are fortunate to have a home equipped with a cold room or fruit cellar. However, those of us who live in warm climates or homes without basements don’t have those same opportunities.
Therefore, we are covering proper cold storage, as well as other preservation methods.
Cold storage of apples
Apples are among the tree fruits with the most extended storage life. Under ideal conditions, these fruits can be cold-stored for up to four months and up to one year in a controlled atmosphere. This offers a shelf life this is rare among fruits.
Depending on the apple variety (and to be specific, the variety’s chilling sensitivity), the cold storage temperature should range between 32 degrees F and 38 degrees F; however, most of the types still store well at temperatures near 32 degrees F.
So, if it’s your basement or shed garage, ensure you regularly monitor your room temperature to help deter freezing, especially if the room experiences inconsistent temperatures.
Before storing the apples, ensure the room is clean; remove everything from the room and sanitize the walls and floors plus the bins to reduce chances of the fruits rotting.
Perhaps, to stop the spread of rot from one fruit to the other and to maximize storage life, you’ll need to wrap each of them with a newspaper before placing into the bin or basket.
If you plan to use a refrigerator, then set the temperature at 30-32 degrees F since anything below 30 degrees F is likely to cause freeze damage to the apples. You also don’t want your apples to ripen quickly, so ensure the temperature doesn’t go beyond 40 degrees F. The best thing about a refrigerator is that you don’t have to worry about humidity or temperature variations.
But first, inspect your apples!
Before you set out to store your apples, ensure you inspect all of them for any damages, soft spots, and or cuts. Only store perfect fruits and eat the bruised ones to prevent them from going bad.
Also, ensure that you sort your fruits by size. Why? Large apples don’t store for as long and as well as the small and medium sizes. So by sorting them, you get to eat those bound to go bad first.
Dehydrating apples
Dehydrating apples, creating apple fruit leathers or even delicious crunchy apple chips allows you to safely preserve your fruit for about six months at room temperature, in an airtight bag or jar. Or, you can stash them in a freezer-proof container and remove them as you use them for a full year.
So, are you wondering about what some of the best apples for dehydrating are? Try:
- Golden Delicious
- Fuji
- Honey Crisp
- Gala
- Red Delicious
How to Dehydrate Apples
Materials
- Electric dehydrator or air fryer
- Large bowl
- Lemon Juice or Ball Fruit Fresh
- Apples at least a five pound bag
- Cutting board
- Wooden spoon
Instructions
- Prepare a cold water bath with one tablespoon of lemon juice to every one cup of water, or prepare Fruit Fresh bath, according to the directions on the canister.
- Wash and then cut the apple wedges into 1/4 slices, discarding the seeds and core. Leave the peels on for extra nutritional value. Drop the apple wedges into the cool water and stir them so the water covers each slice. The citric acid in the lemon (or Fruit Fresh) stops them from turning brown. Soak for about five minutes.
- Patting the apples dry with a clean, lint-free dish towel, line the dehydrator trays with the slices in a single layer. Don’t stack or over crowd them, or the air will not circulate properly.
- Set the dehydrator to 150° for seven hours. Check them at the timer to make sure they are dry and slightly brittle. If they still have too much "give," then they are holding water. Dry them for an additional thirty minutes.
- Open the door to your dehydrator and let the fruit cool for at least fifteen minutes before packing them into storage bags or a mason jar.
Video
Notes
Storage:
Store the dried fruit in a mason jar with a tight lid or vacuum seal them. They keep for about six months. Do not pack them if they are still warm – they must be completely, totally cool first!How to Oven Dehydrate Apples
Making dried apples don’t necessarily require a dehydrator since an oven can do the job just perfectly well.
The oven…! You say. But what of the fiber and nutrients–will my apples still retain their rich contents?
Yes. Homemade dried apples are still high in nutrients and fiber. Just ensure that you skip the peeling process to retain the additional fiber from the peels.
You also want them crispy, so ensure they bake for about an hour or more. If possible (to save time) and enhance the appeal of your apples, consider skipping the coring process as well. The star-shaped core at the center is a real beauty to your dried apples as it enhances their appeal.

My pick for slicing them into perfect, even slices is the Pampered Chef Mandoline Slicer. ![]()
Ingredients
Note: It’s best to use unpeeled apples, but you can still peel them if you so wish.
- 2 large apples
- ½ cup of lemon water
- 4 cups of water
Preparation
- Have the racks in the upper plus lower (lower third) positions of the oven; then preheat to 200 degrees F. Take 2 large baking sheets and line them with parchment paper.
- Mix the lemon juice with cool water in a bowl. The essence of lemon juice here is to prevent browning.
- Slice the apples as thinly to about ⅛ inch in thickness using a mandolin or a sharp knife. A mandolin is very efficient and effective in ensuring consistency in the sizing of the slices.
Proceed to soak the slices for 30 minutes in the lemon water. Drain and then use clean paper/kitchen towels to pat dry the slabs.
Next, place the slices on the already laid baking sheets but in a single layer.
- Ensure the slices ( both on the lower and upper racks) bake for an hour. Then take it out of the oven and flip over each slice. Return to the oven and bake for another one hour to ensure dry and soft apples. However, an additional two hours of baking guarantees even more crispy apple chips.
- Turn off the oven and allow 1-2 hours for it to cool completely before taking out the apples.
Storing your apples in an airtight storage device will see them last up to one week, but a refrigerator can last them up to a month.
Just remember that timing may vary depending on the type of apple you’re dehydrating, the thickness of the slices, and sometimes even the oven itself. Therefore, check from time to time and increase or decrease the total time as required.

How to Dehydrate Apples in an Electric Dehydrator
Just like in the oven dehydrating case, peeling and coring are optional.
But did you know that:
- Apples naturally double or even triple their sweetness when dehydrated? So, don’t add any sweeteners. If you have issues with too much sugar, then opt for apple varieties like the Granny Smith, McIntosh, or Spartan as they aren’t too sweet.
- Under drying your apples can trigger mold growth? It’s better to over dry them rather than under dry, especially if you’re planning to store them to eliminate all the moisture, which may otherwise encourage mold development.
- 6-8 apple slices equal one full apple. So moderate the bites!
- The dehydration process takes 7 ½ hours. You’ll take 30 minutes to prepare and 7 hours to cook.
Ingredients
- 5lb apples
- ¼ cup of lemon juice (this is optional, especially if you like brighter apple chips/rings)
- 3 tbsp of cinnamon
Instructions
- Wash your apples and peel. Peeling is optional plus coring.
- Use a mandolin to slice them as evenly and thinly as possible–¼ inch.
- Soak the slices in your mixture of 1 ¼ water and ¼ cup of lemon juice to prevent browning (optional).
- Align rings on the dehydrator trays while leaving small spaces around every slice to enhance air circulation. But this should be after patting dry the apple slices.
- Lightly dust the slices with cinnamon.
- Proceed to dehydrate for 6-8 hours (at 135 degrees F).
- Check for any moisture traces by breaking a slice into two. The inside should more or less resemble a dry, dense sponge.
- Allow to cool and then store in an airtight storage device. It can go for months as long as the location is cold, dry, and dark.

RECIPE: Cinnamon Ginger Apple Butter
Cinnamon-Ginger Apple Butter (no sugar recipe)
Ingredients
Equipment
Method
- Peel and core the apples, cut them into medium-ish sized chunks. You don’t need to be super precise as the blender will be doing the hard work of pureeing them anyway!
- Place the water into the bottom of the Cooking Blender, first. Then add the apples. Place the lid on the unit and make sure it’s secured to the base.
- Set the machine to "jam" setting.
- After the first cooking cycle, the unit will beep. Remove the clear lid vent cap and add the stevia, cinnamon, and ginger. Press the start button to tell the unit you’re ready for it to start cooking again.
- At the end of the cycle, pour the apple butter into a container to cool at room temperature. Once cooled, cover it and place it into the fridge.
Notes
- The Pampered Chef Cooking Blender will not run if you don't have it in place correctly. This is an intentional safety feature–and it prevents a mess! If it doesn't turn on, check to make sure all is secure.
- This will yield about 2 1/2 cups of apple butter. Remember there are NO PRESERVATIVES! Enjoy it. Better yet, share some with a friend!
- The nutritional data calculates the ideal serving size as 1 tablespoon.
Apple Jelly
Home canning is an art that was once dying but has made an enormous resurgence. With a focus on natural, organic ingredients, you can purchase the finest ingredients and make your own homemade jellies with just a few tools.
Canning apple jelly is fun and easy to do! Here’s an easy method and recipe to try canning jelly at home. The entire process takes only one day forty minutes.
Ready?
Here are the recommended varieties to use for jelly:
- Granny Smith
- Pink Lady
Recipe: DIY Apple Jelly
Ingredients
- 3 ½ pounds of cored and diced apples
- 7 ½ cups of white sugar
- 3 cups of water
- ½ teaspoon butter (if preferred)
- 1 package of powdered fruit pectin (57g)
Procedure
- Rinse the apples; put them in a large pot; add water and cover, then bring to a boil.
- Reduce the heat (when bubbling) and let it simmer for about five minutes when now you can expect the apples to be slightly tender.
- Crush your cooked apples and allow them to simmer for another five minutes.
- Place a cheesecloth or a sieve over a deep bowl and transfer the crushed apples therein. Let it drip (as you press gently) to drain all the liquid.
- Measure out the juice at precisely five cups (add water if required to obtain this amount); add in some sugar; stir, and add butter to help reduce foaming. Then bring this mixture to a boil while stirring constantly.
- Add in pectin while stirring constantly; allow a minute of boiling to help dissolve the pectin–all this time, stirring constantly. Turn off the heat. Then, skim off the excess foam using a metal spoon.
- Use clean jars (sterilize them together with the lids for at least five minutes–in boiling water) to store your apple jam, preferably when the jars are still carrying the sterilization heat. Fill them to no more than ⅛ inch of the crown.
- Use a thin spatula or a knife to eliminate any air bubbles from the filled jars–by merely moving it around inside the jars. Proceed to wipe the jar rims (starting with the lids) off any food residues by using a moist paper towel. Screw on the rings.
- Take a large stockpot; put it in a rack (at the bottom) and pour in water, halfway. Let it boil; use a holder to bring in the jars into the boiling water. Ensure the jars are 2 inches apart and that the boiling water is at least one inch above the jar tops (add in more boiling water, if necessary to meet the water level requirement).
- Cover the pot and leave the water to boil for about five minutes.
- Turn off the heat; take out the jars from the pot; place them apart on a wood surface or a cloth-covered space to cool.
- Ensure the seals are tight once the cooling process is done. Stand them for 24 hours at room temperature, after which, you can store in a cool, dry, dark area. Once opened refrigerate and consume the jelly within three weeks.

Homemade Applesauce
Moms of picky eaters know that applesauce is an almost foolproof way to sneak some fruits into your kiddo’s diet.
But a quick peek at the label of in-store brands will reveal the truth. They are laden with preservatives–most of which are unpronounceable. Yuck.
Applesauce is super easy to make. And, when you enlist the assistance of your electric pressure cooker, you’ll make the job even easier!
If you don’t own a pressure cooker just yet, you are missing out. Today’s pressure cookers are not the death trap that rattled across your Granny’s range, threatening to blow its top at any moment.
Instead, the electric pressure cookers are convenient, safe, and a joy to use. In fact, I am so addicted that I own two. I have the Power Pressure XL which has a canning setting and the Pampered Chef Quick Cooker for daily cooking–and making applesauce.
Recipe: Applesauce in the Your Multi Pot or Instant Pot Cooker
Ingredients (making up to 4 cups)
- 10 large melrose or golden delicious apples
- ¼ cup stevia (optional)
- ¼ cup water or apple cider
- 1 teaspoon cinnamon
Procedure
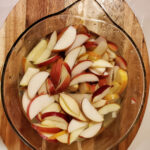
- Peel, core, and cut the apples into equally sized wedges.
- Mix the apple pieces, cinnamon, apple cider, and stevia in the pressure cooker. Cover and lock the cooker into place; place the cooker over the heat and set the Quick Cooker to the “Desert” setting
- After the timer beeps, you have two options. You can depress the steam release to discharge the steam. Or, you can allow the closed pressure cooker to sit for about ten minutes. Don’t fret as the pressure gauge will clearly indicate when all the steam has been discharged. You’ll know this when the red safety indicator returns to the ready position.
- Open the lid carefully, and using a wooden spoon, stir while breaking up the large chunks. Continue until you obtain the desired consistency. An immersion blender would be more useful here. Alternatively, use a food mill or processor to make your mixture even smoother.
You can eat your pressure cooker applesauce as soon as it cools or a cold one straight from the fridge. But it’s best at room temperature.
Canning Your Applesauce in the Pressure Cooker XL Electric Pressure Canner
Here is where having two pressure cookers comes in quite handy. When you can the applesauce, you’ll hot pack the canning jars. This means that you will take the freshly cooked, hot applesauce and place it directly into the already prepared jars.
Not all electric pressure cookers are approved for home canning. The Power Pressure XL was the only one on the market indicated for this use when I bought it several years ago.

Here are some instructions for pressure canning applesauce:
1 – Prep your jars
While the applesauce is cooking, sterilize your jars and rings by boiling them or using the sterilize cycle of your dishwasher. If you are boiling them, allow them a good 10 minute boil time. Of course, this process kills any bacteria–don’t skip it!
The Power Pressure XL accepts jars pint-sized or smaller. It does not accommodate taller jars.
2 – Simmer the rings
Before you begin packing your jars, simmer the lids in a shallow pan of water to loosen up the “gum” that seals the jars closed. If you don’t soften up that material, your lids will not correctly and safely seal.
3 – Pack the jars
Use a ladle to carefully move applesauce into each of your now sterile and ready jars. Try to be neat about it to save you some clean up (but a little dribble of product down the jar won’t hurt the process, either).
Leave one inch of headspace, or room, at the top of the jar. Use a clean, barely moist paper towel to wipe the rims free of any drips.
4 – Place the lids
Now, use a magnetic lid tool to pick the lids out of the simmering water and place one on top of each jar. Then, without disturbing that lid, screw on the rings until they are as snug as you can make them.
5 – It’s time to can, man!
Place one batch worth of jars into the electric pressure canner. Add enough water to come up about ¼ of the way on the jars. Do not run the canner without water, or you will have an epic fail on your hands.
Place the lid securely on the canner, close the steam valve, and press the “CANNING” indicator light. It will run for twenty minutes.
Finally, when your timer goes off, release the steam, remove the lid, and use canning tongs to place your jars onto a wooden surface until they cool.
Start your next batch!

RELATED RECIPE: Apple Pecan Dump Cake (4 Ingredients!)
Home Canned Apple Pie Filling
Canning apples in a pie filling offers you the way to bake homemade pies at a moment’s notice. This canning recipe is as American as…well, you get the idea.
This recipe is so good that I’ve often plunked vanilla ice cream over it straight out of the pot on more than one occasion.
For this recipe, try Golden Delicious, Granny Smith, or Braeburn varieties.

Recipe: Home Canned Apple Pie Filling
Total preparation time: 60 minutes
Ingredients
- 2 teaspoon cinnamon
- 10 cups water
- 12 pounds apples
- 4 ½ cups sugar
- ¼ teaspoon nutmeg
- 1 teaspoon salt
- 2 drops of yellow food coloring
- 3 tablespoons lemon juice
- 1 cup cornstarch (or else you can use sure gel)
Preparation
- Mix all the ingredients (except the apples and cornstarch) in a saucepan and cook on low heat. Cook until thick and frothy. Turn off the heat; add the food coloring and the lemon juice.
- Wash, peel, and core the apples. Then cut them into small pieces.
- Put your canning jars, rings, and lids into a large pot of boiling water to have them sterilized.
Pack your sliced apples into the hot jars leaving a headspace of at least ½ inch.
- If your syrup turns out very thick, add some sure gel or consider simmering it with cornstarch when ready to use. Only add cornstarch after canning, and not before–as it doesn’t allow for the much-needed uniform heat penetration in safe canning.
- Pour the hot syrup into the jars (on top of the apples). Use a knife to push down the syrup and to remove air bubbles.
- Ensure the jars’ rims are cleaned out and dry (before putting on the lids) to enable a good and tight seal. Proceed to put the caps on and ensure they’re tight enough.
- Place the jars in a hot water bath canner and fill with adequate water–adequate to cover the jars’ lids. Bring the water to a fast simmer or just boiling, then set the processing time at 20 minutes.
- After twenty minutes of processing, remove and let cool.
The Bottom Line on Preserving and Storage of Apples
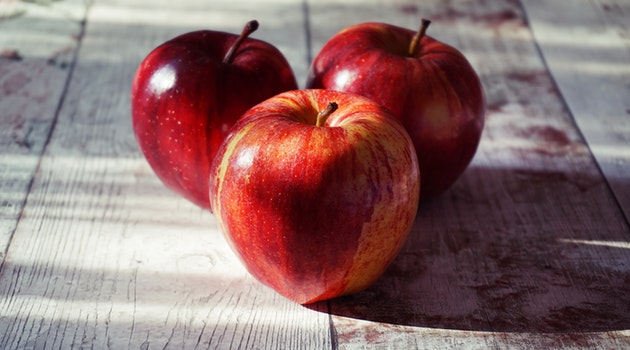
Don’t pass up your annual opportunity to grab the best selection of this nutrient-dense fall favorite fruit this autumn. Purchasing them while fresh, in-season, and at the peak of excellent flavor is a wise plan. Not only will you enjoy the best apples of the year, but you’ll also save money on your budget in the long term.
And, you’ll have the satisfaction of serving to your loved ones foods that you made, at home, with love.
Want a bonus recipe for apples? Head over to your blog post: Apple Bourbon Peanut Mini Cakes.