• Skip to main content
  • Skip to secondary menu
  • Skip to primary sidebar
  • Skip to footer
  • About Us
    • Meet Our Talented Team
    • Anti-hate Speech Policy
  • Terms Of Service
  • Free Printables
  • Advertising
  • Contact Us

DIY Home & Garden

A DIY & Gardening Resource

  • Home Page
  • DIY Projects
    • Upcycling
  • Home
    • Cleaning and Organizing
    • Holidays
      • Christmas
      • Valentine’s Day
      • Easter
      • Fourth of July
      • Halloween
      • Thanksgiving
      • Memorial Day
      • Mother’s Day
    • Home Safety
    • Home Decor
    • Pets
    • Real Estate
  • Gardening
  • Herbal and Natural Wellness
  • Recipes
    • Baking
    • Breakfast
    • Salads
    • Venison Recipes
    • Home Canning and Preserving
      • Canning
      • Dehydrating
      • Freezer Recipes
  • Travel
Home » Make a Portable First Aid Kit in 3 Easy Steps
Make a Portable First Aid Kit in 3 Easy Steps

Make a Portable First Aid Kit in 3 Easy Steps

07/15/2021 By Deborah T

Love us? Share us!

Purchasing a portable first aid kit to keep in your car or gym bag can be costly.  Not to mention, it’s frustrating to know that you could purchase all the items separately for less money–but you want the convenient carrier.

Instead of buying a first aid kit, why not make your own? 

You can upcycle a short stack Pringles® can.  All you need to do is the inside of the tube clean with warm water and dish soap to remove the oils after you eat the potato chips. Then, a few crafting tools and get started. 

These little guys are sturdy, and the lid keeps everything nice and organized. When the can gets “beat up,” I make a new one, check the expiration date on the products, and restock as needed. I keep them in multiple locations where I might need to access a bandage or disinfectant.

  • One for inside each car
  • The barn (we get lots of bug bites and small scrapes)
  • Inside the carry basket of our four-wheeler

My friends who drive their grandchildren or children to soccer, dance class, or other activities love to keep one of these in the gear bag, as well. I’m past the age of young kids, but that’s great advice!

What to Pack in Your Portable First Aid Kit

Each one can supply all I might need to take care of minor cuts and scrapes or insect bites on the go.

I made relatively basic first aid kits for my use. 

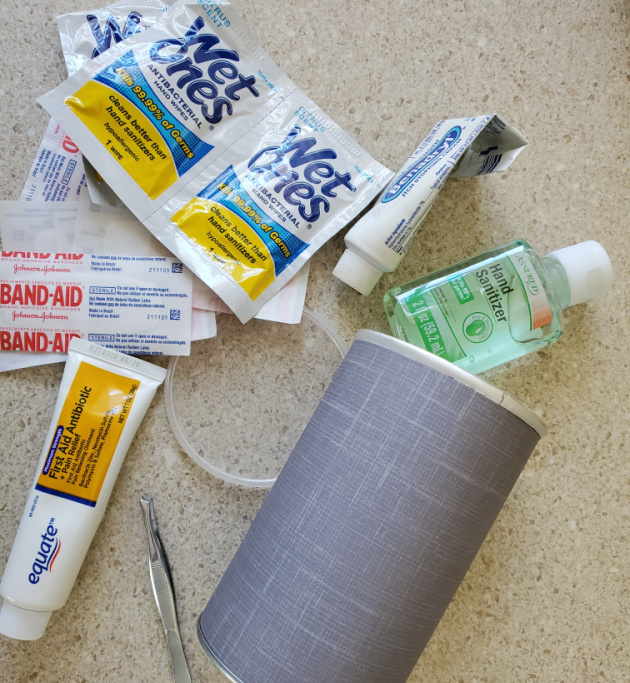
I included these things:

  • Individually wrapped antibacterial hand wipes, so I can clean a superficial wound.
  • Hand sanitizer
  • Benadryl® anti-inflammatory cream
  • Antibiotic cream
  • Tweezers (for removing ticks or splinters)
  • Bandages

After I took the photo you see, I found insect repellent wipes at the local big box store and tucked a few of those inside, as well. I prefer natural essential oil repellents, but these might come in handy if I get into a bind. 

first aid kitDecide what you might need for your family.

Consider whether you  need to include the following items:

  • Epinephrine injection pen for someone allergic to bee stings?
  • Aspirin in case someone with a heart condition needs it?
  • Asthma inhaler?
  • A few pieces of hard candy for a family member with diabetes?

In other words, think about what your family might need and add to it what you wish. You can also check out guidance from the Centers for Disease Control and Prevention (CDC) for other ideas. My kit might look different than yours! 

How to Make Your Portable First Aid Kit

You can make this useful craft in under five minutes, with only three easy steps!

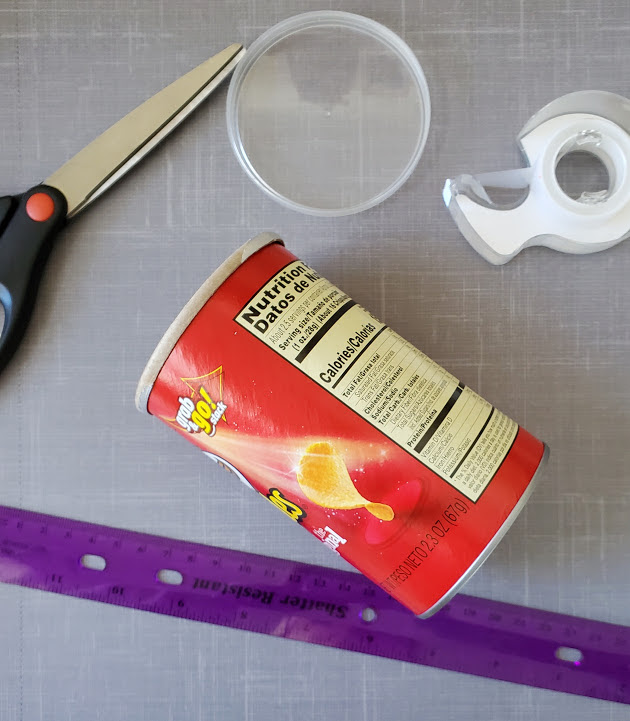
Before you start crafting, gather your supplies. You will need:

  • A small Pringles® can and lid. However, if you need to carry epinephrine due to a bee allergy, a tall can works perfectly for you.
  • Scrapbook paper of your choice (gift wrapping paper could also work, but it will feel less sturdy)
  • Scissors
  • Ruler
  • Pencil
  • Tape or spray adhesive (I used tape, it has held up very well)

Now that you have everything you need together, you are ready to craft. 

pringle can first aid kitStep One: Measure the Can and Mark the Scrapbook Paper

First, measure the can from just below the top rim to just above the top rim. You want this to nestle snugly in between. Use the ruler as a straight edge and mark a straight line with the pencil. I like to mark the back of the paper because it’s easier than erasing stray marks if I bloop the cutting line. 

Step Two: Cut the Scrapbook Paper

Follow your pencil line and cut the scrapbook paper, following the pencil line.  “Fit” the length of it around the can, and using your ruler to make a straight edge to cut off the end. You want just a little bit of overlap for taping.

Step Three: Tape the Paper to the Can

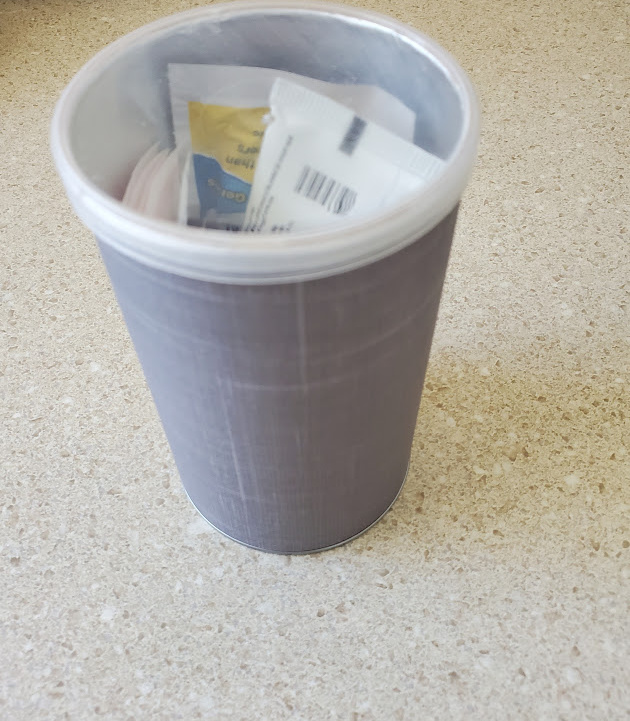
Finally, line up the cut paper squarely between the two rims of the can. Tape the first end of the paper directly to the can–use generous amounts of tape. Remember you cut some overlap to hide this. But if you don’t make secure the tape firmly, the whole thing will pop apart.  

Wrap the paper around the can and neatly tape down the loose end.

That’s it, you are done. All you have left to do now is to drop in the supplies you need to take with you and pop on the lid. Voila!

pringles


The Takeaway: You Can Make a Portable First Aid Kit in a Few Minutes

Making your own first aid kit out of a potato chip tube only takes a few short moments. You can take one with you anywhere you go because they are small, sturdy, and light. Because you probably have bigger containers of the supplies to stock it, you’ll save money when you DIY instead of investing in a full kit. Finally, when the tube becomes worn looking, it’s a great excuse to indulge in your favorite snack. 

Please follow DIY Home & Garden on social media and share this post with your friends. And as always, have a happy DIY day.

  • Author
  • Recent Posts
Deborah T
Deborah T
Editor and author at DIY Home & Garden, a Word Innovations publication
Deborah Tayloe is a full-time blogger, children's book author, and freelance writer, contributing to large publications.

She has a B.S.Ed. in Secondary Education/English and a Spanish Minor. In addition, she holds a Certificate in Natural Health from a fully-accredited program and is a Certified Herbologist. She pursued these natural wellness certifications due to her love for herb gardening.

Despite freelancing to make a living, her love is "all things home."

Deborah grew up in a family that grew a large vegetable garden and a fruit orchard, helping her parents pull weeds and can home-grown foods as part of her childhood. In fact, she had no idea that she could purchase veggies and fruits in pre-packed steel cans until she went to college and made a food run.

Today, she lives in Bertie County, North Carolina, an agricultural rural area with more chickens than people. She lives with her husband and two rescue pets a sweet toy fox terrier and a cat who showed up one day and moved into the house. Together, they enjoy DIY projects, furniture refinishing, gardening, and canning.
Deborah T
Latest posts by Deborah T (see all)
  • GMO Seeds Versus Non-GMO: Key Differences and Ethics - 06/05/2023
  • Catnip vs Catmint (They’re Not the Same!) - 06/05/2023
  • Plum Jelly: A Tasty Treat From Summertime Bounty - 06/03/2023
Tweet

Filed Under: Craft Projects, Herbal and Natural Wellness Tagged With: craft ideas, first aid, first aid kit, safety, upcycle, Upcycling, wellness tips

About Deborah T

Deborah Tayloe is a full-time blogger, children's book author, and freelance writer, contributing to large publications.

She has a B.S.Ed. in Secondary Education/English and a Spanish Minor. In addition, she holds a Certificate in Natural Health from a fully-accredited program and is a Certified Herbologist. She pursued these natural wellness certifications due to her love for herb gardening.

Despite freelancing to make a living, her love is "all things home."

Deborah grew up in a family that grew a large vegetable garden and a fruit orchard, helping her parents pull weeds and can home-grown foods as part of her childhood. In fact, she had no idea that she could purchase veggies and fruits in pre-packed steel cans until she went to college and made a food run.

Today, she lives in Bertie County, North Carolina, an agricultural rural area with more chickens than people. She lives with her husband and two rescue pets a sweet toy fox terrier and a cat who showed up one day and moved into the house. Together, they enjoy DIY projects, furniture refinishing, gardening, and canning.

Primary Sidebar

Click for details on our latest travel deal

book vip cancun travel

Here’s Why You Should Plant Sunflowers in the Garden:

https://youtu.be/ZwvPDTbs9U0

You Won’t Even Notice You Tossed These Cluttery Things:

https://youtu.be/z16ZRMC4wbE

Don’t Suffer, Try This Bath to Soothe Itchy Skin:

https://youtu.be/SUxl9UL7QDw

Footer

Amazon Affiliate Disclaimer

DIY Home & Garden is a participant in the Amazon Services LLC Associates Program, an affiliate advertising program designed to provide a means for sites to earn advertising fees by advertising and linking to amazon.com. As an Amazon Associate I earn from qualifying purchases.

DIY Home & Garden does not constitute or intend to provide medical, health, financial, legal, or other professional advice. This website is for entertainment purposes only.

Quick Links

  • Home
  • About Us
  • Terms Of Service
  • Contact Us

Copyright © 2023 · DIY Home & Garden

We are using cookies to give you the best experience on our website.

You can find out more about which cookies we are using or switch them off in settings.

DIY Home & Garden
Powered by  GDPR Cookie Compliance
Privacy Overview

This website uses cookies so that we can provide you with the best user experience possible. Cookie information is stored in your browser and performs functions such as recognising you when you return to our website and helping our team to understand which sections of the website you find most interesting and useful.

Strictly Necessary Cookies

Strictly Necessary Cookie should be enabled at all times so that we can save your preferences for cookie settings.

If you disable this cookie, we will not be able to save your preferences. This means that every time you visit this website you will need to enable or disable cookies again.