Removing popcorn ceilings is a low-cost DIY that gives your home an instant facelift.
If you’ve been searching for how to remove a popcorn ceiling in your house, chances are you belong to the set of textured ceiling homeowners. The popcorn ceiling design was quite the rage in the 80s, and the reason is quite obvious: they were cheap to install. And so, with little money, homeowners could get a nice-looking ceiling, however, with textured grits, just like popcorn.
Fast forward a few years later, and quite frankly, everybody is tired of the textured look (what can I say? We humans are fickle). The in-thing now, which I suspect would be so for a very long time, is smooth ceilings.
This brings us to the purpose of today’s post: your ceiling has a popcorn-textured look, and you want it gone. To have a smooth ceiling, you’ve got to take off the old textured one. Doing so is very easy; so easy you can be done in less than an hour.
However, some things could make this DIY project a bit complicated. “Complicated??” Yup. Complicated, as in you-won’t-even-be-able-to-remove-it-without-professional-help complicated.
Asbestos, the joy-killer
Yes, I said it. Asbestos may be quite useful in the building industry, but it has been proven to be quite dangerous to human health, especially when particles of it are floating in the atmosphere. By law, only professionals are allowed to remove asbestos. No DIY involved. So, you’ve got to check if your popcorn ceiling contains asbestos.
How do I check for asbestos? There are two ways: The first option is to purchase a testing kit from Amazon (check price here). If the result is positive, then you should seek the help of professionals. To be really sure, you can go with the second option of scraping a sample into a plastic bag and sending it to an approved testing site. You might have to hire professional testers to help with the scraping (for health reasons). Then wait for the testing results.
If you confirm no asbestos, here’s how to address a painted popcorn ceiling
So you’ve checked and confirmed that you have zero asbestos in your popcorn ceiling. All well and good. However, things won’t go so easily if the ceiling is painted. Not to go into the physics of it all, but paint actually acts as a water barrier and would effectively prevent you from removing the ceiling. So, you would have to spend extra time and effort to first remove the paint using necessary chemicals before moving on to the ceiling itself.
Popcorn Ceiling Removal, Step by Step
Now the moment we’ve all been waiting for. A step-by-step guide on how to remove that unwanted popcorn ceiling. First things first, what do you need?
Supplies:
- drop cloth and plastic sheets
- dust mask
- coveralls
- eye goggles
- spray bottle and water
- dishwashing soap (optional)
- drywall scraper
- drywall knife
- sanding pad and damp cloth
- a paint roller and extension
Step 1: Protect your floors, furniture, electrical fittings…..and yourself
This is very important and that’s why the drop cloth is needed. Basically, you’ve got to cover everything coverable. I don’t know about you, but I sure wouldn’t want specks of ‘popcorn’ and drywall flecks on my prized settee. Plus, the covering makes clean-up way easier.
But like I usually say, nothing is more important than a human life. Put on a respirator or dust mask to protect your lungs, some eye protection and then coveralls or work clothes. It’s gonna be a messy business.
Step 2: Spray ahoy!
I’m sorry if I sound too enthusiastic, but this project is so much fun. Fill up your spray bottle or sprayer with warm water. You can add a bit of dishwashing soap if you like. Now spray a small section (about 5 -10 square feet) with moderate water. Too much water could affect the drywall beneath the popcorn ceiling. So, don’t get carried away!
Step 3: Go do something else
“Huh?” Yup, except you like staring at your boring ceiling for twenty minutes. The water needs to saturate the ceiling for that amount of time. So play with your phone, check on the kids, or check out our other interesting posts. Anything, really.
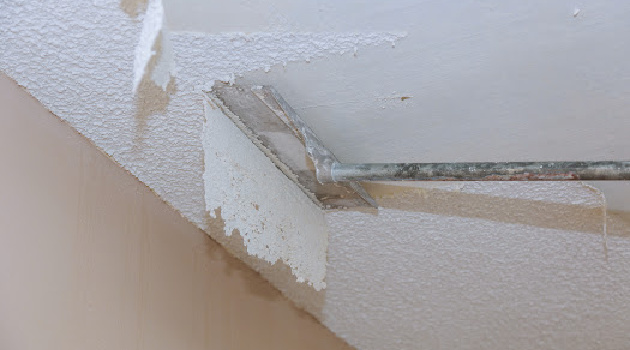
Step 4: Now you scrape the popcorn ceiling
After the 20-minute wait, gently scrape off the textured ceiling, use a scraper or any other tool with a wide blade. Be careful (remember the drywall? It’s quite sensitive). Repeat steps 2 – 4 until the whole popcorn look is gone.
Step 5: Repair, Refinish, Repaint
Sadly, no matter how carefully you scrape, there would still be slight damage to the drywall, and you’ve got to fix, pronto! Use the knife to apply drywall compound to those areas. Let them dry, possibly overnight. Then sand and paint with the color of your choice.
Step 6: Sand, Prime, and Paint
Once the drywall compound is fully dry, lightly sand the ceiling using 120 grit sandpaper attached to a pole sander for easy reach. This will help remove ridges or bumps and ensure a perfectly smooth surface. After sanding, use a damp cloth to wipe away any residual dust.
Prime the ceiling to seal the drywall and provide a suitable base for paint. Once the primer has dried, paint the ceiling in your chosen color. Using a paint roller, start from one corner of the room and work your way towards the center, ensuring even coverage and a professional-looking finish.
Clean-Up Tips After Removing a Popcorn Ceiling
Cleaning up after the removal process can be quite a chore, but it’s an unfortunately necessary step. Make sure to promptly bag up and dispose of the scraped material according to your local waste disposal regulations. Use a shop vacuum to collect any dust and debris on your protective sheets.
When removing the plastic sheets, be careful to fold them inwards to keep the dust and debris contained. This method will prevent dust from spreading to other parts of the house when carrying the sheets out. Once everything is clean and back in place, you can step back and admire all that hard work!
The Takeaway: Popcorn Ceiling Removal Is a Simple DIY
If you enjoyed this post and found it valuable, we invite you to join our newsletter list for exclusive content. You’ll receive insights, tips, and tricks on various DIY projects, home and garden improvement ideas, and more directly in your inbox. Being a part of our community also means you’ll be the first to hear about our latest blog posts and special offers.
To join, simply enter your email address in the newsletter sign-up box. We promise to respect your privacy and keep your email secure. Your journey toward becoming a DIY master is just a click away!
Remember, with some patience and the right tools, you can transform your living space into your dream home. We’re here to guide you every step of the way. Stay tuned for more exciting DIY projects and happy renovating! Until the next post, have a happy DIY day.
Content last updated: 06.20.23