You will be pleasantly surprised to find out exactly how easy it is to dehydrate potatoes. In fact, you can make this process happen in only four easy steps. I will grant you that they are very time-consuming, especially the many hours in the electric dehydrator.
Why Would You Want to Dehydrate Potatoes?
We learned in 2020 to take nothing for granted. I remember braving the grocery stores in those first scary days of the coronavirus pandemic. Remember when health officials were advising us to wash off our cereal boxes? The panic that ensued wiped shelves clear of many products. From toilet paper to taters, everyday things that we take for granted were not available. It was several weeks before I found potatoes in my local store.
Fortunately for me, I dehydrate potatoes for these very moments. While everyone else was doing without their favorite side dish, I had a reasonable number of them set aside, waiting for the need to arise.
So not only was I able to pull from my supply of dehydrated potatoes for my family, but I was also able to drift away to sleep knowing that even if the stores could not replenish quickly, I had stored sufficient goods for a few weeks. Between my practice of dehydrating foods and dry canning other staples, we were all set in my household.
Fortunately, that shortfall at the local grocer remedied itself in about three weeks.
Whether you grow your own crop of spuds or stock up on them when they go on sale, dehydration is an excellent way to ensure you never run out of this culinary staple.
To Peel or Not to Peel When You Dehydrate Potatoes
Besides that, we all know that potato peels contain nutritional value. Many people assume that it’s the greatest source of fiber in this root veggie. However, the peel contains only about one-third of the total fiber in one medium-sized spud. But don’t take my word for it. That statistic comes straight to you from the industry experts at Washington State Potato Commission.
So whether to peel or not when you dehydrate potatoes… the answer is yes, peel them.
The outer skin of the tater is rather tough, and it would take so long for the electric dehydrator to do the job that you’d turn the spud’s flesh overly brown. That outcome would mean the potato could impart a mild scorched taste when you reconstitute for consumption.
Choosing an Electric Dehydrator
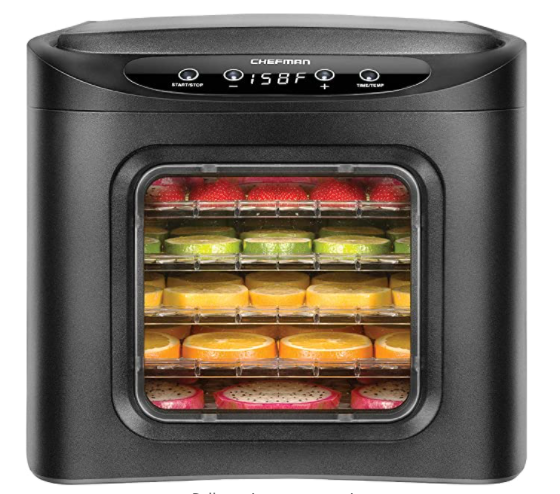
For several years, I had one of the circular electric dehydration units with stacking trays and no fan. I spent a lot of time rotating the trays to get consistency in drying times. It worked fine, but it took that extra effort. Three years ago, it died on me after many years of use.
I spend the following year doing oven dehydrating instead of reinvesting. However, I quickly realized that I was ramping up my air conditioning bill and probably cost myself as much energy consumption over the entire summertime season. (I dehydrate other foods than potatoes–carrots, oranges, apples, venison jerky, herbs, and cabbage).
So the next time around, I spent a little more money and chose a front-loading electric dehydrator with an electric fan to circulate the air.
I find that it dries the foods evenly with excellent results and in less time than lying the food flat on a tray in the oven. This better outcome is probably because the fan and the perforated trays (cookie sheets in the oven forced me to lay the foods flat).

If you don’t have an electric dehydrator, check out the guide my writing buddy Maureen wrote on dehydrating foods in the oven or by using your air fryer.
Her article includes lots of step-by-step directions in an easily understandable overview, easy enough even for newbies to food prepping and storage.
How to Reconstitute Dehydrated Potatoes When You’re Ready to Eat
You probably also want to know how to rehydrate the spuds when it’s dinner time!
Rehydration is an easy matter. Just like you pull out the moisture during the drying process, you must add water back during reconstituting it. Fortunately, it couldn’t be easier. You can do two things, depending on how you plan to cook the taters.
- If you use your slow cooker or make a slow roast in a liquid in the oven, just toss the spuds you need into the liquid. During this slow process, the potatoes will absorb the juices, and they will plump back to their size. The same goes if you are adding them to soups or stews.
- However, you need to plan ahead just a little bit if you plan to pair the spuds as a side dish when you’re grilling or using a dry cooking method. Boil water, cut off the heat, add the desired amount of dehydrated potatoes to the pot, and close the lid for about twenty to thirty minutes. You will see them become larger and fatter as they absorb the liquid. Hint: This also works beautifully by heating chicken stock for extra flavor.
What Potatoes Are Best to Dehydrate?
I find that plain white potatoes or russets work best. I have used Yukon Gold, red potatoes, and even fingerlings. However, they are similar when you reconstitute them, so I use the least expensive ones I can find. Other than that, I literally don’t see any difference.

How to Dehydrate Potatoes
Dehydrate potatoes in just four easy steps. They store well in long-term storage and rehydrate beautifully for soups, stews, and alongside roasts.
Materials
- 5 pounds of potatoes
- Salt
- 2 tablespoons of lemon juice
Tools
- Potato peeler
- Large pan
- Chef's knife
- Electric dehydrator
- Colander
- Ice bath
Instructions
- Prepare the five pounds of potatoes by washing, peeling, and then cutting them into thin slices.
- While you are prepping, boil a large pan of water, plus the salt and lemon juice. Drop the sliced potatoes into the water and blanch them for about six to seven minutes, or until fork tender. Be careful not to completely cook them - they will be difficult to work with if they are too soft. Drain them into a colander.
- Drop the potatoes into an ice bath to shock them. Remove and pat them dry, lining them up on the dehydrator trays as you finish drying each one.
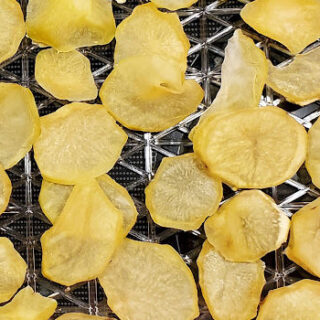
- Set the dehyrdator for 135° F for eight hours. Check them, and set at thirty minute intervals. Mine for this post took ten hours; my previous batch took just under nine. I suspect it has to do with my cutting varying thicknesses from one batch to the next.
Notes
Let the potatoes cool completely before you pack them into individual mason jars or vacuum-seal bags. They keep for up to twelve months in a dark, cool, pest-free location.
The Takeaway: Potatoes Are a Frugal Favorite…and They Are Easy to Preserve
Albeit a time-consuming undertaking, you can easily dehydrate potatoes for your emergency food storage needs. I try to start these first thing in the early morning due to the relatively long drying time. That said, all the work comes at the beginning of this process, so once you add the spuds to the electric dehydrator, you are free to go about your business for the day.
Please chime in on social media–we’d love to hear from you on Facebook or MeWe. And as always, have a happy DIY day.


