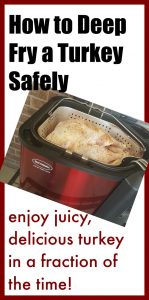
It seemed fitting to make a post on how to deep fry a turkey safely. I have been getting hungry for turkey, so why wait for Thanksgiving? I can fire up the fryer and turn out a succulent, moist deep-fried turkey just because.
It’s the time of year when our thoughts turn to family gatherings, chats by the fireplace, decorating with Pilgrims, and a scrumptious turkey in the center of the table. There’s no doubt that turkey can be dry, and deep-frying makes the most succulent turkey.
However, we’ve all seen news stories on disasters that occur when turkey fryers go wrong. Burnt hair. Burnt cars, burnt houses. You get the idea.
I abandoned the propane fryer years ago and I now use an electric fryer that’s oversized, created specifically to accommodate a large turkey. It holds up to 22 pounds of bird. I will admit, that a 22-pound bird is too heavy for me to safely pull out of the fryer. I stick with one around 15 pounds.
My turkey fryer (electric deep fryer) of choice? The Butterball XL fryer. Check it out online–it won’t disappoint you. I get amazingly consistent results when I use it.
Here is the method for electric deep-frying a turkey that will keep you safe.
BE PREPARED:
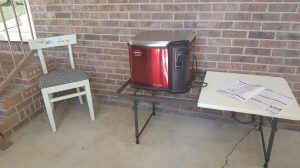
My electric fryer has a lid that swings open so high that it hits the upper cabinets. It is indicated for indoor-only use because of the indoor outlet. However, I have a covered porch. I purchased a small foldaway table that has a low height setting. I sit the fryer on this table so that I can easily put the turkey into the oil without dropping it and burning myself.
If you have upper cabinets, do a dry run before you fill the fryer up with oil to ensure that you can put the lid up and down.
DEEP FRYER SAFETY TIP – Set up a sturdy table at a low height that you can easily reach to put the turkey in and out. It’s heavy and you don’t want to knock over the hot fryer as you remove your bird.
CHOOSE THE RIGHT OIL
Every oil has a smoke point. This is the temperature at which the oil will start to billow smoke and can catch fire. In case you didn’t read between the lines, that’s bad! You want oils with a high smoke point to ensure a lovely, browned bird.
Beyond the important factor of not catching fire easily, it’s important to get the oil very hot for the turkey. This will cause the skin to brown and lock in the moisture so that the skin gets crispy. Crispy skin is good because it means the moisture is sealed inside the meat. In addition, that crisped, browned skin keeps the oil from saturating the turkey making it oily.
My favorite oil is 100% peanut oil. It has a high smoke point, is cholesterol-free, and has a neutral taste. Some people say I am biased because I live in the peanut belt of North Carolina. But truly, it’s the superior frying oil. In fact, cooks around here insist that it gives all those southern cooks a leg up.
SAFETY TIP – If you’re unsure of the oil temperature, use a candy thermometer to check it to prevent starting a fire.
PREPARE THE BIRD
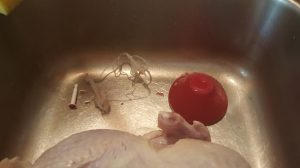
Just as when you are roasting a turkey, you need to prepare the meat for the fryer. Remove the packets of innards and discard, unless you are one of the people who fry them – I hear it’s quite delicious, I just don’t do it. Remove the neck. Rinse the entire cavity out with cold water.
SAFETY TIP – Remove your turkey from the freezer several days before cooking it, and defrost it in the fridge. Never leave thawing turkey (or any meat) sitting at room temperature.
SAFETY TIP – If your turkey has a plastic pop-up timer and plastic trussing around the legs and wings, pull those out! You don’t want to eat melted plastic! I use a silicone jar lid remover to grasp the plastic truss so that I don’t cut my fingers pulling that plastic piece out of the legs.
I also like to put seasoning both UNDER and ON TOP OF the skin of the turkey. What you use is up to you. Dry seasonings are always the safest when you’re deep frying.
RELATED POST: 3 Easy Dry Rubs for Your Thanksgiving Turkey
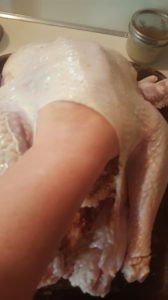
SAFETY TIP – Blot water off of the turkey before you season it. There may be water from the ice melting as it defrosted. The water will splatter violently when it hits the fryer, so it’s best dried up.
SAFETY TIP – If you are thinking of injecting the bird…don’t! All those delicious injection juices might cause the oil to pop violently when they hit the fryer. It’s a bad idea when you are deep frying.
HOW LONG SHOULD I DEEP FRY A TURKEY?
Carefully lower your turkey into the fryer! You don’t want to “drop” the turkey or you can get burned.
Calculating your cooking times will help you fry a moist and delectable bird. Most electric fryer manufacturers suggest 4 minutes per pound. For my 15 pound turkey, this is one hour. This has always worked for me.
SAFETY TIP – Make sure that the oil is heated to the correct temperature. When you put the turkey into the oil, the temperature is going to drop. It will reheat to the correct temperature more quickly if you have it properly heated to start with!
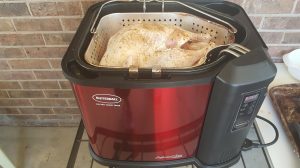
SAFETY TIP – After the time is up, use a meat thermometer to make sure that the turkey is cooked to a temperature of 165 degrees.
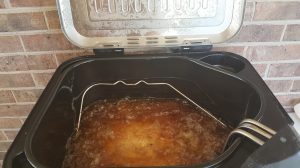
REMOVE THE TURKEY FROM THE FRYER:
Before you remove the turkey from the deep fryer, get your area prepped. Have a cookie sheet lined with paper towels to blot excess oils and an extra set of hands is nice! Be sure to lift up high enough to clear your fryer. My fryer has a notch where the basket can rest while I pull out the turkey.
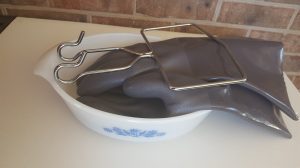
SAFETY TIP – Your fryer will have a kit that contains a metal hook and probably a heavy set of gloves. These assist you in raising and lowering the basket without burns. Please use these to protect yourself.
Place the turkey on the paper towels to rest for 15 minutes. While it’s resting, I usually drop hand-cut potato chips or french fries into the oil. Yum!
LET IT REST BEFORE YOU CARVE:
After the turkey has rested for 15 minutes, carefully carve it. I added an extra sprinkle of some Alarita Spicy Dry Rub to mine before eating it.
SAFETY TIP: As you start to carve the turkey, carefully cut a slit with the point of your knife before you cut in. If any hot oil is under the skin, this will release it gently so it doesn’t splatter you!
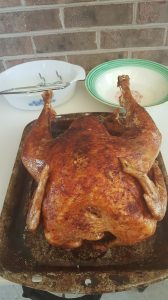

So you see, there’s no secret in how to have a safe and happy Thanksgiving. You and your guests will certainly enjoy the flavor of a moist deep-fried turkey. And the fact that you can achieve this without fire extinguishers? Priceless!
Happy cooking!
