Do you want to grow your favorite herbs, but your yard provides only limited garden space? To maximize the available space, consider building a bucket planter stand using salt-treated 2x4s and 5-gallon buckets. This project takes about three hours to make and another hour to plant your favorite offerings.
We have a highly shaded yard. Our home sits on a corner lot with commercial pinewood forests on two sides, creating heavy shade. The other two sides of the property are roadways, with one neighbor having tall, mature trees. So, to say the least, we are creative in carving out every productive inch possible–with the bucket garden being one such adjustment. Besides that, we plant several small gardens in the sunny spots around the yard instead of a single larger one.
Anyhoo…
We were able to place this apparatus where it receives only early morning shade and basks in the full sun from mid-morning until sunset.
Transparency. I’m always honest. We built this bucket planter stand three years ago. I snapped the images, then I forgot to write the blog post and share it with you. Mea culpa. It was the spring of lockdowns, and we had tons of time on our hands. We were fortunate–we made this piece before the lumber and material costs took off like skyrockets.? To be fair, I saw this on Pinterest but did not have a pattern to follow, either. I guess we were lucky that it turned out so well!
I no longer have the cut sheet my husband noted for me to share. Besides forgetting to publish the instructions, I also lost his list. However, I do have all the finished dimensions to help you calculate everything you need for this project.
Why You Would Build a Bucket Planter Stand
Why should you invest the time and materials to make a bucket garden? Here are the reasons why I decided to make one:
- Limited garden space: The trees surrounding my yard matured so much that my previous plot was almost fully shaded. I needed to move my tomatoes and peppers to a sunnier place.
- Easy of care: Everything is in one compact, neat area. I can set the sprinkler to a fixed position, turn it on briefly, and then work on another task. Also, the weeds are easy to remove from the containers, as long as you keep on them once or twice per week.
- Home-grown food for preserving: Growing your own food for canning or dehydrating gives you a very satisfying feeling. If you want lots of one thing? (as in for canning), fill your bucket garden only with those plants. But if you wish to produce small amounts of lots of things, you can put different plants every couple of buckets.
- Avoid food shortages: Since early 2020, we have seen supply chain breakdowns like we’ve never witnessed in the past. From scarcity to flat-out food outages, you never know what you’ll find at the store. You will feel more secure and in control of your resources if you plant a bucket garden (or any garden for that matter!).
How to Build a Bucket Planter Stand
Before you start building your bucket planter stand, know that you will need two people to move it once you assemble it. It. Is. Heavy. Once you place potting soil and buckets, you will not likely be able to move it at all. So build it near your desired location, adjust the placement, then start filling the buckets!
Here is an overview of how to build this.
Materials:
- Salt-treated 2x4s
- Deck screws
- Drill
- Screwdriver bit
- Drill bit
- Circular saw, or hand saw
- 12 5-gallon buckets (wash them out well before planting in them)
- Weed control fabric
- A knife or sturdy scissors
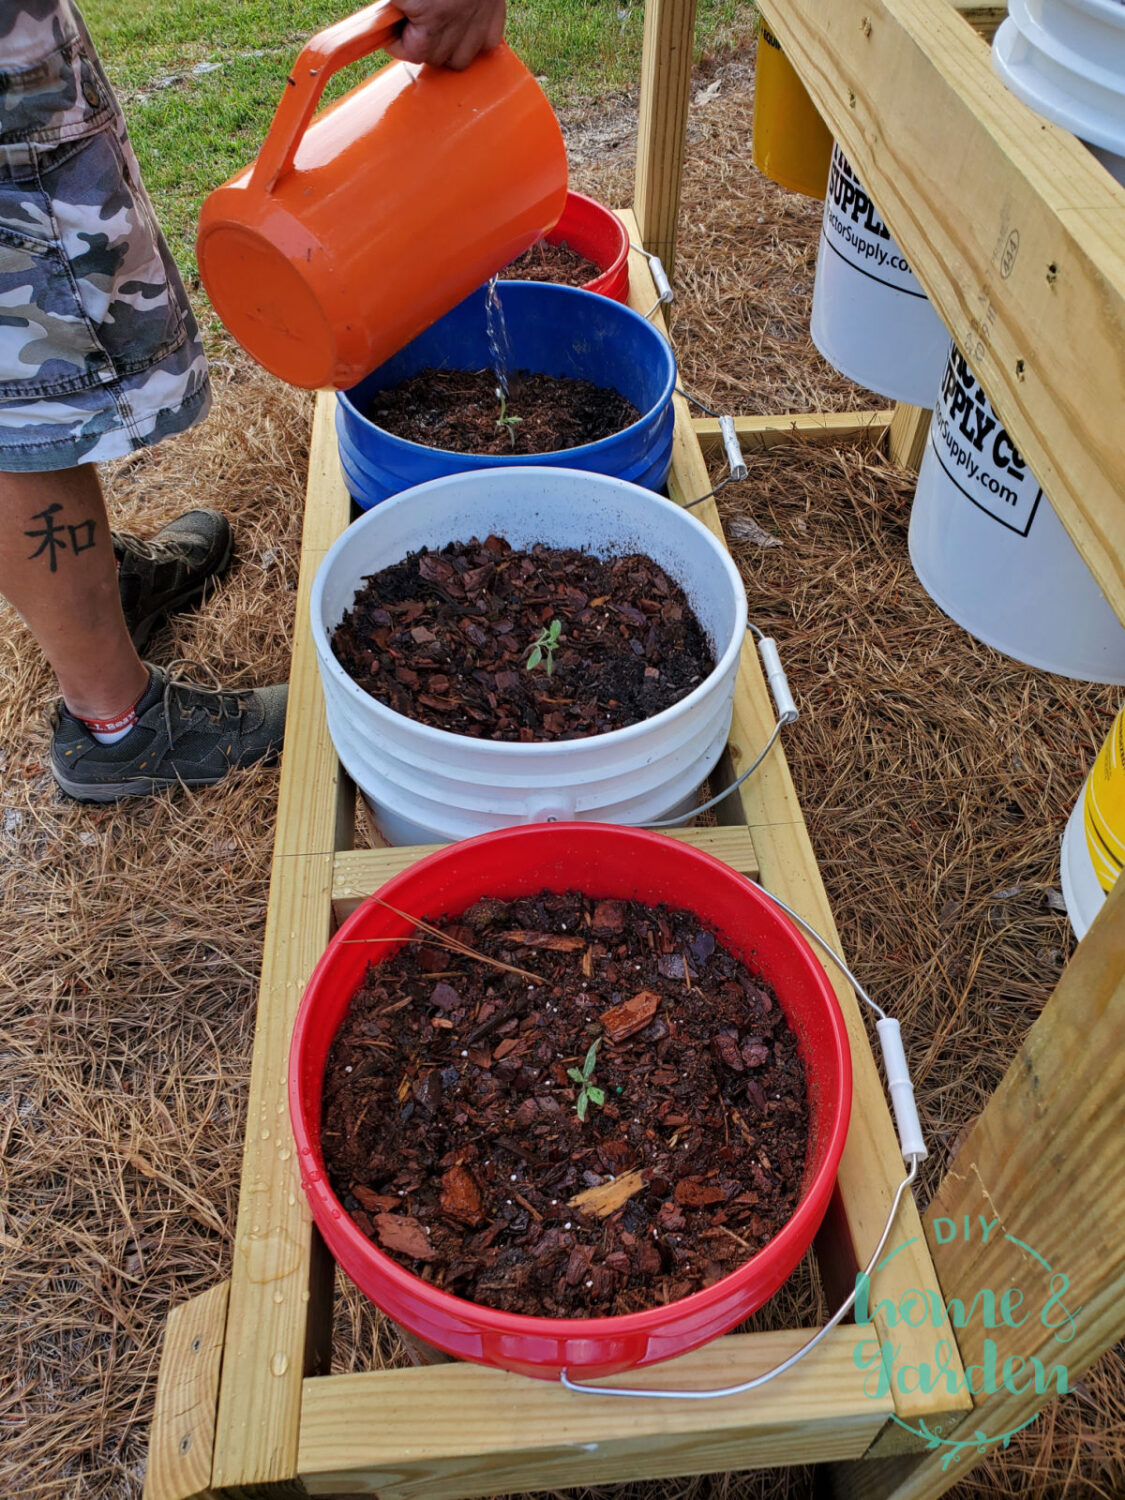
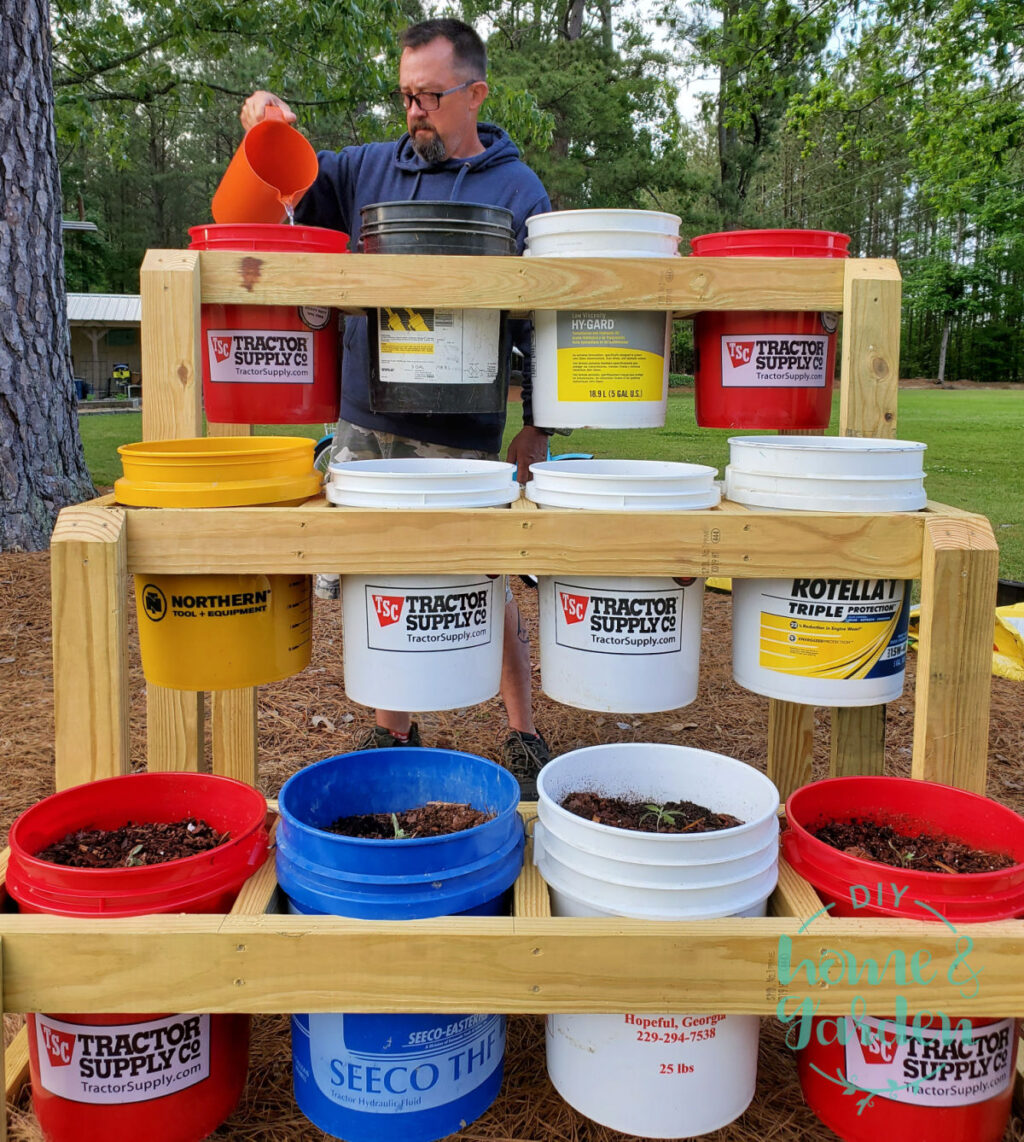
I chose a variety of colorful buckets that I found in the barn. You can do all one color if you like, as well. Also, if you have kitty litter buckets, you can wash them out and modify this project to hold those instead.
Finished Dimensions of the Bucket Planter Stand
Height
- Bottom tier: 13.5″
- Middle tier: 29.5″
- Top/back tier: 46.5″
Width
- Overall: 52″
- Inside dimension of each individual slot: 11.25×11.25″
Depth
- Front to back, total depth: 49.5″
- Each tier: 14.25″ deep
Directions:
- First, we measured the collar of the buckets to make sure each was the same size.
- Hubby built the exterior frame first, with all four corners sturdy. The top tier requires support all the way to the ground. Otherwise, it would tip over!
- He added a bottom support rail to reinforce the corner posts from front to back.
- Then, he cut the supports for the two upper tiers and assembled them.
- Finally, he cut the fronts and inserts between the buckets next, screwing them into place securely.
Planting Your Bucket Garden
After you build your planter and move it to the exact location you like, it’s time to fill your buckets with your favorite herbs, vegetables, or fruits. Strawberries would be AMAZING! Be sure to choose plants that will thrive in a container garden!
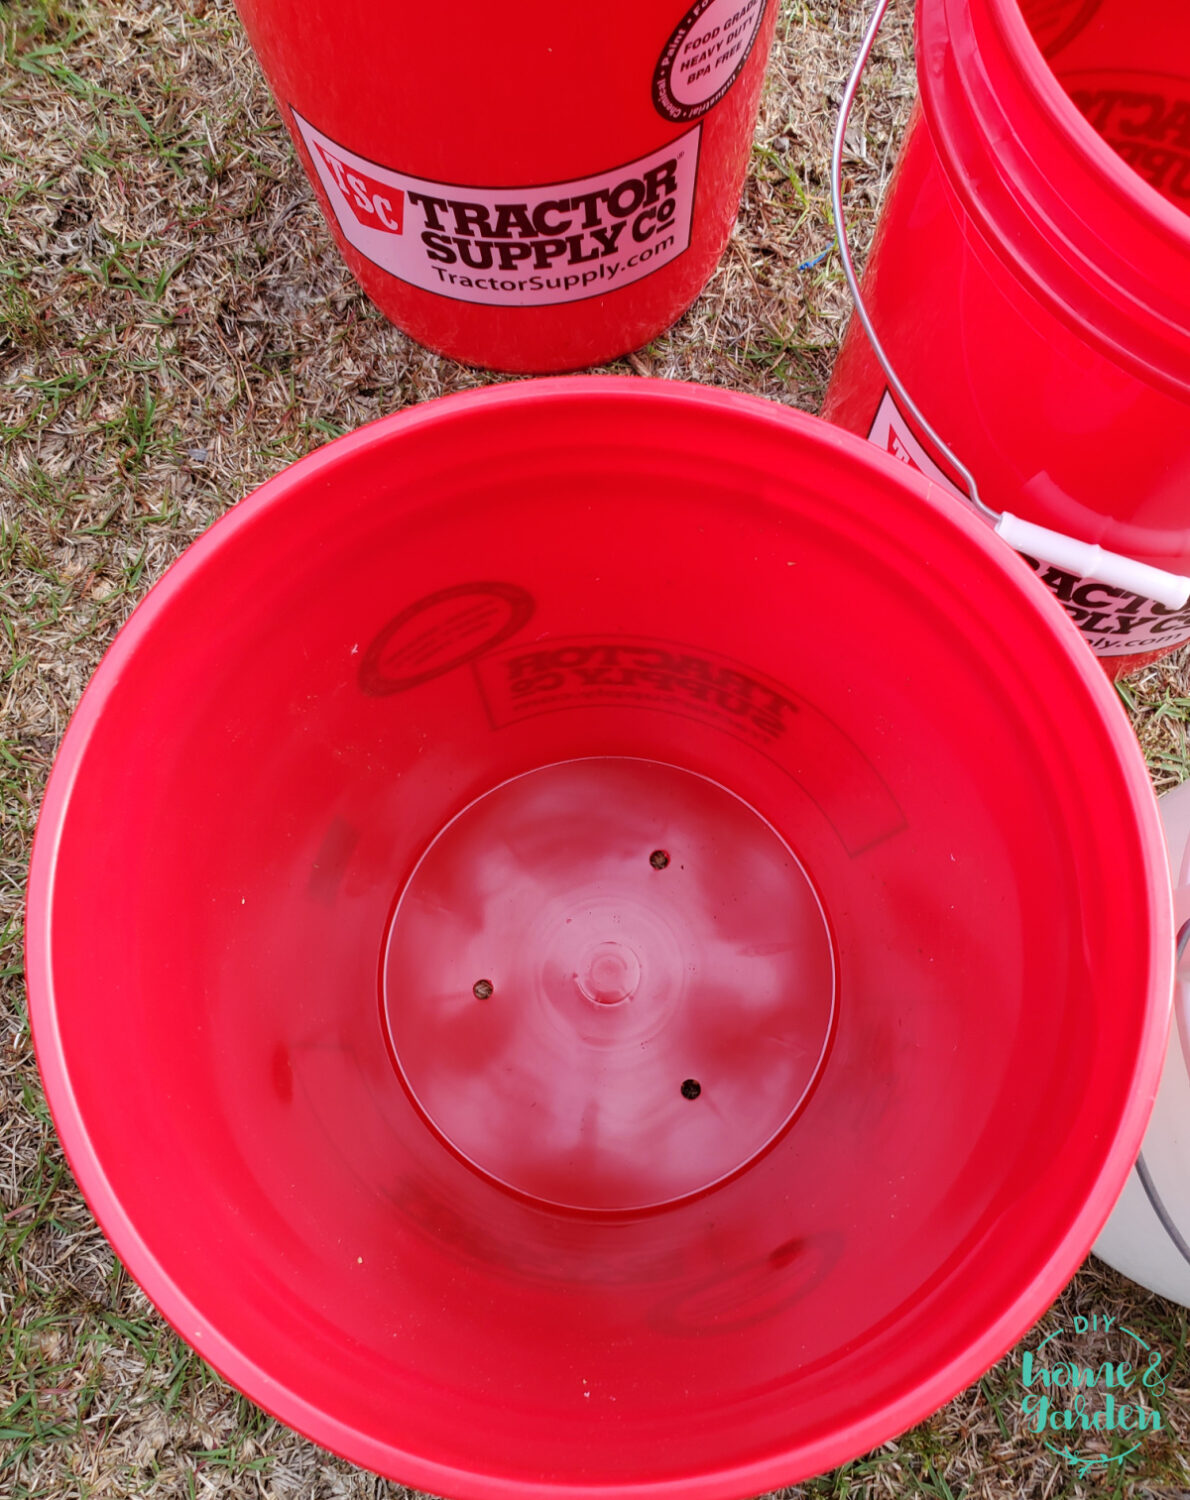
- Pull out a small length of weed control fabric from the roll. Turn a bucket upside down and press the material firmly against it until it leaves an impression. Follow that mark to cut out a circular piece for the bottom of the bucket. Use that as a pattern and cut eleven more.
- Drill medium-sized water drainage holes in the bottom of each bucket. If you’re experiencing a heavy downpour, you’ll want to ensure proper drainage without letting the rainwater pour out like a waterfall.
- Add your potting medium of choice–generally use a potting mix. I filled each bucket to the bottom of the collar.
- Follow the care instructions on your plants or seeds and plant them as instructed. Note whether they require fertilizer–and how much.
- Put the bucket in its place in the frame of the bucket planter before you water. It will be too heavy for most, otherwise!
The Takeaway: Building a Bucket Planter Stand Gives You Maximum Output If You Have Little Gardening Space
Building a bucket planter stand might be an excellent solution if you have limited yard space or limited full-sun spots in the yard. You can plant twelve of your favorite veggies, fruits, or herbs in a small footprint. Not only will you have a bountiful harvest in late summer, but you will also have hours of enjoyable time to spend in your little “garden.”
Please comment on this post on social media to let me know how this worked out for you. I read every comment and love hearing all about your successes. Until the next time, have a happy DIY day.