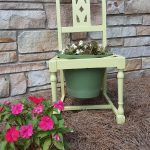
I’ve long been wanting to upcycle a broken chair into a planter for my yard. I have one particularly bare spot in my front flower bed that needed a good bit of color. Unfortunately, it gets full sun, during the hottest part of the day and nothing seems to thrive in this spot.
RELATED POST: 6 Ways to Upcycle an Old Chair
We have had over two weeks of days over 100 degrees, almost daily. No matter how much I water this front bed, it is not enough for the poor flowers. This planter is going to be able to be removed from the chair and moved to the shade if we continue to have these hot days.
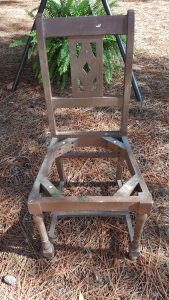
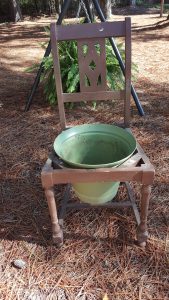
This chair had no seat. It was in a pile of trash being discarded at my job. With my manager’s permission, I took it home for an upcycled chair project…and blog post.
In addition to the missing seat, the feet were rotting off. No problem… I don’t care about the feet as the chair will be on the dirt either way. A nice mound of fluffy pine straw can hide the feet.
This is what the upcycle project looked like before I transformed it:
HOW TO UPCYCLE A BROKEN CHAIR INTO A PLANTER STEP BY STEP:
Easy to follow instructions. However, you may need to do additional minor carpentry if your chair or planter is a different size. I got very lucky on mine. Here’s what I did.
STEP ONE: SAND IT
I used my electric sander with 120 grit sandpaper to just remove the glossy top layer. This project is going outside, I was not super concerned with perfection. However, if you don’t remove that top layer of paint, your paint may not adhere.
STEP TWO: TWO COATS OF PAINT
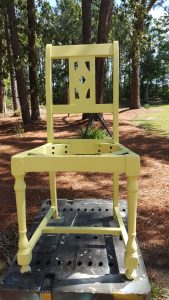
So I applied the first coat of paint, paying special attention to the nooks and crannies. I wanted all of them filled in. Then I used a Valspar sample sized pint of paint in Citrine, from Ace Hardware. This is an interior paint with a satin finish. I know an exterior paint would be better, but I had this on hand. If you have an exterior paint handy, go for it.
This is definitely an admitted case of “do as I say, not as I do.” I just really liked this color but an exterior paint is longer lasting. However, I was planning to seal it with an exterior sealer to make it more durable.
I love to use the sample pints by Valspar. They are great for small projects, especially in a color like this…it’s a bright departure from my beloved neutrals, reds, and blues.
On the second coat of paint, I paid a close eye to smooth out brush marks and make sure nothing was left uncovered. This is your last opportunity to smooth out any runs or drips.
I let the paint dry for about two hours.
STEP THREE: CLEAR COAT
I sealed the paint with Valpar’s Interior/Exterior Clear Satin Spray Paint. This gives a satin shine and helps lock in your color. It also helps to protect it from the elements.
I allowed this to dry for about two hours.
STEP FOUR: ADD YOUR PLANTER
I got very lucky. I grabbed an empty planter from my she-shed and dropped it into the seat frame area. It fit without me needing to frame it in to fit. I had tested this before I painted so I knew it would work.
If you need to, you can use scrap wood to screw into the inside of the chair seat frame to hold your planter. However, I suggest doing this BEFORE you paint so that you can also paint this wood.
Like I said, pure dumb luck for me on this project.
STEP FIVE: ADD PLANTS
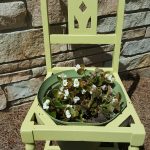
I moved some Begonias from another area of my yard to this planter. I liked the white color against the vibrant yellow-green chair.
Of course, you want to give newly transplanted flowers a good, long drink of water.
Finally, remember to keep an open mind when you see items that will be discarded. If a chair looks like a planter to you, then it’s in your hands to make that transformation happen!
Have a Happy DIY day!
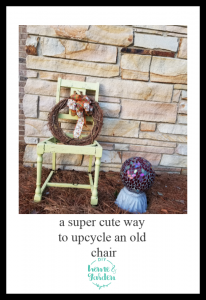
UPDATE 10/22/2018 – The upcycled chair has been outside my house for over a year. It’s sat out there through 3 hurricanes, one ice storm, and countless rainy days. It’s gotten a really cool weathered look. However, it is an indoor chair, and the weight of the planter became too heavy for the chair. I have now repurposed it once again…into a wreath holder. A simple wreath is held in place with a piece of clear fishing line. It looks like the wreath is just sitting there, but it is nice and secure.
