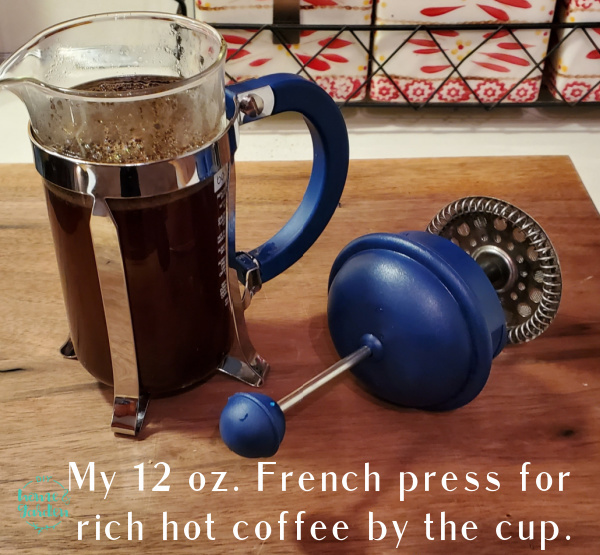
Perfectly good coffee begins with choosing the right beans, grind, and brewing system—in this case, a French press. This (mostly) manual coffee maker is quite inexpensive. It is so effortless that anybody can use it. Plus, it allows you total control over your brew.
Four French Press Coffee Maker Options:
- Large French press: you can use this humongous 8-12 cup piece of equipment to brew several cups of delicious coffee in just a single batch.
- Small French press: This is ideal for one or two people, making 3-4 cups.
- Electric French press: This style of the unit makes an alternative for the manual option. It heats the water, brews the coffee, and stores it warm after it completes the brew cycle.
- Metal French press: This option is ideal if you reside in a cold area. It is more durable and retains heat better than glass.
French press coffee brewing: Step by Step Guide
Are you ready to learn how to make excellent, flavorful java in your French press? Let’s look at how to get it don.
Gather all the items that you need:
Before you embark on the process, ensure you have the following:
1. A French press
This is a must-have to be able to brew your French press coffee. And just like any other store-bought equipment, ensure you get the right quality, so you don’t have to replace it within the first year of purchase.
2. Whole coffee beans
Good beans and grind equals excellent coffee.
Though most coffee lovers (who routinely utilize a French press) may prefer the ready-grounds—which in most cases come finely grounded, it would be best to grind the beans yourself for a uniformly coarse texture that ensures maximum flavor and color extraction.
This brewer functions best with a medium to coarse grind. Although fine grounds make good coffee, but they tend to easily pass through the filter. Thus, they create sediment in your coffee.
3. Burr coffee grinder
You may want to choose a burr grinder over the regular blade grinder for consistency purposes—when it comes to grain texture.
Unlike the regular blade coffee grinder, a burr grinder features two abrasive surfaces (the burrs)—between which the beans are grounded. The distance between the two surfaces is adjustable, making it possible to alter the size of the grind to your preferred texture.
Whether manual or electric, a burr grinder guarantees a uniform grind, qualifying it as the ideal choice for a French press.
4. Digital food scale
Using a digital food scale is the most accurate way to measure the right amount of coffee beans before grinding; however, if you don’t have one, use a standard measuring cup.
Here is a general guide to help you work out the right ratios concerning coffee/water proportions.
- 8 fluid ounces (1 cup of water) — 14 grams (2 tablespoons) coffee beans
- 16 fluid ounces (2 cups of water) — 28 grams (1/4 cup) coffee beans
- 32 fluid ounces (4 cups of water) — 56 grams (1/2 cup) coffee beans
- 64 fluid ounces (8 cups of water) — 112 grams (1 cup) coffee) beans
5. Stirring spoon
Any long spoon will do—a teaspoon or a wooden spoon.
6. Gently-boiling water
This water is how you will warm your press before brewing. Plus, of course, you need the same boiling water for the actual coffee brewing process.
7. Timer
You need a timer to ensure you don’t surpass the 4-minute brewing duration.
French press brewing instructions
1 – Warm up your French press
Start by warming up the press. This helps prevent your brewing temperature from fluctuating. Simply rinse the press with some boiling water.
2 – Weigh/measure your coffee grounds
You can use the provided guideline above to get the right coffee to water ratio.
3 – Grind your coffee beans
Use a burr grinder for coarse and uniformly-sized grounds. Ensure you have a clean French press before adding in the coffee grinds when you add them to the coffeemaker.
4 – Weigh or measure water
Measure the water (as per the above coffee: water ratio guidelines) and heat—preferably between 195-205 degrees F. Allow a minute of cooling, then pour into the French press.
Use your long spoon to stir the coffee ensuring that the water disperses evenly over the coffee grounds.
5 – Put the lid on, then start the timer
Time the brew for four minutes. The lid helps insulate the press, trapping the heat inside during the brewing process.
After four minutes elapses, gently press the plunger down the press to prevent your coffee from brewing further into over-extraction.
6 – Decant the coffee
The longer your coffee stays in a container with coffee grounds the more bitter it will become due to over extraction of the flavor. Therefore, decant immediately, serve, and store the rest in a thermos to keep it warm. Do not let it sit for so long in the thermos since by that you also risk drinking bitter coffee.
That is it. Congratulations on that excellent brew.
The Takeaway on enjoying French press coffee
Here is a final thought about your French press coffee maker.
A well-maintained work tool will always give you the best outcome. And so is the case with your French press.
For consistent and perfect coffee brewing, ensure you rinse your coffemaker after each use. Then, disassemble and clean it at least once a month. This sanitation practice means that you will brew a terrific cup of coffee every time you use your French press.


