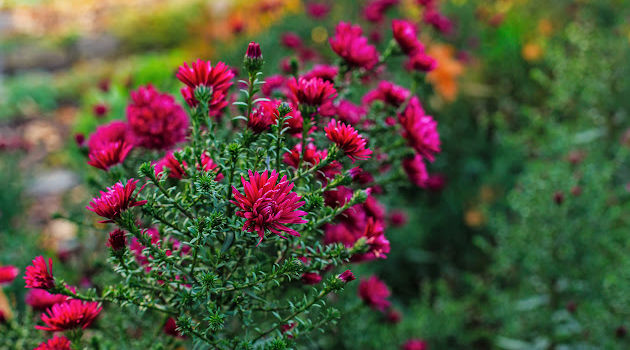
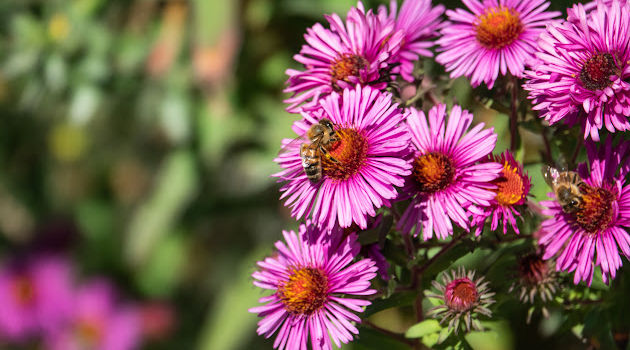
The aster flower, a popular daisy-like perennial, is a true delight in the garden. When most summer blooms bow to the heat pressure, these beauties will still warm your garden with their white to purple and blue tones.
Aster Flower Varieties
There exist quite a few species of aster plants. However, the New York aster and New England are the most popular in the home gardening space. They make excellent borders and great additions to rock and wildflower gardens.
Depending on the variety, asters can grow from 8-96 inches. So they can be pretty tall–read the seed packet and plant them accordingly. Growing and caring for these beauties is relatively a straightforward process. However, read the tips we share below to ensure they achieve their maximum growth potential.
Aster Flower FAQs
Below are the answers to the most commonly asked questions before diving into the aster growing and care needs and growing tips.
Do aster flowers come back every year?
If left to full maturity, asters spread by self-seeding or through underground rhizomes and are likely to come back every year.
What does the aster flower symbolize?
- Different people and cultures cherish this flower for varying reasons; however, it’s generally a symbol of love, faith, and wisdom.
- In Victorian culture, aster flowers represented patience, daintiness, and charm. On the other hand, the French soldiers used it to adorn the graves of their fallen comrades as a sign of honor.
- Some ancient cultures believed that the odor from burning aster could ward off serpents.
What time of year do asters bloom?
Asters bloom in late summer and early fall, with either full multi-petaled or flat daisy-like flowers. This depends on the variety.
Where does aster grow?
Asters thrive in USDA hardiness zones 3-8.
They prefer a climate with cool, moist summers and especially cool night temperatures.
If you reside in warmer climates, you want to have these flowers in spots not exposed to the hot mid-day sun.
What is wild aster?
Wild aster is a common hardy plant, often coloring the landscape when other blooms wither and die in the summer heat.
It’s popular in pastures, gardens, crops, waste areas, and roadsides. The plant is considered an environmental weed in South Australia, Victoria, New South Wales, Western Australia, and Queensland. While Americans call this plant “aster flowers,” Aussies call it “aster weed.”
Are wild aster flower seeds edible?
Wild asters are edible. Some people add the flowers fresh in salads while others use the leaves in making tea.
How do you harvest aster seeds?
You can collect your aster seeds by Stalk Harvesting, Seed Head Crumbling, or Flower Head Snipping.
- Stalk Harvesting—It’s the ideal method for when there is a likelihood of frost, and you don’t want the asters to be mushed before you harvest them. The technique involves cutting the entire stalks bearing the clusters of blossoms.
- Seed Head Crumbling—If you don’t mind some of the asters self-seeding, then wait until you see a few brown heads; then harvest only what you need, and let the rest be. Holding a paper grocery bag under the plant, rub the dry heads with your fingers and thumb until loosened and they fall in.
- Flower Head Snipping—this involves collecting individual aster flower heads and leaving the stalks intact. Hold your paper grocery bag beneath the plant with one hand, then using the other hand, snip off the individual dry flower heads.
Once harvested, dry your seeds and store them in an airtight container, to maintain their freshness until the next season.
How do you know when seeds are ready to harvest?
Most aster flower seeds are ready for picking when the flowers begin fading at the end of the season. Begin collecting the seeds once the seedpods change from green to brown—when they can be easily split. Harvest the bases on a dry and sunny day.
Can aster flowers be grown in pots?
Yes. Just make sure that the pot or container has plenty of space to support proper root development.
You also want to avoid overly large pots as large amounts of potting mix tend to hold excess water, which may lead to root rot.
The best practice is to re-pot once the plants outgrow their containers.
When should I plant aster seeds?
If sowing your aster seeds outdoors, then the best time is just after your area’s last frost.
But you can also start them indoors four to six weeks before your last frost.
What is the difference between asters and daisies?
Daisies are bloomers with large, star-shaped tops that feature clusters of florets encompassing a center disc of black or yellow florets.
On the other hand, Asters also exhibit starry-shaped flower heads, which is one of the reasons people confuse the two.
Both flowers belong to the Asteraceae family.
How to Grow Aster Flower Seeds
Seeding is just one way to propagate asters. Other methods include division, soft stem cuttings, and nursery plants.
Starting the aster flower seeds
- Start your aster flower seeds indoors, about one or two months before your planned transplant date.
- Fill the compartments of your seedling tray or seed starting containers with good quality potting soil.
- Ensure that the containers are three to four inches deep; that is, if you resort to using mediums like pots or cups.
- Place a single seed per compartment, pushing down lightly to a depth of about an inch; then cover lightly with soil.
- Next, keep the seeds in the refrigerator for about four to six weeks. The North Carolina State University Agricultural Extension Center explains that this period simulates winter dormancy, helping ensure a better growth phase after removing them.
- Cover your seedling tray loosely with a plastic wrap, then chill the entire thing. This artificial chilling process (unlike the cold ground outdoors) helps shield the seeds from freeze stress—the primary cause of seed death.
Prepare to move your seedlings to the great outdoors
- About two to four weeks later, just before your area’s last expected frost, remove seeds from the refrigerator and place them in a sunny location (indoors), with at least six hours of sunlight a day.
- Wait until the seedlings develop at least two true leaves before hardening them off.
- To harden off, set them outdoors for a few hours each day. Start with three to four hours daily, but only once the frost danger has passed.
- Transplant outdoors in spring after the frost threat has passed.
The aster flower needs good-quality soil
- The soil should be well-drained, with easy access to full sun, though asters can tolerate a bit of shade.
- Consider boosting your soil’s nutrient level before transplanting the aster seedlings to give them a good start.
- Work in two and four inches of compost into the top loose twelve or so inches of your soil. This you can do using a tiller or garden fork.
- Make holes with the same depth as the current seedling containers, ensuring a spacing of one to three feet between individual plants.
Transplanting your seedlings
- Carefully remove the seedlings from the container by gently pressing the planting compartment (or container) holding each seedling. Dampening the soil with water will make the process even easier.
- Place each of your asters in their individual holes, ensuring that the root ball top is even with the soil surface around it.
- Fill the remaining space around the plant with soil; tamp down firmly in place; then water immediately to help settle the plants into the ground.
- You can apply mulch immediately after planting to help with soil temperature regulation and suppress weeds. Two inches of mulch around the base of the asters is sufficient.
- Repeat mulching every spring; however, be sure to remove the old mulch before applying the new one.
Note: Aster seeds can also be directly sown into the ground after the spring frost danger has passed and the seeds harvested at the end of the season.
How to Care for the Aster Flower
Watering—Keep your new plantings moist and maintain regular watering until the flowers are done blooming.
Water at the plant’s base, making sure not to splash water on the leaves. This helps prevent fungal or mildew growth. Offer an inch of water each week except for when it rains.
Note that the soil should stay consistently moist and not saturated—to avoid rot.
- Fertilizer—Feed your asters each spring before the onset of new growth by thoroughly working in balanced, general-purpose fertilizer (as per the instructions on the package label) into the soil.
- Pruning—Prune your aster plants twice every year, lightly in the spring then heavily in the fall.
- Division—Divide asters every two to four years in the spring to encourage vigorous growth and healthy abundant flowers.
And to do that, dig out half of your established aster plant, dividing the dug portion into clumps, with either three or five shoots on each cluster.
Use the divided portions as seedlings, making sure to follow the recommended transplant process.
- Staking—Most aster flower varieties will thrive without staking; however, some cultivars may require support, especially in windy locations. Some larger types may also just droop, in which case, you should erect a stake to help train the foliage upright.
An effective stake should be twelve inches taller than the plant’s current height and stand about two to three inches away from the plant’s main stem.
Gently tie the aster flower branches to the stake using a nylon stocking or wool yarn.
The Takeaway on Adding the Stunning Aster Flower to Your Garden
Though hardy, aster foliage can be affected by powdery mildew. Avoid splashing during watering and ensure adequate plant spacing to enhance air circulation.
Lace bugs are also likely to bother aster plants causing yellowing of the foliage and leaf drop in summer. Coat all the foliage sides with insect soap—to rid off the hiding pests.
And in case you’re worried, spraying won’t affect the beneficial pollinators and butterflies since lace bug outbreaks often precede aster blooming time.


