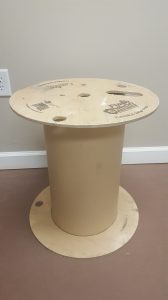
I recently had an idea on how to fill an empty corner of my office without spending a dime. This involved an empty wood spool upcycled into a seasonally decorated side table. The spool I had in mind was a smaller spool, and it was just sitting in a warehouse waiting to be hauled to the dumpster.
Of course, my upcycling senses kicked in! How could I let such a useful object be hauled off?
RELATED POST: 6 DIY Home Updates on a Budget
RELATED POST: 5 Ways to Upcycle an Old Dresser
I had been wanting to put some type of table in a blank area of my office. This was just the right size. Once I looked closer, I realized one challenge. The ends of the spool were made from plywood; however, the tube in the center was cardboard. I knew that the paint would not look right since they were two different materials.
So what could I do? Fabric! I could cover the center tube in fabric and change it out every season. Bingo!
Here’s how I did it.
SPOOL UPCYCLED INTO A SIDE TABLE
First, here’s the before picture of my simple, unassuming spool.
STEP ONE: PAINT THE SPOOL
I started by painting the top of the bottom platform as well as the “tabletop” piece of plywood. Even though I planned to put a round mirror on top, this gives me the option of white wood finish if I decide to change it.
Don’t forget to pain the edges (like I did, I had to go back and do them two days later when I noticed).
This took two coats of white paint; in fact, where there were logos and words stamped on the wood, I had to touch up with a third coat. I chose white to keep it bright and neutral.
STEP TWO: COVER THE CENTER TUBE IN FABRIC
I had a yard of fabric that someone stuffed in a supply cabinet from some prior decorating efforts at the office. So I took it home, ironed it, and cut it with pinking shears to the correct size to cover the cardboard support.
Then I laid the spool on its side and used clear thumbtacks to secure the fabric. I chose thumbtacks so that I can swap out the fabric for Christmas in a couple of months with no hassle.
You need thumbtacks down the seam where the fabric ends meet as well as concealed under the tabletop in a couple of places to keep the fabric from sagging. It laid perfectly on the bottom edge, thanks to the careful measuring and ironing.
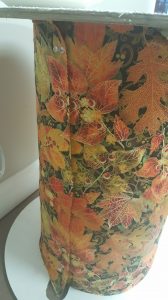
Once you have wrapped the tube in fabric, go around and straighten around the bottom carefully so it looks nice and turn the “seam” to the wall to hide the thumbtacks.
STEP THREE: ADD THE MIRROR TOP
My spool top was 19″ across. I had an unused mirror at home that I thought was the right size. It measured in at 20″ so it was just the right fit!
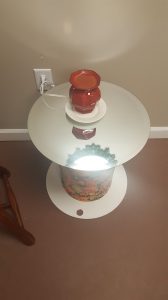
Here is the finished table:

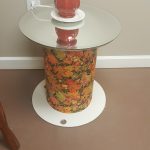
This project was quite easy and would be a great beginner-level spool upcycling project.
This allowed me to fill in an empty gap in my office with a cute and useful table…without asking my boss for any budget. And why have standard store-purchased office furnishings when you can create your own unique DIY project instead?
Do you have any ideas on how to upcycle small spools? Please share them with me on Facebook if you have any photos!