Last week, a friend gave me a worn out, rickety wooden ladder. She happened to be clearing out an old barn. Moreover, she’s always entertained by how I transform junk into something usable. Well, she should prepare to be double-amazed because that old ladder is being repurposed into two useful items. Today, I’m sharing Upcycled Ladder Project One, the clematis trellis.
RELATED POST: Upcycled Ladder Project Two: Shabby Chic Towel Rack For My She-Shed

I have a clematis vine that was, well… Out. Of. Control.
The little wire trellis that I have used every year is not working this year. It has lifted the trellis out of the ground and tipped it onto its side. Also, the weight is beginning to uproot the plant. It’s a beautiful vine, but it’s a big old mess right now.
As you can see from the photo here, the blooms are almost done for now. While it’s not ideal to trim clematis at this time of the year, something needed to be done.
Unfortunately, I had to trim this back to get it off the wire trellis. I tried to gently remove the vines but they were breaking as I worked with them.
But I bit the bullet, pulled out the clippers, and sacrificed it for the time being. I know that the vine will grow back up and it will look pretty and green, but I will probably not have blooms again until next spring. Oh well, I guess it’s better than letting it uproot itself.
By the way, I feel completely unqualified to write a “how to tame a clematis” article. This poor clematis…
CUTTING DOWN THE LADDER:
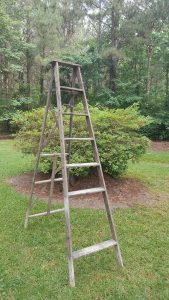
The ladder that I got was an 8 foot ladder, far too tall to make into a trellis. As you can see, it was missing a rung at the towards the bottom. There was a piece of rusted wire stretched across there which was the only foothold to replace the missing rung. Dangerous!
It had bits of dark green paint dribbled down in places and was very unsteady feeling
I wanted it to be only about 5 1/2 feet tall, so out came the radial saw. Don’t you love power tools?
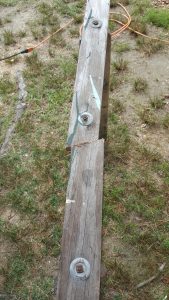
I measured from the top of the ladder to around the missing rung and it was just the right height. I cut it down carefully and angled the bottom so it would sit level.
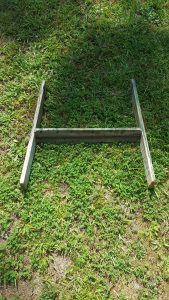
Below are photos of how to angle the bottom and of the leftover piece (the missing rung section) for which I have exciting upcycling plans. I also saved some scraps from the opposite side of the ladder to reinforce my trellis.
PAINTING THE LADDER:
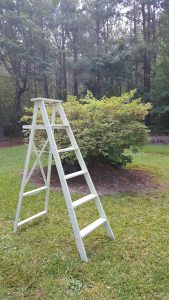
Because there were dribbles of paint and stain on the ladder, I took the time to sand it smooth and blew off all the dust and sanding grit with the air compressor to give it a nice, smooth, clean surface. I wanted a pretty, soothing green and I settled on a Valspar paint in a shade called Green Lawn.
Then I began to paint every little bit. I crawled under the ladder, using an angled brush to leave a coat in every little nook and cranny. Also, there were tons of places where the wood had split over the years. I slathered them with paint to correct them.
After two coats of paint, I had it looking much better. However, it was still very wobbly. Now, I don’t plan to stand on it. But say my girlfriends come over for margaritas or something crazy like that…
I needed to make it just a little bit sturdier.
STURDYING UP THE LADDER:
Remember the scraps that I cut down in step one? I took a piece of that and cross-braced the ladder about half way up so that it was sturdy.
Also, I tilted in the back of the ladder so that it would stand more upright. I wanted it to stand more narrow than opened wide up. In doing this, a little bit of the paint cracked.
I pulled out my paintbrush, painted that bracing piece that I added, and touched up anywhere that I cracked paint as I adjusted its stance.
PUTTING THE UPCYCLED LADDER IN PLACE:
The area where I went to place the ladder isn’t quite level. I place it on bricks for a couple of reasons. First, I was able to easily prop up the three low corners without any carpentry.
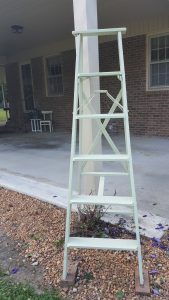
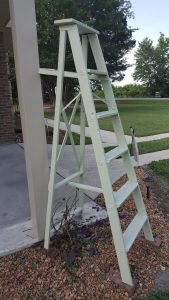
Second, Bertie County is in the Inner Banks region of North Carolina. It’s June, which is the beginning of hurricane season. If we know we are getting a hurricane, we put all our pretty things away in advance. At other times, we get strong thunderstorms in the summer so we try to make sure that things are secure in the event of strong wind gusts.
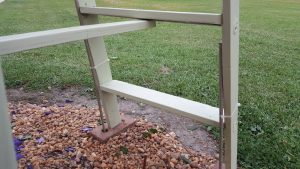
I have been so excited about creating a sturdy trellis for those beautiful purple flowers. It’s a shame that we needed to trim them back to make this idea work. For today, I’ll just pour myself a glass of sweet tea, go sit on my porch, be content waiting for the clematis to grow.
October 22, 2018 Upcycled Ladder Update:
I’ve had my upcycled ladder turned clematis trellis for two summers now. Where has time gone? I have trimmed back my clematis for the year, but I found a great new use for my ladder. I have taken fishing line and suspended a sweet, rustic fall wreath from it. What do you think of this idea?


