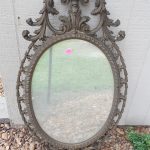
Mere mirror on the wall? I think not! Today I will show you how to refinish a vintage mirror properly. This ensures that it comes out without getting paint on the mirror or breaking the glass. It’s a quick, fun, and easy project.
WHERE TO FIND OLD MIRRORS
Old mirrors are readily found at flea markets, yard sales, and auctions. It seems like every housewife in the 1960s and 1970s decorated with large amounts of mirrors in the home. As these baby boomers downsize their homes, they sell off their treasures. The mirrors are among those items.
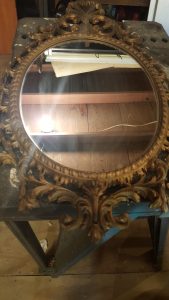
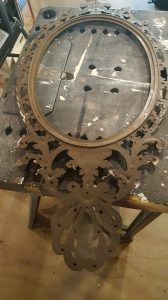
In my case, I was recently given access to an old barn that had been sitting empty for years. It was filled with little treasures…and a lot of it looked like junk. I saw the potential in the pretty frame and saved it from going into the dumpster. Despite the scratches in the plastic frame, the mirror itself has one little mark on it, but that just added to the vintage look. At least in my opinion.
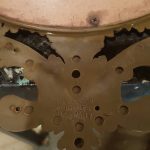
As I took it apart, I found the manufacturer’s information. It was stamped: Burwood Products Company on the back of the frame. The back of the mirror was stamped with the date Jan 15 73. It turns out, these pieces are collectible. However, with some humidity damage and scratches, I decided to paint it to my liking and keep it.
Here’s how to refinish a vintage wall mirror:
STEP ONE: DISASSEMBLE ALL YOUR PARTS
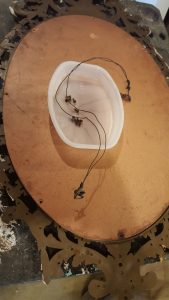
Disassemble all your parts, then put them someplace safe. You will need them to put your mirror back together! Take care to work gently so that you don’t crack the frame or the mirror.
If you’re not good at reassembling, use your cell phone and take photos as you go. This way you can refer to the photos to put everything back in place after your refinish.
STEP TWO: CLEAN IT UP!
I keep a spray bottle mixed with rubbing alcohol and water in my workshop. I clean everything with this before I paint. This removes fingerprints, dust, and oils. As a result, your paint will adhere better to the it. You will also get a smoother finish.
If something is particularly filthy, like this mirror was, it may take a little patience. I also used an old toothbrush to clean out all the scrollwork pieces using the same cleaning solution.
Please don’t skip this step, it’s essential to a good paint finish.
STEP THREE: PAINT AND SEAL
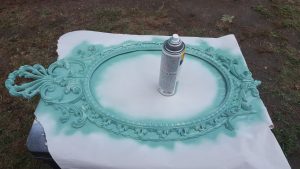
I chose Krylon ColorMaster Paint+Primer in Satin Jade for this piece. Because it was a plastic frame, I needed something that would grab to plastic. But this always does the job for me. It took two coats of careful spray painting, with attention given to the scrolled portions of the frame.
After it dried, I sealed it with Krylon ColorMaster Clear to make the finish more durable.
I let this dry overnight due to the fact that it was 98 degrees and high humidity on the day I picked to do this project!
STEP FOUR: REPLACE THE PARTS
After your frame is dried completely, put everything back together. You may then opt to put in new screws and hanging hardware. However, I used the original parts as they were still in good condition.
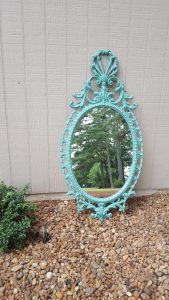
The next time that you see a mirror with a pretty shape but a worn out finish at a yard sale, remember this! It’s so very easy to refinish a mirror. So don’t pass up a gorgeous mirror over some minor cosmetic wear. With a little time, it’s very easy to refinish a vintage mirror.
Almost always, you’ll save money by restoring something old instead of investing in new.


