One of my favorite foods is meatball pizza sliders. I love both pizza and burgers, it’s often difficult to decide which one I’m hungry for. This quick and easy recipe can combine your love of pizza and burgers into one cheesy, flavorful, delicious dish. They solve the dilemma of pizza vs. burgers.
These sliders can be prepped ahead. Throw them on the grill, then add the toppings, and you have dinner on the table in a flash. They are great for entertaining. After all, what meat-eating American doesn’t like pizza? Or burgers? Plus, they add a fun and unexpected twist to your cookout!
RELATED POST: BBQ Pork Sliders From the Pressure Cooker
Sliders are one of my favorite foods to make and serve. Because they are small, they deliver big flavors with a lighter feeling. They grill up very quickly and allow you to entertain your guests without too much fuss. They really are just too cute!
The base of these sliders is 93%/7% ground beef, just like hamburgers. However, the main difference is the seasoning. Instead of traditional hamburger seasonings, I use Italian spices and seasonings…like meatball!
MEATBALL PIZZA SLIDERS:
Ingredients
for the burgers
- 1 pound of 93%/7% ground beef
- 1 tsp freshly minced garlic
- 1 tsp black pepper
- 2 tsp sweet basil
- 2 tsp oregano
- 1 tsp parsley
- 1 tsp onion powder
- 2 tbl steak sauce
- 3 shakes liquid smoke
for topping the burgers
- provolone cheese
- pizza sauce
- pepperoni
- sweet Hawaiian buns
Directions:
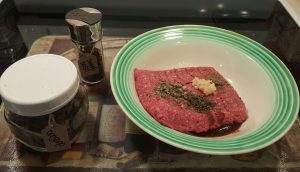
- Place all the “for the meat” ingredients into a bowl and mix. Because my herbs aren’t ready this season, I used oven-dried herbs which I preserved in the autumn. Form 8 equal portions. Take each portion and form into evenly sized sliders. I also like to make a small indent in the middle of the burger. It helps the burger hold it’s shape as it grills. Cover and refrigerate the patties until you’re ready to grill

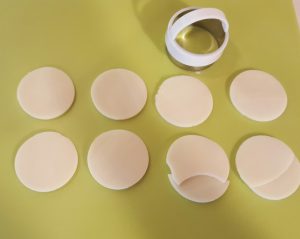
Season sliders with meatball flavors to enhance sliders. - I also prep the provolone cheese circles ahead of time. Use a small biscuit cutter to form a small circle of cheese. As you can see, I cobbled together a couple of pieces from the edges, it will all melt together anyways. Wrap up in a piece of waxed paper and store in the fridge until you’re ready to top the sliders.

Use a small biscuit cutter to form perfect provolone cheese circles to top to sliders. - Firstly, pre-heat your grill. Then grill each meatball pizza slider about four or five minutes on the first side. But resist the urge to smash down on the sliders. Otherwise, you’ll lose all the juice.
- Flip the sliders. Then add a tablespoon of pizza sauce, a couple pieces of pepperoni, and lastly a provolone cheese circle to the top of the slider. Continue to grill your sliders for about four minutes.

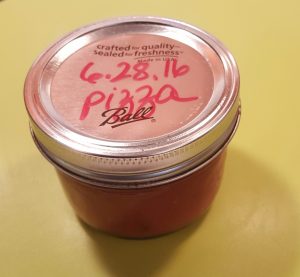
Because I can pizza sauce every summer, it’s a pantry staple I always have on hand. - While the cheese melts, I toss the Hawaiian rolls onto the grill to give it a little toasty crunch.
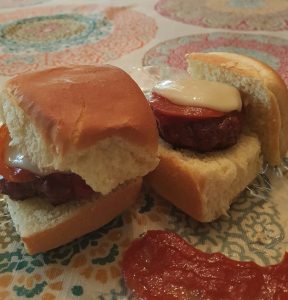
- Put it altogether, and add a dollop of pizza sauce on the side for dipping.

Meatball pizza sliders with sauce, pepperoni, and cheese.
And Serve!
Doesn’t this look delicious?
This really is a recipe that can please everybody in your crowd. Try this once, and I’m sure that you’ll agree! Please do email me to let me know how this recipe worked out for you.