You waited until the last minute and now it’s almost Mother’s Day.
But you can treat the Mom who loves to garden to a quick, easy, and customized present with this DIY garden sign. Because it’s quickly personalized, it will look like you had made it weeks ago. Even better, nothing about this looks like an OMG I forgot about Mother’s Day gift.
RELATED POST: Candle Making Step-by-Step: Mother’s Day Candle Gift Set
My husband gets the credit for the putting together of this particular sign. He loves woodworking. While I could have screwed the parts together, it’s something he enjoys. I give co-credit when it’s deserved (which is quite often). He constructed and lettered the sign. I sanded and painted. Teamwork and all that.
My husband found a secret honey-hole of scrap wood. A local manufacturer gets their raw materials in by train car. The material is sent on top of very rough 2″x2″ oak strips that serve as pallets. The manufacturer unloads the train cars, uses some of this oak, and burns the rest once weekly.
The manufacturer unloads the train cars, uses some of this oak, and burns the rest once weekly. Let’s just say that we are helping reduce their workload by taking some of this lovely oak off of their hands. It’s the same oak that he used to build the shelving on my potting bench. This oak is sturdy, strong, and has character.
While building my potting bench, my husband took the ends he lopped off of the oak and made me a garden sign that welcomes visitors to my garden. He lettered it, painted it Tiffany Blue and hung it for me to enjoy.
It was so pretty that I decided to make one for my mother as well.
I’m going to share the basic techniques, but not measurements. Why? Well, chances are great that you don’t happen to have a pile of oak pallet pieces lying around your yard. The technique is the same no matter what size scrap wood you happen to have on hand at your house.
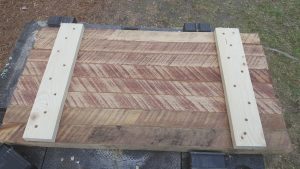
The hubby started by cutting two pieces of scrap wood the same length. They run vertically up the back and serve as the support. He then cut horizontal pieces of equal-ish length to screw into the vertical pieces from the back to form the front pieces.
We live in the Inner Banks Region of North Carolina. We like that casual, beachy feel so we kept them “almost” the same length to give them a soft beach feel. It was an intentional style choice…to each their own! I do love happen to love this beach-chic, imperfect look.
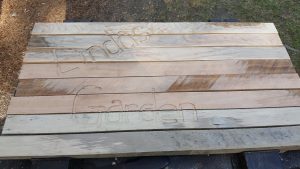
Next, I sanded the front. I left it somewhat rough because I was still trying to keep a beach shack look.
My husband used his Dremel tool to and traced penciled letters to add depth. You could skip this and hand paint on your letters. I, however, am not neat enough to do this.
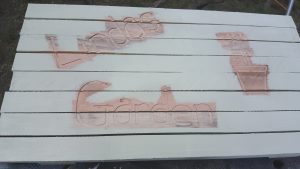
Next, I painted around the lettering. In this case, my local Sherwin-Williams store matched a color from Benjamin Moore called Guilford Green. It was perfect for the beach look I wanted.
Using a fine craft brush to fill in the areas that we carved out with the Dremel tool.
I finished up by painting in close to the letters with the Guilford Green with that same fine craft brush.
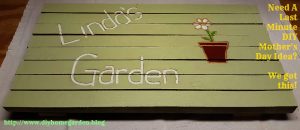
The green made me very nervous. My mother doesn’t like blue. In fact, she’s the only person I know who “hates blue.” Just a little quirk of hers. Let’s just say, I was relieved that the green color intensified as it dried. All was good! The addition of eyes on the back for hanging completed the project.
This really is a quick and fun project. From start to finish, this project took under 3 hours. While that is a little bit of time, it’s a highly look that looks that I know she will love.
On a final note, on my garden sign, we went back with the sander to scuff it up a little bit more in places, to make it look more weathered. But that’s just an option. This one, we decided, was just right for Mom.
