• Skip to main content
  • Skip to secondary menu
  • Skip to primary sidebar
  • Skip to footer
  • About Us
    • Meet Our Talented Team
    • Anti-hate Speech Policy
  • Terms Of Service
  • Free Printables
  • Advertising
  • Contact Us

DIY Home & Garden

A DIY & Gardening Resource

  • Home Page
  • DIY Projects
    • Upcycling
  • Home
    • Cleaning and Organizing
    • Holidays
      • Christmas
      • Valentine’s Day
      • Easter
      • Fourth of July
      • Halloween
      • Thanksgiving
      • Memorial Day
      • Mother’s Day
    • Home Safety
    • Home Decor
    • Pets
    • Real Estate
  • Gardening
  • Herbal and Natural Wellness
  • Recipes
    • Baking
    • Breakfast
    • Salads
    • Venison Recipes
    • Home Canning and Preserving
      • Canning
      • Dehydrating
      • Freezer Recipes
  • Travel
Home » Great Grilling! Transform Unused Lawn Space Into A Grill Zone For Your Yard

Great Grilling! Transform Unused Lawn Space Into A Grill Zone For Your Yard

07/21/2017 By Deborah T

Love us? Share us!

Great grilling at home is easy. That is, when you carve out a grill platform from grass or unused lawn space, you create attractive grill zone for your yard.

In fact, my husband and I look forward to grilling every Sunday afternoon. First, we take time to prep a lot of food. Then we cook it for lunch all week long. This is because we both have full-time jobs. So this helps us to stay on track with healthy-ish eating habits.

A SPECIAL PLACE FOR GRILLING

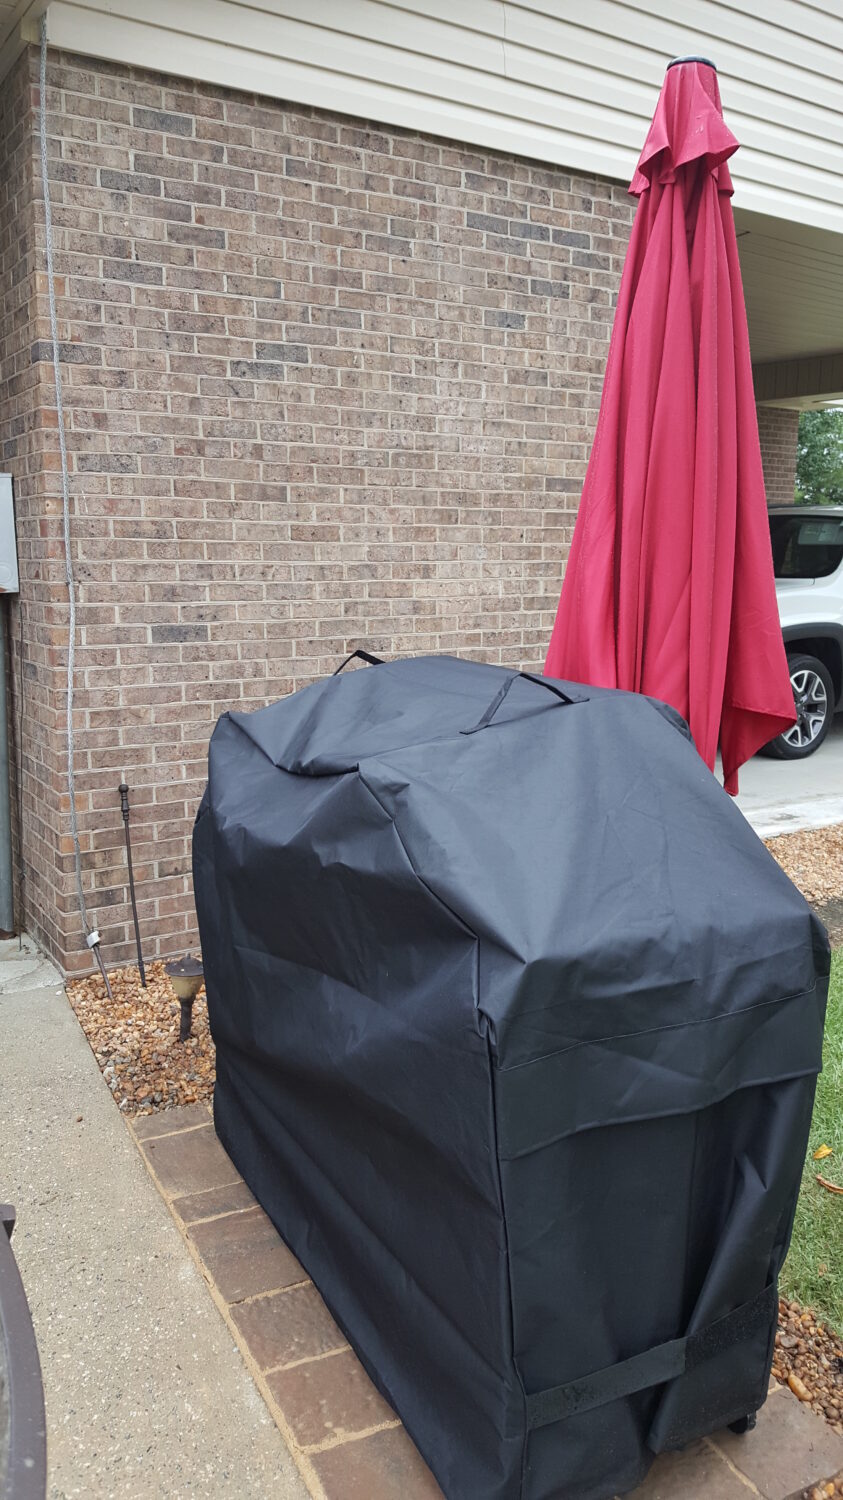
Sadly, our grill was under our carport. So we always had to move the car first, then roll it out. Then we can use it. After use, we cleaned it, then rolled it back under the carport. Then, we move the car back into place. Blah! Enough of that!

So it was time to create a special space for the grill. Firstly, I asked for a pergola. This was so I keep my red-headed self in the shade as I grilled. However, we compromised on a big colorful lawn umbrella. It was something we could roll up if needed. Or something we store away safely if we expect a hurricane.

This was about an hour’s job work. Moreover, it was something that we worked on together. We quickly got it done this past Sunday afternoon. Just in time for grilling!

grilling rules

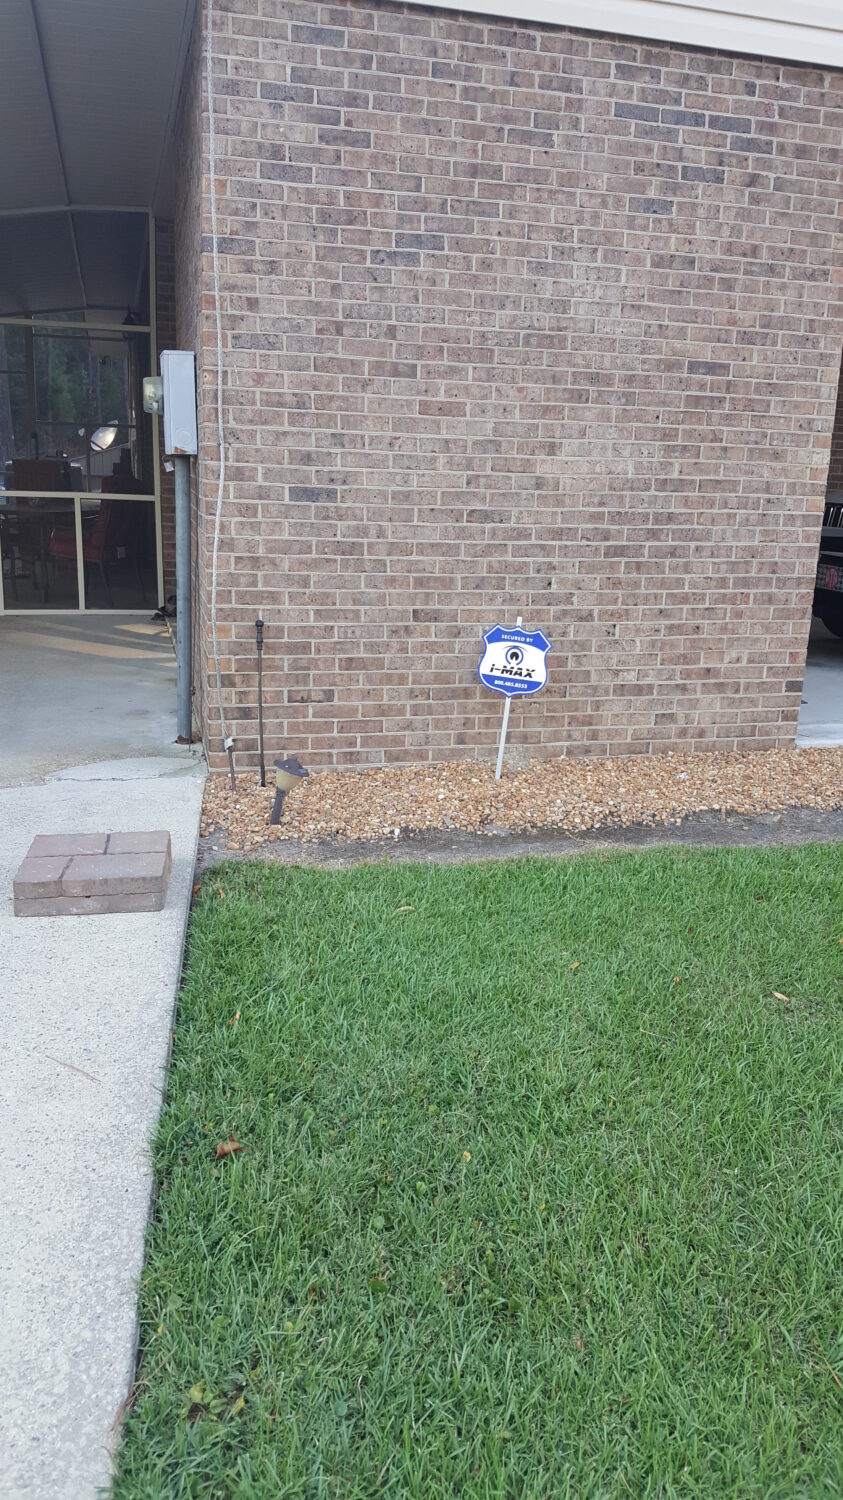
SELECT A SITE AND START DIGGING!

Select a level, relative rock-free spot in the grass as the site for your grill zone. Somewhere near your kitchen, if possible. Also, you want to consider a location somewhere near a seating area. This gives you easy access to the kitchen. So you can quickly move food in and out of the house. Also, you can entertain your guests. We have an excellent, shady carport next to the grill zone. We purchased a couple of clearance chairs that we plan to tuck into the screened porch when not in use by the grill.

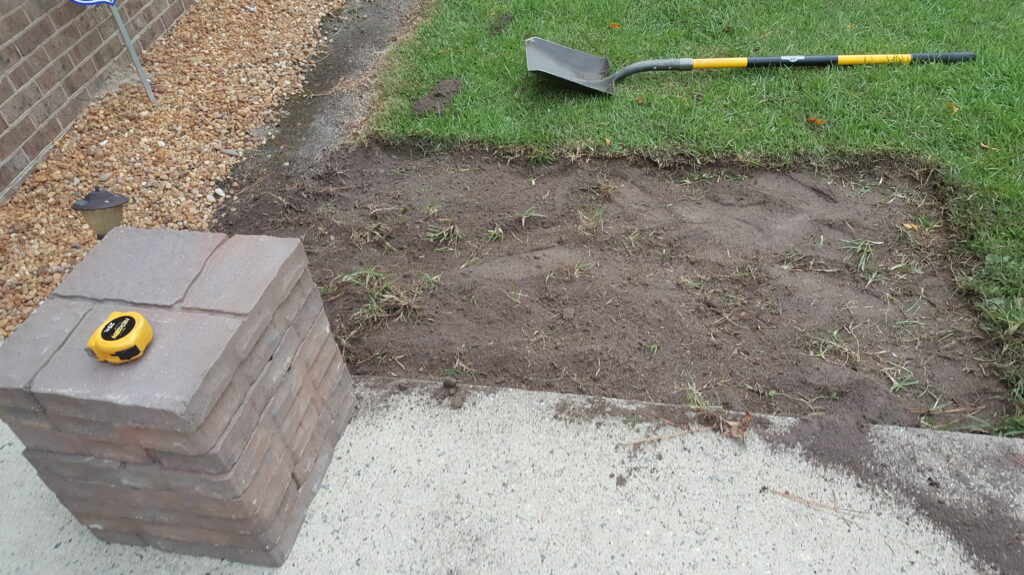
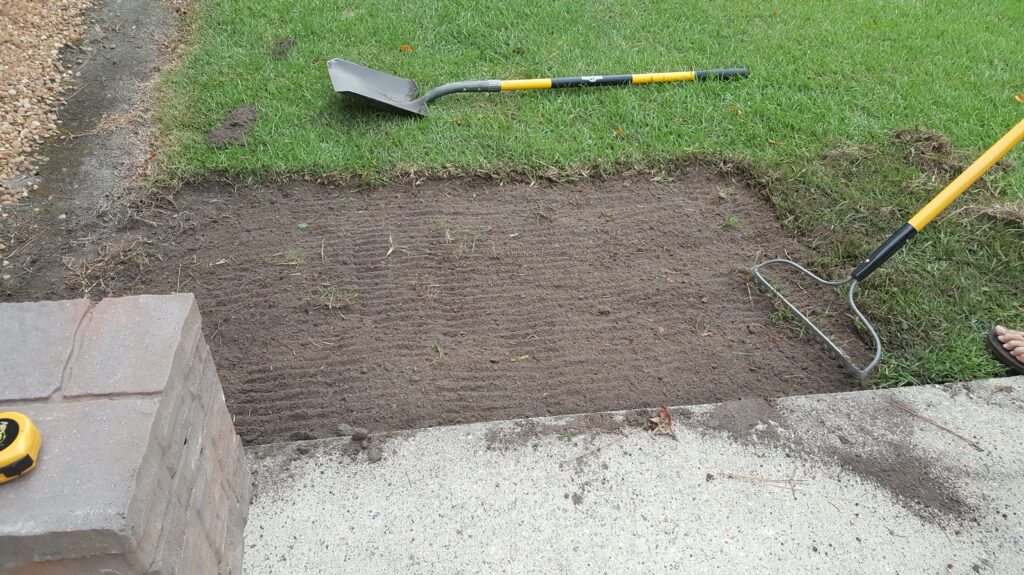
Measure your pavers and estimate the shape of your grilling area. Dig out and grass, weeds, rocks, and debris with a flat-bottomed shovel.  Use a rake to smooth out the area and get rid of all small debris. Just the tiniest rock can make your pavers uneven. This is very important because you want your grill to sit level.

Grilling Area with patio pavers
Of course, you need do select an area close to your home before digging up your grilling zone. This will make it easy to bring grilled foods in and out.
Grilling Area with patio pavers
Dig out the area so that your pavers will set level.
Grilling Area with patio pavers
Use a rake and get rid of any stones, grass roots, or debris.

ADD YOUR PATIO PAVERS:

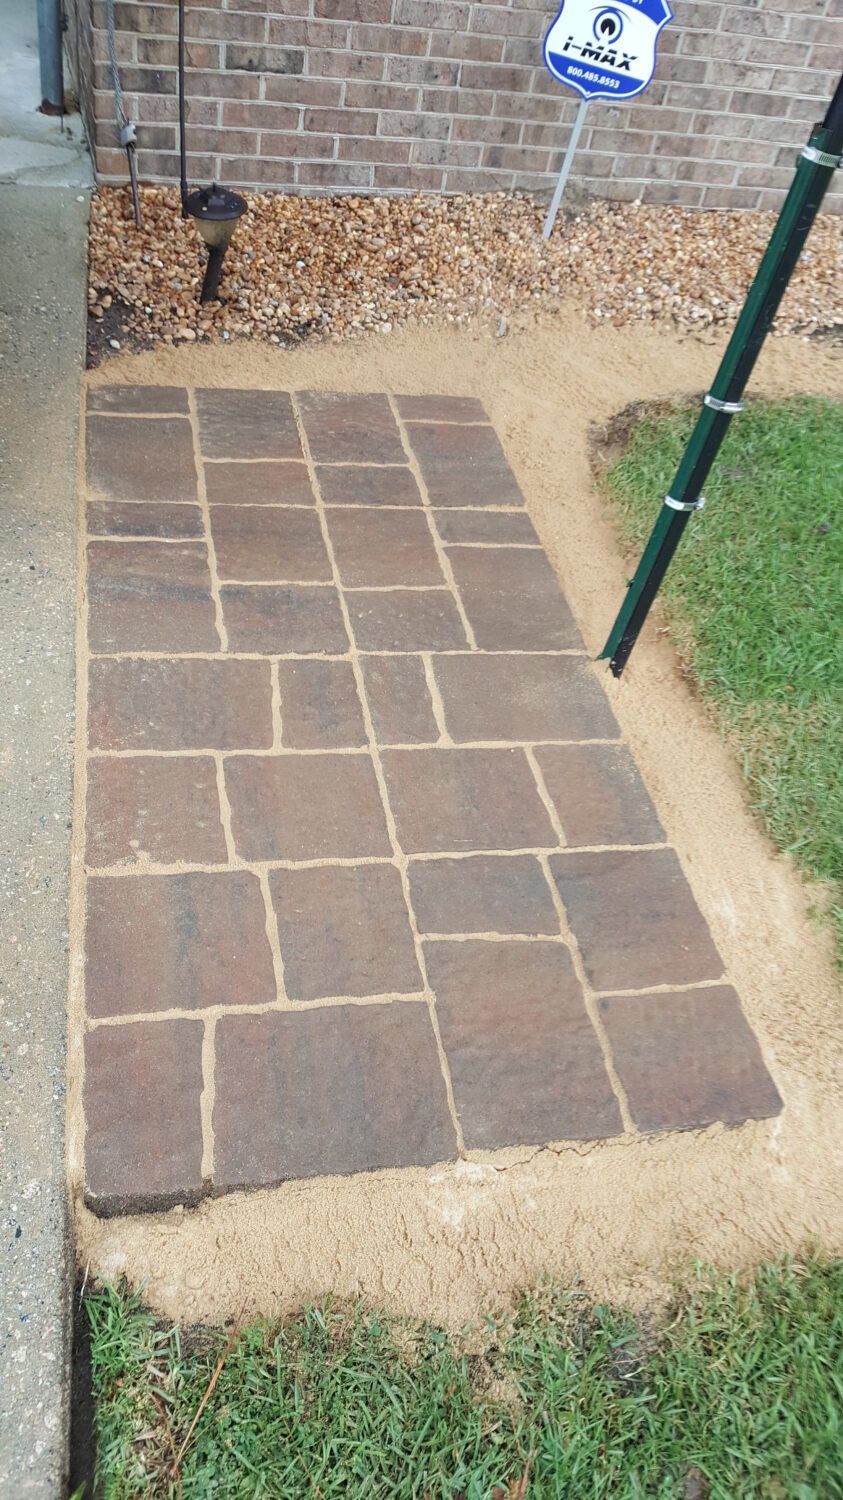
Add your patio pavers and leave a little bit of space between each one. You may need to play with the layout. For example, you may need to dig out a little more prominent space, then wiggle them in to fit correctly. Or you may stagger the patterns as we did.

Taking the time to “dry-fit” the pavers in your new grill zone will save you aggravation later. Make sure you like the arrangement of the blocks and that they sit level before you proceed.

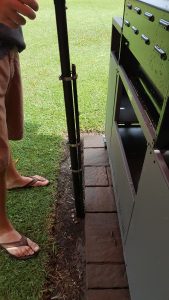
STAKE YOUR UMBRELLA INTO PLACE:

We set a metal fence stake into the ground securely. Then we added three clamps to hold our shade umbrella into place. Make sure you leave clearance to put up the umbrella, so it doesn’t hit the grill as it winds up. Also, make sure it’s high enough to not catch fire!

We did this before setting the sand. We thought it wouldn’t hurt to add a little sand around it for extra help keeping in place.

Of course, we plan for the unavoidable event of tropical storms or hurricanes. So we can pull this out of the metal clamps at a moment’s notice. We store all our patio furniture in the barn before hurricanes. So this will go with those other items.

As we use our new space, I will update if we decide to squash this umbrella idea.

grill zone with patio pavers
A fence post is set deep into the ground. Metal clamps hold the post of the umbrella into place.

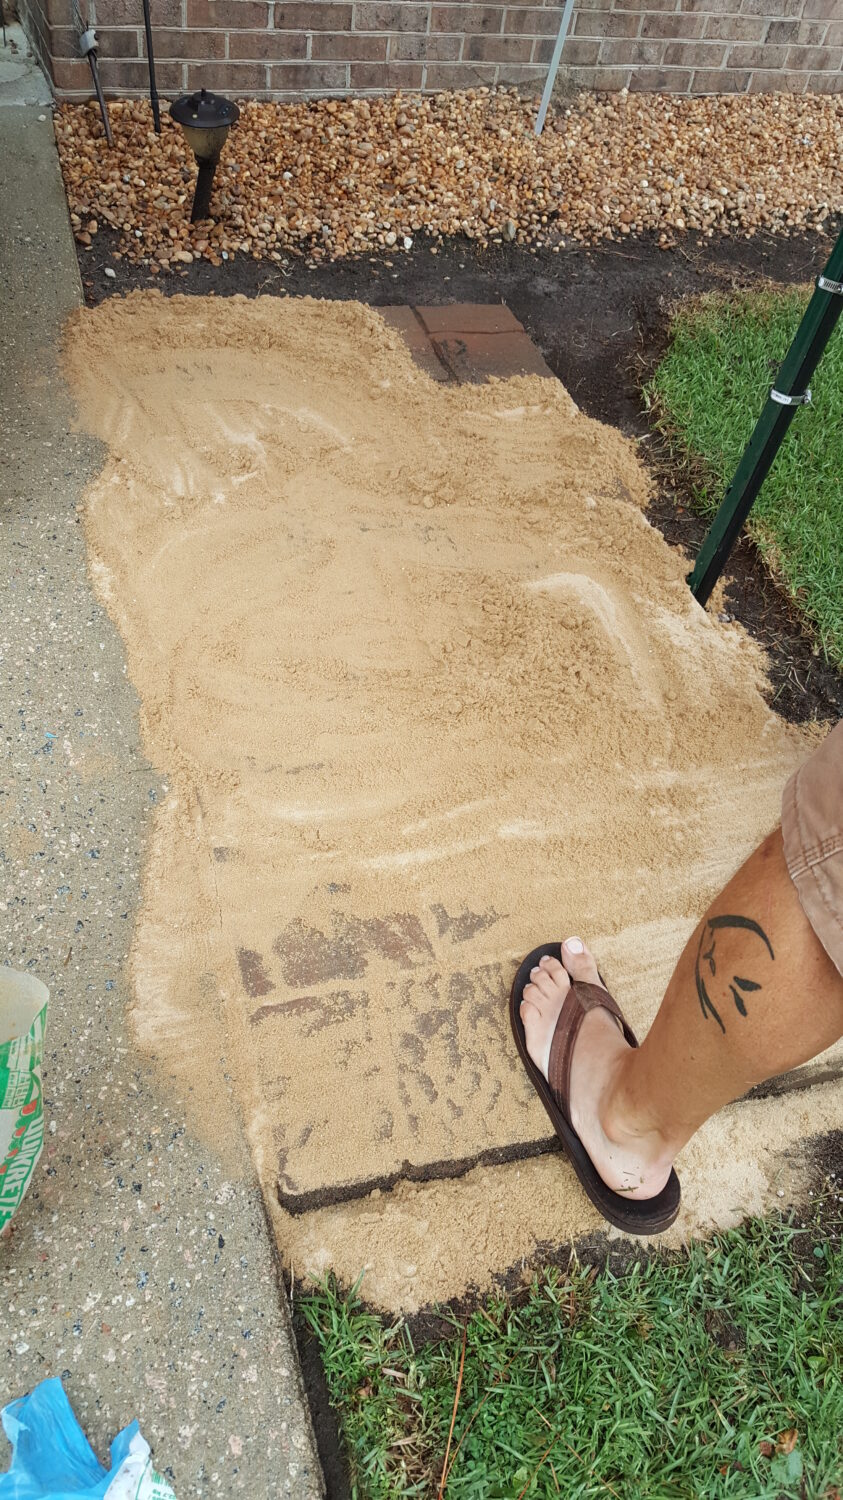
SET THEM IN WITH SAND:

Firstly, dump a large amount of sand onto your pavers. You will need more than you think! Then grab an old broom and work the sand into the space between the patio pavers.

Fill every space as tightly as you can. Here’s a really short video of my hubby sweeping the sand. This demonstrates how he works one little section at a time.

grill zone with patio pavers
Add a large amount of play sand over the pavers. Start working the sand into the spaces between the pavers. Don’t leave any nook or cranny unfilled.
grill zone with patio pavers
This is what our pavers looked like after working all the sand into the pavers.

Does anyone ever notice that I’m always holding the camera while he does all the work? Lol.

ADD EDGING MATERIAL

Adding some kind of edging material will make your grilling patio look more finished. So we chose to use river rocks to make it easy to cut grass. Then we can ride the mower with the tire on the rocks. This is better than trimming with the weed eater every week. This is especially important if you have a large yard. Who wants more grass to edge? Not me!

grill zone with patio pavers
We added river rocks around the perimeter to make it easier for grass cutting.

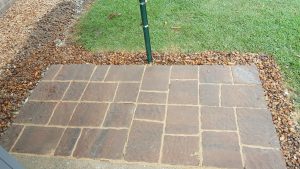
THE GRILLING ZONE – AFTER:

grill zone with patio pavers
The grill is closed after use. Naturally, we can store away the umbrella during storms or in the winter.
grill zone with patio pavers
The grill is open! Where’s the beef?

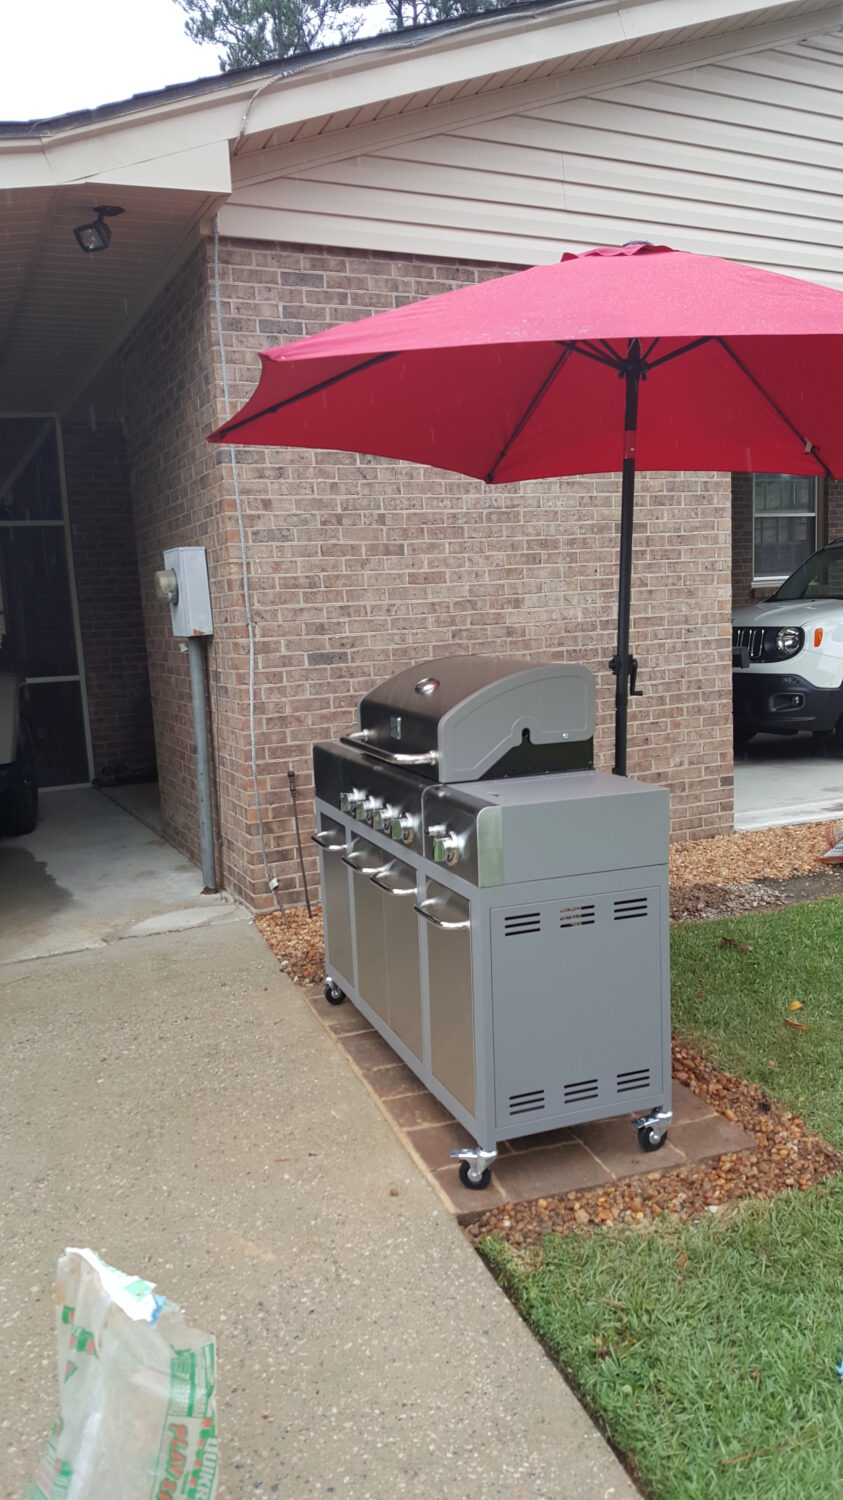
We finished this project fairly quick. Moreover, we were able to complete it despite some rain showers. By the time we were done with the grilling zone, the skies had cleared. And yes. We did throw a couple of steaks on the grill as a reward for our hard work!

As always, please comment with your feedback! We love hearing from you.

Have a happy DIY day!

  • Author
  • Recent Posts
Deborah T
Deborah T
Editor and author at DIY Home & Garden, a Word Innovations publication
Deborah Tayloe is a full-time blogger, children's book author, and freelance writer, contributing to large publications.

She has a B.S.Ed. in Secondary Education/English and a Spanish Minor. In addition, she holds a Certificate in Natural Health from a fully-accredited program and is a Certified Herbologist. She pursued these natural wellness certifications due to her love for herb gardening.

Despite freelancing to make a living, her love is "all things home."

Deborah grew up in a family that grew a large vegetable garden and a fruit orchard, helping her parents pull weeds and can home-grown foods as part of her childhood. In fact, she had no idea that she could purchase veggies and fruits in pre-packed steel cans until she went to college and made a food run.

Today, she lives in Bertie County, North Carolina, an agricultural rural area with more chickens than people. She lives with her husband and two rescue pets a sweet toy fox terrier and a cat who showed up one day and moved into the house. Together, they enjoy DIY projects, furniture refinishing, gardening, and canning.
Deborah T
Latest posts by Deborah T (see all)
  • The Explosive Truth of PYREX vs. pyrex - 08/15/2023
  • Viola, Violet, and Pansy: Close Relatives But Distinct Flowers - 08/11/2023
  • Purple D’Oro Daylily: A Regal Touch of Elegance - 08/10/2023
Tweet

Filed Under: DIY Projects Tagged With: diy patio, diy patio pavers, grill patio, grill zone, grilling zone, patio pavers

About Deborah T

Deborah Tayloe is a full-time blogger, children's book author, and freelance writer, contributing to large publications.

She has a B.S.Ed. in Secondary Education/English and a Spanish Minor. In addition, she holds a Certificate in Natural Health from a fully-accredited program and is a Certified Herbologist. She pursued these natural wellness certifications due to her love for herb gardening.

Despite freelancing to make a living, her love is "all things home."

Deborah grew up in a family that grew a large vegetable garden and a fruit orchard, helping her parents pull weeds and can home-grown foods as part of her childhood. In fact, she had no idea that she could purchase veggies and fruits in pre-packed steel cans until she went to college and made a food run.

Today, she lives in Bertie County, North Carolina, an agricultural rural area with more chickens than people. She lives with her husband and two rescue pets a sweet toy fox terrier and a cat who showed up one day and moved into the house. Together, they enjoy DIY projects, furniture refinishing, gardening, and canning.

Primary Sidebar

Click for details on our latest travel deal

book vip cancun travel

Here’s Why You Should Plant Sunflowers in the Garden:

https://youtu.be/ZwvPDTbs9U0

You Won’t Even Notice You Tossed These Cluttery Things:

https://youtu.be/z16ZRMC4wbE

Don’t Suffer, Try This Bath to Soothe Itchy Skin:

https://youtu.be/SUxl9UL7QDw

Footer

Amazon Affiliate Disclaimer

DIY Home & Garden is a participant in the Amazon Services LLC Associates Program, an affiliate advertising program designed to provide a means for sites to earn advertising fees by advertising and linking to amazon.com. As an Amazon Associate I earn from qualifying purchases.

DIY Home & Garden does not constitute or intend to provide medical, health, financial, legal, or other professional advice. This website is for entertainment purposes only.

Quick Links

  • Home
  • About Us
  • Terms Of Service
  • Contact Us

Copyright © 2023 · DIY Home & Garden

We are using cookies to give you the best experience on our website.

You can find out more about which cookies we are using or switch them off in .

DIY Home & Garden
Powered by  GDPR Cookie Compliance
Privacy Overview

This website uses cookies so that we can provide you with the best user experience possible. Cookie information is stored in your browser and performs functions such as recognising you when you return to our website and helping our team to understand which sections of the website you find most interesting and useful.

Strictly Necessary Cookies

Strictly Necessary Cookie should be enabled at all times so that we can save your preferences for cookie settings.

If you disable this cookie, we will not be able to save your preferences. This means that every time you visit this website you will need to enable or disable cookies again.