Ever wonder how to make candles at home? Candle making is easier than you might think. Take a look at these adorable soy candles–you’ll have plenty of time to make them before Mother’s Day.
Everyone wants to spoil their Mum on Mother’s Day, so why not take your time and create a unique gift she will love. Cosy Owl has made this easy to follow, a step-by-step guide so you can present a wonderful handmade candle gift set for your mother this Mother’s Day. This guide includes everything you need to make the gift set and you can add anything you like to personalize it further.
RELATED POST: Upcycle a Used Jar Candle Into Two Items
Candle Making Supplies
- 650g of either Kerawax 4105or Kerasoy 4130
- 100g of either Kerawax 4600or Kerasoy 4120
- Heart shaped silicone mold
- 3g of 39/4327 Pink Dye
- 3g of 35/4141 Light Rose Pink Dye
- 100ML bottle of a Fragrance Oil of your choice
- 4 TCR 27/16 Wick
- 4 Glue Dots
- 4 20CL Karen Round
- (optional extra Silver Lid for the 20CL Karen Round)
- 10 Porex Natural Reeds
- Penny Diffuser Bottle
- Silver Metal Shelled Diffuser Cap
- 50ml Diffusol Base Oil
How to Make Candles at Home: Step by step
Step 1
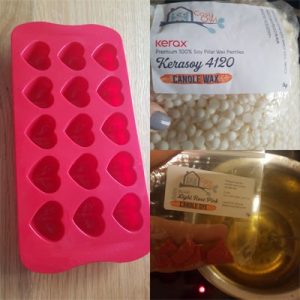
Making the melts; pour 50g of Pillar wax into your melt pot, (we use our Bain Marie) making sure the temperature of the wax doesn’t exceed 70-75°C. Once the wax has melted, add either a pinch of the Pink or the Light Rose Pink Dye and gently stir until the dye is evenly distributed throughout the wax.
Step 2
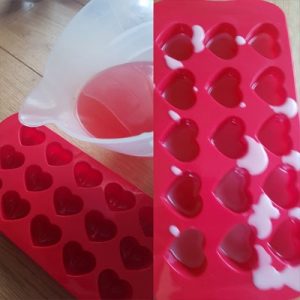
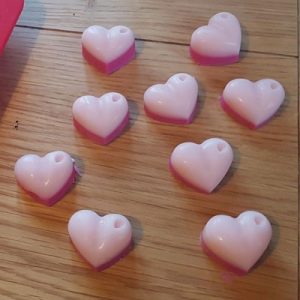
If you are choosing to add fragrance oil you would do so at this point. Add around 5ml of your selected fragrance oil below the flash point temperature for that scent. Cool the wax to around 55-60°C, transfer into your pourer and pour slowly into the molds only filling a third to a half of the way up the mold.
Step 3
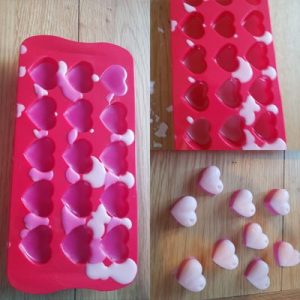
Repeat steps 1 and 2 for your second color on the heart melts, ensuring the first layer has cooled before pouring the second one. Leave these to one side to cool as you will need them later.
Step 4
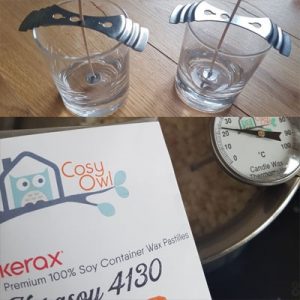
Melting the wax for your candles; put all of the container wax into the burner and melt to approximately 70°C. Whilst this is melting, continue with Step 5.
Step 5
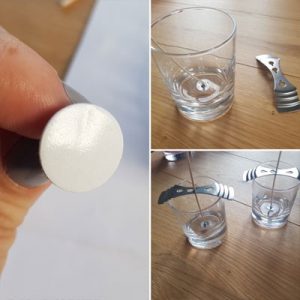
Preparing your container; use the glue dots to hold down the sustainer into the glass in a central location. Use the Wick Holder to keep this in place during the pour and whilst the candle is setting.
Step 6
Once the wax has melted, and the temperature has been reduced add approximately 30ml of fragrance to the wax (please be aware of the fragrance oil flash point). Stir gently and then transfer 2/3 of the molten wax into your pourer. Evenly pour this wax into your four prepared containers 2/3 of the way up. Leave to cool.

Step 7
While the wax is cooling, remove the hearts from their mold and set to one side whilst the wax is hardening. In the meantime keep the remaining wax heated at a consistent temperature approx. 60°C and gather together the items for making your reed diffuser.
Step 8
Pour the 50ml of Diffusol Oil into the Penny Diffuser Bottle, and add 30-40ml of your chosen Fragrance Oil. Screw the cap on top of the bottle and add the reeds, it really is that easy!
Step 9
Now the candles have cooled, place the heart melts on top of the candle in any layout that you prefer, we stuck to two melts per candle. Once you are happy with the placement to pour the remaining wax into the candles (make sure it’s not over the top of the melts) submerging the base of the hearts into the molten wax, but leaving the top layer of the melts still visible above the wax.
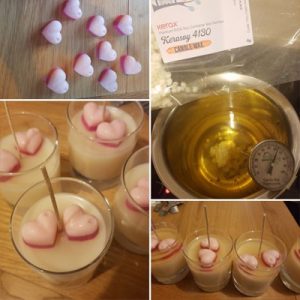
Leave the candles to cool for a minimum of 24 hours before lighting or gifting. Once everything is done why not put it all together in a hamper; you can also include our 3-Wick Mother’s Day Candle.


Comments are closed.