Oven dehydrated herbs are the quickest and easiest way I have found to preserve my herbs. In a short time, you can have your herbs preserved for the winter.
I used to use an electric dehydrator to preserve my herbs. However, I had to take up valuable storage space to only pull it off the shelves once or twice a year. Here in the south, most of us don’t have basements. In fact, I am very lucky to have a small storage room just off the kitchen. Most homes don’t have this. However, I found the dehydrator to be bulky and took up space.
Also, it took a lot of time to use the electric dehydrator. Mine did not have a fan. Therefore, I had to rotate the trays about every hour. Blah.
Finally, the dehydrator overheated, melted the plastic trays, and almost caught on fire last August. I decided not to replace this and to experiment with oven dehydration instead.
RELATED POST: Oven Dehydrate Jalapenos: An Easy Way to Preserve
I have found oven dehydration to be quick and easy. On top of that, I have reclaimed a shelf in my tiny storage room!
Today, I took photos of my oven dehydrated sweet basil and oregano. I have found the same method to work with all the herbs I have tried. The main difference is watching the times in the oven. Larger, leafier herbs take about 30-40 minutes. Smaller leaf herbs take 20-30.
How to Dehydrate Herbs
First, I pre-heated my oven to 175 degrees.
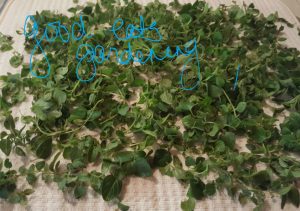
Then I washed and picked through my herbs. I picked out any leaves with visible bug damage. I also laid them in a single layer onto a clean dish drying mat. This absorbs any excess moisture so they will dry out more evenly.
You can see below my oregano spread out on the dish mat.
Next, I arranged my herbs on a cookie sheet in a single layer. Don’t double up or the bottom herbs will burn before the top ones dehydrate. I learned this by doing this. Just trust me…
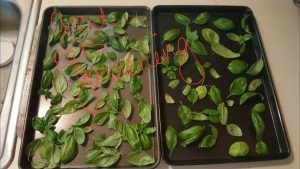
Place your herbs in your now pre-heated oven. Leave the oven door opened as shown below. This allows the moisture to escape. Otherwise, you will just end up with herb stew.

After 20 minutes, start checking your herbs every 10 minutes. When they are completely dehydrated, they will have shrunk to a fraction of their original size:

I next simply took the herbs (basil in this photo) and crushed them by hand to desired texture. I wanted mine to be able to shake out of a container. In the photo below you can see some are crumbled up and some are still whole pieces. Just crumble the pieces until they are how you want them.

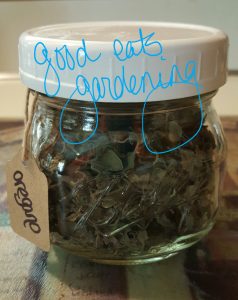
In my case, I ended up with this in about 90 minutes. Sweet basil that was finely hand crushed into a shaker jar.
Also, oregano which was left a little bigger that I can “pinch” into sauces and atop pizzas.

Remember to check your herbs throughout the process, keep the temperature nice and low, and save money on your winter grocery bills by making oven dehydrated herbs while they’re in season.