I recently drove past a yard sale that was ending and stopped, only to find a yard sale leftover piece that I thought could be easily turned into a charming “welcome” chair for my foyer. It had a $2 price tag on it. An affordable DIY project can usually be found easily at a yard sale.
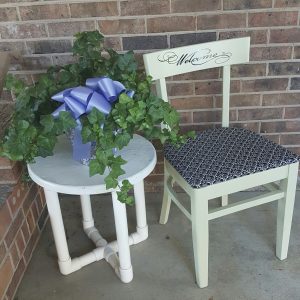
I use this chair to decorate an empty spot near my backdoor. Its welcoming, cheerful message offers up hospitality. But it also gives me a place to change shoes or for the UPS driver to leave packages–off the ground and out of the dust.
YARD SALE LEFTOVER CHAIR
This chair was drab and ugly. I spotted it as soon as a pulled up to a yard sale. On the other hand, it was very sturdy and had nice clean lines. I had been looking for a simple but inexpensive chair to put next to my back door. It’s outside but under a carport and the area stays dry. I wanted a place to sit down and change my muddy shoes when I come in from the garden and I knew this could work for me.
So I reached in my pocket only to remember that I had left my cash at home on the end table. I promised that I’d make a quick run to a nearby ATM and come right back to pay the man. He asked me how much money I did have on hand. When I responded “fifty-three cents,” the man said he’d take it. Apparently, he was hot and tired and just didn’t feel like hauling the larger items back to his shed.
I packed up my .53 chair and started my drive home. As I drove home, my head filled up with plans. I knew I had paint on hand. Also, I had just picked up a remnant yard of fabric for just $1 at the fabric shop. I wanted to make this chair very special. Moreover, I was getting away with it for CHEAP!
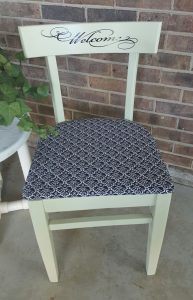
When I finished painting and re-covering the seat, it was still missing a little something special. I decided to have the word “Welcome” across the back. I had wanted a “Welcome Chair” for some time but hadn’t found a chair with a simple, unadorned back like this one.
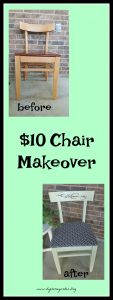
This was what the chair looked like when I purchased it.
Here’s how I achieved this project.
SANDING:
I started by sanding the chair until all shiny, stained areas were removed. I used 120 grit sandpaper. It took two passes with the sander to get the old stain removed. To get in the narrow areas, I used the sanding wheel on my Dremel tool.
PAINTING:
I applied two coats of Sherwin Williams paint. It was indoor paint, but I will have this in a well-covered area of my carport. If it fades, I can just re-do it again. I used a shade called Guilford Green. It’s a Benjamin Moore paint color which I had mixed in my favorite Sherwin Williams formula.
RECOVERING THE SEAT OF THE CHAIR:
As the paint was drying, I started recovering the seat. I used a cute clearance piece of remnant fabric that I bought for $1. However, it only took half the yard. Perhaps I have enough left to make a pillow for the chair.
For more details on how to refinish a seat cushion, click here.
REATTACHING THE SEAT TO THE CHAIR:
I realized that I had covered the screw hole with fabric. A couple clicks of the scissors and I was able to reattach the seat.
LETTERING THE BACK:
I have done some personalizing on wood before, but I wanted this chair to be perfect. After all, it was sitting at my kitchen door greeting my visitors.
I took it to my friend who is a genius with vinyl lettering. I was able to pick out the exact script I wanted and the vinyl color. Most of all, they have done other monogramming and personalizing for me in the past. I was confident that the vinyl would be crisp-looking and flawless. Of course, if you have a vinyl cutting machine, you can tackle this task yourself.
Finally, this is the outcome of this project. In my opinion, it’s a charming way to greet my friends and family and add a little color to my back door area. It’s a great little extra chair to keep handy.


Here’s how the math broke down on my chair makeover for under $10
- Chair: .53
- Fabric 1.00
- Vinyl Lettering 8.00
My grand total was $9.53. I didn’t count the paint because I have many partial gallons on hand that I’m trying to use up. Therefore, I didn’t spend anything out of pocket.
I hope you liked seeing the before and after on this project. Please take a moment to follow us so that you’re alerted to new posts the moment they are published.
Have a happy DIY day!


