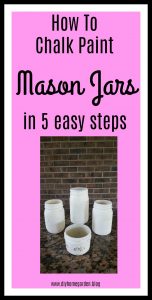
This how-to guide will show you just how simple it is to chalk paint a mason jar. Mason jars are so useful! Firstly, they are cute. Secondly, hold stuff. Lastly, they can be used to display things. I am wild about them. Chalk painting a mason jar was the natural solution for me when I decided to look for a new pen organizer for my desk.
RELATED POST: Chalk Painting With Antique Wax: An Old Shelf Makeover
Instead of purchasing a generic black or gray pen holder, I wanted to add some cuteness. And ya’ll know I didn’t just do one! Nope. Not me. In fact, I did four jars. Then, I did a short half-pint to hold paper clips and a pint jar for scissors, pens, and ruler. Actually, I did the two extra because I just felt like painting. I’m sure to find someone to give them to as a gift.
Chalk paint is easy. It takes little to no surface prep. There’s no sanding or priming. It works on a lot of things. For instance, glass, metal, or wood. I know one DIY blogger who has used it on laminate furniture… But I haven’t tried that yet so I can’t speak to it.
Anyways, here is your easy step by step guide on how to chalk paint a mason jar in 5 easy steps.
MATERIALS LIST FOR CHALK PAINTED MASON JARS
Here is a list of the supplies you will need handy before you start painting. Note: I am an Amazon Affiliate. Should you decide to make a purchase through one of my links, I receive a small commission (no cost to you!). These fees keep our blog running, so your purchases are definitely appreciated!
- Mason jars
- Isopropyl alcohol
- Plastic spray bottle
- Chalk paint
- Paintbrushes designed specifically for chalk painting (see the image below)
- Sandpaper (for distressing the finish)
- Chalk paint wax to seal the finish
STEP ONE – WIPE DOWN THE PIECE YOU ARE CHALK PAINTING:
Firstly, give your surface a quick wipe down. I have a little spray bottle that holds isopropyl alcohol and spritzed the surface. Then I gave it a quick wipe with a paper towel. This removes any dust, debris, or oils that could mess up your paint job.
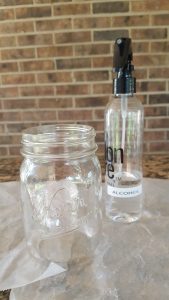
In addition to prepping the mason jar, I sat sheets of waxed paper down to protect my workspace. I prefer waxed paper over the newspaper. This is because if any paint “sticks”, the mason jar will still lift off easily. On the other hand, newspapers stick and could leave bits of paper.
STEP TWO – APPLY TWO COATS OF CHALK PAINT:
Next, take your brush and load the bristles with your chalk paint. Then, work in a swirl motion around the mason jar, from top to bottom. Don’t forget to paint the rim at the top, if do you want it painted.
I let each jar’s first coat dry as I painted the other pieces. By the time I finished painting the fourth jar, the first one was ready for the second coat of paint. Technically, the directions on my jar of paint said to wait two hours between coats. But I ignored it. This was because I was painting on my patio, in 90-degree heat. Also, the ceiling fan was blowing and it dried really quickly. So use your judgment.
After the second coat is completely dry, decide if you want a third. A third coat will give you a solid opaque finish. I liked seeing the little brushstrokes and imperfections so stopped at two coats.
Once your rim and sides are dried, you can flip the jar upside down and paint the bottom if you wish.
Let the project dry overnight.
STEP THREE – DISTRESS THE MASON JAR:
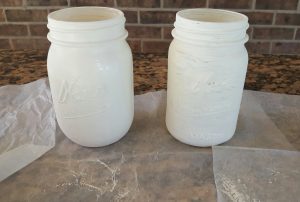
If you want to distress the paint, this is the time to do so. I distressed one jar to show you. Take a fine grit piece of sandpaper, then gently stroke it horizontally across the jar. Do this at a random, no set pattern for a more naturally distressed look.
However, I liked the solid look better so I left the other three alone. That is, of course, your choice. Whichever way you prefer is just fine!
STEP FOUR – APPLY THE CHALK PAINT WAX
Apply your chalk paint wax after your paint has dried overnight. You can use the chalk paint wax brush that you purchase or apply it with a lint-free soft cloth.
This, I did let dry for about 4 hours. Again, the manufacturer said to let it dry overnight. But I felt like it was fine, so I moved on to step five.
STEP FIVE – BUFF THE WAX
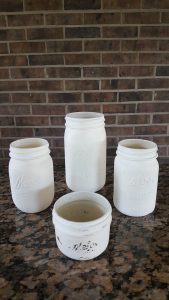
Lastly, use a soft cloth to buff out your wax. Waxes come in a clear, white, or dark. The dark gives a nice, antiqued look. The white adds glorious highlights. The clear keeps the paint natural looking. For this project, I chose the clear wax.
Don’t skip the waxing and buffing steps. This is important because of three things: they seal in your color, make the paint durable, and keep your project looking beautiful.
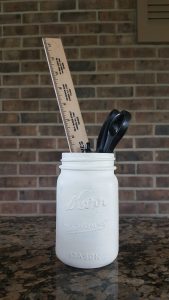
The Bottom Line on Trying to Chalk Paint Mason Jars
Once you master the chalk painting technique for mason jars, you have a whole world of decorating opened up to you. These projects can be used to hold floral arrangements, battery-operated candles (the light shines through distress marks beautifully), desk supplies, or about anything you can think of!
You can tie twine or raffia around the rim to make it even cuter. You can also tie a colorful bow around it to present it as a gift. The possibilities are endless!
It’s fun and easy. Give it a try!
Please share photos of your mason jar projects with me on Facebook @diyhomegardenblog.
Have a happy DIY day!
