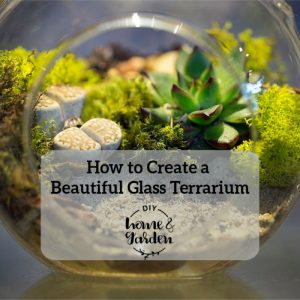
Ever considered planting a terrarium?
Even if you don’t have enough room to grow a garden, you can still enjoy the beauty of plants inside your home. A terrarium is the perfect option for someone who wants a low-hassle, easy to maintain garden.
Unlike a traditional garden, terrariums are self-contained. Building a glass terrarium is easy and something you can do with very little time and effort.
Find a Glass Container
You need a spacious glass container to act as the holding vessel for your terrarium. The larger it is, the more plants you can grow inside. However, consider where you plan on displaying your terrarium and how much space is available. Glass vases or jars are great options.
Gather the Materials
It doesn’t take much to build a terrarium, but make sure you have everything you need in advance. That way, you won’t need to go to the store during the middle of your project. The basic materials you’ll need are potting soil, pebbles or rocks, activated charcoal, and plants. You can even add seashells or small branches if you like.
Pick Your Plants
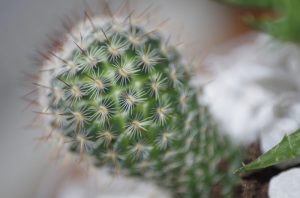
You can choose to make a forest terrarium or a succulent one. Pick your plants accordingly. If you want to recreate the forest, pick out moss, ferns, or small house plants. Any type of small succulent, like most types of cacti, are perfect for a succulent terrarium.
Put It Together
Building a terrarium involves many layers. Begin by adding pebbles to the bottom of your container. You only need a thin layer. The purpose of the pebbles is to drain excess water.
Once the pebbles are in place, add a layer of activated charcoal. This is to prevent bacterial growth. A layer of potting soil goes on top of the charcoal. This layer should be about 5-8 centimetres thick. (That is 2-3″ of soil for American readers!)
The final layer is the plants. It’s a good idea to place the largest plant first. Prune the roots and push it into the potting soil layer. Finish adding plants until you like the final look.
Make It Your Own
Although your terrarium probably looks perfect at this point, you can still add a few more decorations to give it a little more personality. Place branches, shells, or even small garden trinkets around your plants. Arrange them in any way you see fit.
Take Care of It
Even though your terrarium needs very little care, there are still a few things you should do to make sure it thrives for a long time. First, it needs enough sunlight. Place your completed terrarium in a sunny area, such as by a window. It needs plenty of bright, yet indirect light.
The base of the terrarium should be watered every two weeks. Don’t oversaturate the soil. A small misting of water should be enough to keep the soil from drying out.
With the right amount of care, you can expect your terrarium to last for a very long time. Some terrariums have even lived for more than 40 years!
Even if you don’t have a private garden, you can still enjoy nature with your own personal glass terrarium. For advice on terrarium design care and alternative back gardens ideas, chat with a local tradesman.