Want to try your hands at starting seeds inside?
It’s a low rung on the ladder to self-sufficiency. Growing your plants, feeding on fresh, nutritious vegetables and fruits, saving money, and trying out the different varieties of crops…
…It’s all a home gardener would long for.
Though the entire seed-starting process may seem quite overwhelming, especially if you’re a beginner, your motivation should be anchored on the benefits—which outweigh the challenges.
Benefits of starting seeds indoors
- You have total control over your plants—from how you grow them from seeds to maturity.
- Offers variety. Buying transplants is easier and more convenient, but you’re limited to growing only the types of fruits and vegetables you can find. However, starting your seeds offers you a wide variety to choose from.
- It’s a great way to tap on the few weeks of growing time before the threat of frost sets in. This is especially if you hail from regions with colder climates. As you know, such regions have shorter growing seasons.
- Starting seeds indoors in warmer regions allows you the advantage of an extra round of cool-weather crops before the scorching summer heat.
- It’s cheaper, especially if you plan to grow numerous plants.
Though relatively inexpensive, indoor seed-starting does require some tools and equipment to get started—most of which are readily available.
What you need to start your seeds indoors
Here are the supplies to gather before you start.
1. Seed-starting mix
This is the soil-less medium used to germinate seeds.
It’s made of vermiculite, peat moss, perlite, and coir, depending on the manufacturer.
Lightweight, good drainage, and zero-disease surprises are some of the advantages seed-starting mix has over the normal potting soil—making it the most preferred choice for seed germination.
You can buy or make some for yourself.
Here is a basic recipe to help you make your seed-starting mix:
Ingredients
- 1 part perlite (add more if starting cactus seeds or succulent plants that require faster draining soil).
- 1 part vermiculite
- 4 parts compost
- 2 parts peat moss
Break up any clumps in your compost to ensure an even texture. This helps encourage healthy root development of your seedlings.
Use a hose nozzle (on a mister setting) or a spray bottle to slightly wet the ingredients and make the mixing process easier.
You can use a garden cart or wheelbarrow to do the mixing.
Coconut fiber, an alternative
Note: You can always use coconut fiber—also known as coir—if you aren’t a peat moss fan.
In that case, use:
- 2 parts coir
- 2 parts compost
- 1 part perlite
- Soak the coir in water before use.
Use a garden cart or wheelbarrow to mix all the ingredients.
2. Seeds
You can buy seeds from your local store or online, use those gifted to you, or those you saved from the previous year.
To confirm viability, simply moisten a paper towel, sprinkle a few seeds over it, fold the towel in quarters—fold in half, fold the half into another half, and form two parallel halves.
Put the towel into a plastic baggie, then place it somewhere warm. A windowsill inside your house will do.
The seeds should begin germinating in about 7-10 days.
A green light that your seeds are viable is when more than half sprout; if that’s not the case for your seeds, consider buying some.
Tip: To prolong the life-span of your seeds, consider storing them in a cool, dry, dark place—free from pests.
3. Seed-starting pots/containers
No need to spend on the expensive seed starting kits. Instead, procure the simple black plastic trays (commonly used in nurseries and greenhouses) from your local nursery or gardening supply store.
Alternatively, make your seed containers by repurposing items such as yogurt containers, egg cartons, toilet paper (or paper towel) rolls, or eggshells.
There are endless possibilities out there on what to use for seed-starting, and below is what to consider when choosing one:
Compostability
Will the planting medium break down? For obvious reasons, you may want something that will still carry your seedlings even as you transplant them into the ground—in which case, an item made of paper or cardboard will suffice.
Using plastic containers is convenient in the sense that you can re-use them. However, you can’t plant them directly in the ground.
Drainage holes
Consider poking drainage holes into the container (if it doesn’t have any in place) to enhance aeration and prevent issues like root rot or mildew.
The safety of the material
How safe is your repurposed seed container? You want to make sure that it doesn’t contain any harmful substances that could leak into the soil and affect your seeds/seedlings.
And so, if you’re using cardboard, ensure it has no coating. Also, avoid glossy newspapers and magazines.
4. Heat
Depending on the type of plants you’re germinating, you may not or may need some bottom heat source.
While most fruits and veggies will sprout well at room temperature with hanging lights above them, there are instances where additional warmth could offer some benefits.
For instance, if the only location in your home you can use for seed-starting (like your basement or garage) tends to be colder in the winter, it makes much sense to heat the seed trays—only the trays, not the entire space.
…meaning you may need a heat mat.
5. Humidity dome
If you can get a seed tray with a humidity dome, the better it will be for your seeds. However, a DIY drainage tray with a plastic wrap also does the job perfectly well.
Though some may argue that it isn’t mandatory, a humidity dome helps boost your seeds’ germination rate and also cuts down on the effort and time required to keep the soil moist for effective seed germination.
6. Light
Once your seeds sprout, they’re going to need light. And that is where grow lights come in—though quite expensive.
If you plan to transplant your seedlings (someday) in the garden, then you should work with a cheaper alternative.
Get the ordinary fluorescent lights and fixtures from your local store and suspend them over the seedlings—close to the top part of the seedlings. Draw them (the lights) up gradually as the plants grow.
Though a great light alternative, a sunny window can sometimes lead to leggy, wimpy plants.
7. Spray bottle or a hose nozzle
A fine mist is all you want when watering your seed-starting trays.
If you’re using a hose nozzle, have it on the mister setting to not disrupt the soil or damage the fragile seedlings.
8. Labels—for easy seedling identification
Seedlings look pretty much similar when growing, and so consider labeling. Otherwise, you won’t discern which tomato or vegetable variety you planted in which cell.
A permanent marker and some Popsicle stick(s) will do the trick.
9. Timer
Not mandatory, as you can still achieve success without a timer.
But if you have one (a simple kitchen timer), give it some garden task…
Seedlings require between 12-14 hours exposure to light in a day, and so a timer would be a great way to ensure nothing more or less of that time frame.
An easy step by step guide to starting seeds indoors
Step 1: Get all the supplies ready.
…Just as mentioned above.
Step 2: Fill the seedling trays/pots with damp seed-starting mix
You want to ensure your Seed-Starting Mix is properly moistened before transferring it to the seedling trays.
And so, have the Mix in a large bucket and pour in some water. Use a trowel or your hands to stir it up.
Add in more water as needed once the Mix begins to moisten. This may take several minutes.
The final product should be a uniformly damp Mix (slightly damp), not soaking wet.
Now go ahead and fill your seedling trays with the moistened seed-starting mix.
Step 3: Sow your seeds.
Put 1-4 seeds onto the surface of the seed-starting mix; then, using your finger, gently press down the seeds to ensure proper contact with the soil.
Depending on your seeds’ type or size, it may not be necessary to press down or cover your seeds with the Mix after planting. A good example is when you’re dealing with tiny seeds like mustard or basil—which after planting, you leave uncovered.
However, for large ones like bean seeds, cover with ¼ to ½ inch layer of the seed-starting mix.
The best practice is to follow your seed packet instructions to see how deep and how far apart you can plant the seeds.
Mist the Mix surface with water.
Note: Ensure you label the trays/pots with the seed variety plus the sowing date.
 Step 4: Cover the trays with a humidity dome
Once you’ve placed your pots in a seed tray, cover them with a humidity dome. If you don’t have one, use plain plastic wrap.
Covering helps with moisture retention—much-needed by the seeds for germination.
Keep vents open (if your dome has some) to encourage proper ventilation during the sprouting period.
An alternative to this step is to pre-sprout the seeds and see them sprout before planting them into the pots.
Pre-sprouting is known to accelerate the germination process, increasing your chances of success with the whole process of indoor seed-starting.
Step 5: Add heat
At this point, your seeds crave heat (warmth) and not necessarily sunlight.
And most will do well with temperatures of 18-24℃ (65-75℉) to germinate.
Place the seed trays in a warm spot in your house. This can be your attic, near a source of heat (which is probably in your kitchen), on top of your refrigerator, laundry room, or simply utilize a seedling heat mat.
Inspect your seed trays daily for germination. If the Mix’s surface appears dry (which you can confirm by touching), consider misting with water, then wait for the seeds to germinate.
Step 6: Offer light
Remove the humidity dome once the seeds have sprouted. Then move the trays under the light.
A south-facing window is most likely the sunniest spot in your house. Therefore, place the seedlings there.
For artificial lighting, ensure the lights are within 2 inches of the seedlings’ tops.
Step 7: Keep the Mix moist
Use your spray bottle to irrigate the seedlings (moderately) once a day while paying keen attention not to over-water.
Spray bottles are specifically best for this task because they release gentle streams of water to guarantee the safety of your fragile seedlings. Otherwise, big chunks of water would damage the seedlings or (in the early panting stages) displace the seeds.
Begin watering the seedlings from underneath once the roots begin to advance down into the soil. Simply add some water to the tray so that the seedlings’ roots suck it from the bottom. Be careful, though, not to keep the Mix waterlogged.
A sure way to avoid water-logging issues is to allow the seedlings to sit in water only for a few hours.
Once fully established, reduce the watering frequency by allowing the soil to dry slightly before watering again.
Step 8: Thin the seedlings
Now that your seedlings have put forth their first set of true leaves, it’s time to thin and allow only the strongest to soldier on.
Simply snip the unwanted seedlings right at the soil line, so you don’t cause root disturbance.
If they all look good, consider transplanting the extras into separate larger pots filled with the potting mix; however, exercise caution when separating the seedlings’ roots are too close together.
With time, you’ll also need to move even the stronger ones to a larger pot because it’s very likely that most of these seedlings will outgrow the starting pots before the actual transplanting time.
A good sign is when you notice that you have to constantly water the seedlings—meaning their roots have outgrown the container and therefore require extra space to continue growing at a healthy pace.
Step 9: Begin fertilizing the seedlings.
When still in the initial stages of sprouting, seeds draw the needed nutrients from their endosperm—which means that they don’t depend so much on the “often minimal” nutrients available in the seed-starting mix.
But once the seedlings develop the second set of leaves, they begin to “ask” for an external source of nutrients; therefore, they begin fertilizing.
Lightly soak the potting mix with a half-strength organic liquid fertilizer like worm casting tea.
Step 10: Harden off your seedlings
Adapting your seedlings to the outdoor environment before transplanting—helps prepare them for the harsh reality of varying weather conditions outside—a process known as hardening off.
Beginning the process early (2 weeks before the transplanting day) ensures you don’t expose the transplant shock seedlings. Suddenly shifting seedlings from the indoor stable environment to the outside world with varying weather conditions (like cool nights, rain, sunlight, and wind) can adversely affect their growth.
And so, for the first few days, bring the seedlings outside under diffused light only for a few hours before taking them back indoors.
Gradually increase this time after the seventh day until the seedlings adapt to staying out all day.
Ensure that the soil stays moist throughout the hardening off period—to cushion the seedlings from the spring breeze and dry air. Both of these can trigger rapid transpiration causing the plant to wilt due to insufficient water or moisture in the soil for the roots to suck.
Tip: Use this hardening off period to prepare your garden. Add compost and fertilizer so that there are sufficient nutrients for the young plants to consume.
When is the right time to transplant?
Your seedlings are set for transplanting once the hardening off period is done.
By this time, you’ll notice those true leaves (maybe 3-4 of them)—which is an additional sign that your seedlings are ready for the outside world.
You want to constantly keep an eye on your weather forecast to ensure proper timing. Otherwise, you may end up losing your plants to the harsh weather elements if you transplant too early or too late.
A common guideline is the last spring frost date.
Ensure the prevailing temperatures are to the plants’ liking. For instance, if you’re working with cool-season crops like spinach and peas, you want to plant them before your outdoor temperatures become too warm.
Delay transplanting if a serious heatwave or cold snap is imminent OR if your garden soil is claggy and cold. Meanwhile, ensure that the plants are adequately fed and hydrated moving into the transplanting operation.
Feed them with a dilute water-soluble organic fertilizer a day to the transplanting day, then again just before you get them off their pots.
Ensure your garden soil drains well, captures and retains moisture, and that it’s loose enough to allow the seedlings’ roots to penetrate through easily. If necessary, add fresh soil.
Lastly, transplant when you know you will be around—so that you give the young plants maximum attention they need during the first days—keeping an eye on the soil moisture levels, so they don’t wilt.
How to transplant seedlings to the garden
Everything is ready now—you’ve hardened off your plants, prepared the garden, confirmed the weather; timing is right…
It’s time to move the plants to their permanent home.
Bring your seedlings to the garden and place them under a shade until when you need them.
Make planting holes; then carefully remove the plants from the pots, and keep the root balls and the attached soil as intact as possible.
Drop in the seedlings and cover the roots with soil as fast as possible to minimize their air exposure. A good rule of thumb is to cover the root ball top so that those lighter growing medium around the roots don’t dry out.
For nightshade crops (like peppers, eggplant, and tomatoes), bury the root ball a little deeper—since they’re able to grow adventitious roots from their stems. The slightly deeper planting helps stimulate the growth of the adventitious roots.
…which anchor the plant strongly to the ground so that it doesn’t fall over owing to the weight pressure from the fruits.
Crops like lettuce and chicories (escarole, radicchio, and endive) are better planted with the root ball top positioned above the surface of the surrounding soil to allow maximum air circulation reducing the risk of bottom rot.
Irrigate adequately after planting, even if the soil appears moist, enhance the root-to-soil contact, and easily help the plant settle.
Additional transplanting tips
Consider irrigating the beds a day to the transplanting day, especially if the soil or the weather appears dry.
If possible, transplant in the early hours of the day or late in the evening to save your plants from the heat of the sun.
Continue to irrigate regularly in the initial days until the seedlings develop new leaves—an indication that they’re now okay.
If you decide to mulch at this point, ensure you keep the mulch away from the stems, so it doesn’t choke the plants.
A few days after planting, feed the plants with phosphorus to promote strong root development. Simply take your 2 tablespoons of 15-30-15 starter fertilizer and mix with 4 quarts of water. Then feed each of your seedlings with one cup of the mixture.
Note: Use 1 tablespoon of 15-30-15 starter fertilizer in the case of vining crops like cucumbers and melons.
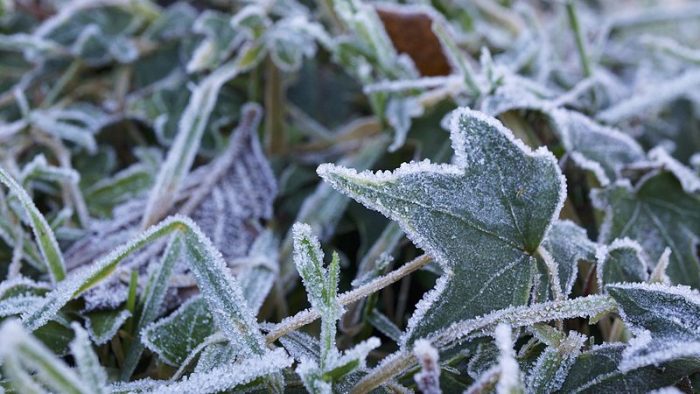
Get your protective coverings (cold frames or sheets) ready—to shield your plants from late spring frost.
Remember to take off the coverings in the morning—when frost dissipates, and temperatures rise. This helps to ensure that the sun’s heat doesn’t build beneath the coverings, causing high temperatures, thus killing the plants.
Easiest fruits and vegetable plants when starting seeds
Here are the 10 easiest-to-grow vegetables and fruits you can start from pots:
1. Bell peppers
Their beauty not only lies in the varying colors, shapes, and sizes they come in but also the treatment they offer your tongue. From sweet to spicy, bell peppers also ensure your favorite dish sizzles hot—to keep your taste nerves alive…!
Now, since bell peppers have quite a long growing season, you want to get ahead by starting your seeds indoors.
Start the seeds 8-10 weeks ahead of your zone’s last spring frost date.
- Meanwhile, embark on preparing your planting site, which can be a large container, raised garden, or in-ground garden.
- The site should be free of trees because bell peppers require full sun (at least 6-8 hours a day) to be more productive.
- The soil should be well-draining with a pH of 6.2-7.0, though they can withstand slightly alkaline conditions close to 7.5.
- Enrich the soil with mature compost or fertilizer so that your seedlings get sufficient nutrients once you transplant them to the garden.
- Harden off completely, then transplant outdoors when the soil temperature is at least 65℉; otherwise, your peppers will succumb to the cold.
- Water immediately after transplanting—then do it regularly, aiming for 1-2 inches a week (more when it gets hotter or if you hail from a desert or warm climate).
- Fertilize once the first fruits appear and mulch to keep the soil moist and cool.
- Use cages or stakes to support the plants once they begin to produce—so that they don’t bend as a result of weight pressure.
- Harvest all your peppers before the arrival of the first fall frost. Consider using a sharp knife or shears for the least damage.
Growing Bell peppers
| Soil | Loamy |
| Ideal temperature | 70-85℉ |
| Light | Full sun |
| Planting time | Early summer |
| Spacing | 18-24 inches apart |
| Soil pH | Slightly acidic to neutral |
| Germination | 7-21 days |
| Growing zones | 4-11 |
| Harvest time | 60-90 days |
2. Carrots
This easy-to-grow vegetable loves loose sandy soil and grows best when planted in the spring and fall—the cooler days of the growing season. However, you can plant them in the summer to ensure a continuous harvest through the fall season.
Carrots prefer full sun but can tolerate partial shade.
Anything like stones, rocks, or soil clumps can easily interfere with their growth and ensure the soil is well prepared.
To amend your soil, consider working in old coffee grounds rather than nitrogen-rich materials like fertilizer and manure—which can cause the carrots to grow an unattractive hairy appearance.
Dig down 12 inches making sure to remove any stones or clumpy soil, so your carrots get enough space to grow their roots deep into the soil.
Consider planting in a raised bed if you have too rocky or heavy clay soil. Maintain the 12 inch-depth and use sandy or loamy airy soil.
Gently mulch to keep the soil moistened and shield the plants’ roots from direct heat from the sun. Mulching also speeds up the germination process.
Thin (by snipping their tops with scissors) once the seedlings are 2.5 cm tall, allowing them to grow 3-4 inches (8-10cm) apart.
Irrigate at least one inch (about 1.9 liters per square foot) a week—for a start, then increase to two inches as the roots mature.
Note: Sow your carrots directly where you intend to grow them to maturity to avoid root disturbance.
For a summer harvest, plant your seeds 3-5 weeks ahead of your last spring frost date. However, for fall harvest, get the seeds into the ground anywhere around mid to late summer. Start about 10 weeks before your first fall frost.
After 5-6 weeks from planting, feed the plants with potassium and phosphate-rich fertilizer to encourage healthy roots.
Harvest when you feel the size is right for you—may be when they’re at least 1.3cm in diameter.
Growing Carrots
| Soil | Loamy, sandy |
| Temperature | 60-70℉ |
| Light | Full sun |
| Planting time | Spring, fall, summer |
| Spacing | 3 inches |
| Soil pH | Neutral |
| Germination | 14-21 days |
| Growing zones | 3-10 |
| Harvest time | 60-120 days (depending on the variety) |
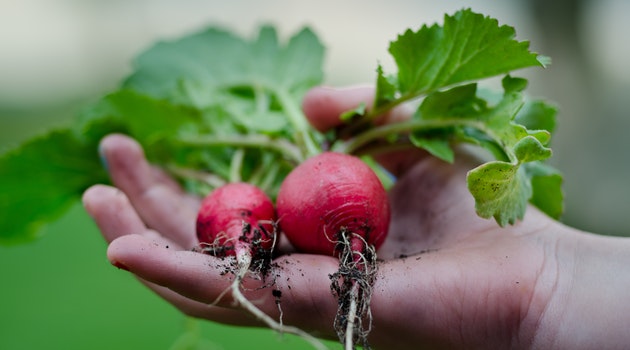
3. Radishes
This easy-to-grow hardy root vegetable can be planted severally in a growing season as it takes only 3 weeks to mature fully for harvest—depending on the variety.
However, plant in the fall or spring, not when the temperatures get too hot—like in the summer.
Scorching temperatures may lead to bolting, thereby rendering the radishes useless.
Just like carrots, radishes love loose, well-draining soil rich in organic matter with plenty of sunlight.
Too much shade will cause them to divert their energy into making larger leaves instead of roots, and that’s why you shouldn’t have them grown even next to vegetables that can shade them.
What about the soil?
If your soil is low on organic matter, add in all-purpose fertilizer as per the recommended amount in the packaging; OR use aged compost—just a few inches.
For a more clay-like soil type, consider mixing in some sand to help loosen the particles and enhance drainage.
Practice crop rotation to prevent diseases from affecting the crop. Only plant your radishes in the same location every third year.
As mentioned earlier, you can plant radishes more than twice in a single growing season. And so, to ensure a continuous harvest (let’s say you’re planting in the spring), begin sowing (preferably in the garden) 4-6 weeks ahead of the average date of your area’s last frost.
Plant your next round of seeds at least every 10 days—when the weather is still cool—so that you continue to enjoy your radishes late in the spring and early summer.
When it comes to radishes, take advantage of the fall season.
You can either decide to plant your radishes late in the summer or early in the fall. Just be sure to sow the seeds 4-6 weeks ahead of the first fall frost.
Sow the seeds to a depth of 0.5-1 inch and space them 1 inch (2.5cm) apart in singular rows with spacing of 30.5cm (12 inches) apart.
Thin the plants (one week after planting) to approximately 2 inches apart—to enhance their growth.
Water regularly (but moderately) to keep the soil evenly moist and not waterlogged.
Harvest when the roots are about 2.5cm in diameter at the surface of the soil. Simply pull out one and test before harvesting the rest.
Avoid leaving your radishes in the ground post their maturity stage, as that may quickly deteriorate their condition.
Growing Radishes
| Soil | Loamy, sandy |
| Temperature | 60-70℉ |
| Light | Full sun or partial shade |
| Planting time | Fall, spring, late summer |
| Spacing | 1 inch |
| Soil pH | Neutral |
| Germination | 4-10 days |
| Growing zones | 2-10 |
| Harvest time | 22-70 days (depending on the variety) |
4. Green beans
These tender annuals are easy and quick to grow even in the tiniest of spaces.
Though most are green, there are also yellow, red, purple, and streaked green beans varieties.
All you need is well-draining soil with just the normal fertility levels since beans are legumes—they take care of their own nitrogen needs.
However, for poor soils, amend with compost before planting.
Sow the seeds directly to the ground after your last spring frost date for successful and faster germination. Direct sowing in the ground keeps you out of trouble with the plants’ fragile roots—so that you don’t break them during the transplanting process.
If you start them indoors, use biodegradable pots to transplant the entire container with the plant into the garden.
There are two types of green beans; pole and bush beans.
Pole varieties—they grow long vines and therefore require staking.
Bush varieties—they grow low and compactly; therefore don’t need to be supported.
Plant the bush variety seeds 1-2 inches apart with the rows spaced at 3 feet apart.
For the pole variety, ensure there is support (can be teepee, fence, trellis, or any other type of support) in place before you begin planting.
Simply cut long strips (about 6-8 feet) of wood and hammer them into the soil—with the legs splayed in a circle and the tops tied together.
Sow 3-4 seeds (1 inch deep) per pole, spaced 3 inches apart. Space the poles (or whatever support system you’re using) 4 feet apart. Then irrigate.
A consistent moisture level is the trick to the highest quality harvest, and so water weekly in the absence of rain. And do that in the early hours of the day to allow time for the foliage to dry before night.
Mulching also helps retain soil moisture and suppress weed growth. You may want to try mulching with shredded leaves or straw.
Harvest when still young and tender—just before the seeds inside mature.
If possible, pick in the morning hours when the beans’ sugar levels are highest.
The rule is—the more you pick, the more your beans grow. And so, stay on top of the harvest by picking every other day, especially in the peak production periods.
Growing Green beans
| Soil | Clay, Loamy |
| Temperature | 55-85℉ |
| Light | Full sun |
| Planting time | Early summer |
| Spacing | 1-2 apart, 3 feet apart (rows)—depending on the variety. |
| Soil pH | Slightly acidic to neutral |
| Germination | 7-14 days |
| Growing zones | 3-10 |
| Harvest time | Bush beans: 50-55 days
Pole beans: 55-65 days |
5. Lettuce
This cool-weather plant grows best in the fall and spring—in loose, well-draining soil rich in organic matter.
It’s happy with 6 hours of sun a day but can still grow with less than that.
Grow it from seeds or sow directly in the ground.
- If sowing directly in the ground, consider waiting until the soil temperature reaches 40℉, though optimum germination is achieved at 13-18℃ (55-65℉).
- Sow once the ground is workable.
- However, for earlier produce—start the seeds indoors about 4-6 weeks ahead of the last spring frost date and only transplant after being well hardened off.
- Ensure your transplants have a well-developed root system (with 4-6 fully developed leaves) before planting them in the garden.
- Spacing between each planting row should be 12-15 inches (30-38cm)—but can be adjusted depending on the variety.
- For instance, a-4 inches apart spacing will do for the loose-leaf lettuce and 16 inches for the crisphead (iceberg) variety.
- You can as well have rows of garlic in between the lettuce plants to help control aphids.
- Water thoroughly after transplanting.
- Fertilize with a slow-release fertilizer 3 weeks after transplanting.
- Be sure to keep the soil moist and not excessively wet. You can use organic mulch since it’s also a great weed suppressor in addition to conserving your soil moisture.
- Plant additional seeds once every 2 weeks to ensure an uninterrupted supply of lettuce.
- As long as you keep it sufficiently watered, lettuce will grow fast and produce for longer periods supplying you with fresh salad every time.
- Though quite tolerant of the frost, anything below 45℉ can greatly hamper lettuce’s growth.
- If the temperatures drop unexpectedly by any chance, just cover your plants with a sheet or some plastic, and they should be okay.
Growing Lettuce
| Soil | Loamy |
| Temperature | 45-75℉ |
| Light | Full sun or partial shade |
| Planting time | Fall, spring |
| Spacing | 4-16 inches apart rows (depending on the variety) |
| Soil pH | Slightly acidic to neutral |
| Germination | 7-10 days |
| Growing zones | 4-9 |
| Harvest time | 30-56 days (depending on the variety) |
6. Spinach
Its growing needs are much like those of the loose-leaf lettuce.
It thrives in well-drained soil with full sun, though it can tolerate partial shade.
Start the seeds indoors or sow directly in the ground.
To prepare your garden soil, add in aged compost a week before planting.
Sow the seeds 1 inch apart with a row spacing of 14-18 inches apart. Cover the seeds with ½-1 inch of soil, then water.
After germination—when the seedlings are about 2 inches—thin to stand 3-4 inches apart.
Water regularly and fertilize only when the growth appears slow. Otherwise, just mulch to retain soil moisture.
Growing Spinach
| Soil | Loamy |
| Temperature | 35-75℉ |
| Light | Full sun |
| Planting time | Spring, Fall |
| Spacing | Thin to 3-4 inches apart |
| Soil pH | Neutral |
| Germination | 5-21 days |
| Growing zones | 2-9 |
| Harvest time | 40-55 days |
7. Cucumbers
This warm-weather crop can be started indoors or sown directly into the ground.
If you decide to have it in your garden, ensure adequate sunlight and that the soil is well-drained—use compost when planting.
Cucumbers are vines, so creating some space with trelliswork for their vigorous vines to run along would be a great idea to reap more cucumbers. The more space you accord them (for their trellis to spread), the more the harvest.
Want to try growing in containers? Cucumber vines are quite heavy feeders and thrive best in lightweight growing medium rich in organic matter.
Mix compost with high-quality potting soil (50-50 ratio). To the mixture, add a slow-release organic fertilizer, then plant.
Have one plant per bucket and place it in the sun. Water regularly.
Cucumbers should be planted post the last spring frost.
Growing Cucumber
| Soil | Loamy, well-drained |
| Temperature | 70-85℉ |
| Light | Partial shade or full sun |
| Planting time | Post the last spring frost/summer |
| Spacing | 2-3 feet (60-91cm) apart in a row—depending on the variety. |
| Soil pH | Slightly acidic to neutral |
| Germination | 4-13 days |
| Growing zones | 4-12 |
| Harvest time | 48-70 days (depending on the variety) |
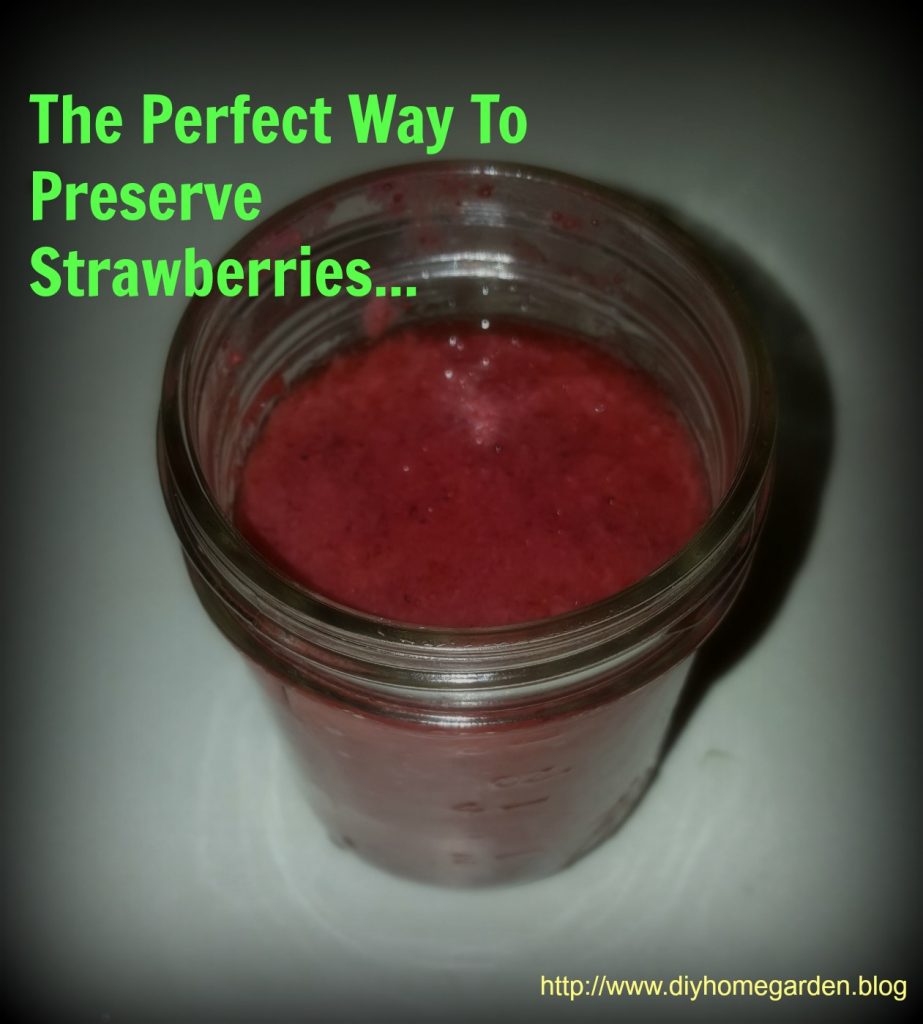
8. Strawberries
They’re among the easiest fruits to grow considering their fast-growing rate compared to all other fruiting crops.
Depending on the variety you grow, you can enjoy strawberry harvest throughout the spring, summer, and fall.
Just that you may know; here are the 3 common types of strawberries:
June-bearing varieties—they’re the most popular and common variety.
They produce the largest strawberries, usually for 14-21 days, which often happen in May or June.
Day-neutral varieties are insensitive to day length and are quite numb to temperature extremes compared to other strawberry varieties.
They continuously produce fruits, buds, and runners if the temperature stays at 38-85℉, though the production is quite low compared to that of June-bearers.
Ever-bearing varieties—they produce largely in the spring, then relatively smaller in the summer. Still, you can enjoy a bit of the fruit in late summer or fall. Generally, this strawberry variety puts out fewer runners than their June-bearing counterparts—conserving and directing the energy to the production of multiple strawberry harvests.
You may want to try the June-bearing type; however, it’s advisable to go with the variety recommended for your area.
Before planting, prepare your planting site (preferably raised beds) by mixing in aged compost to boost the soil nutrients.
Strawberries love loamy soil but can still thrive in different soil types as long as the soil is fertile and well-draining.
What about sandy soils?
For sandy soils—amend by mixing in an inch of mature compost. You want to incorporate more compost (4 inches) if you’re working with clay soil to properly ensure the soil drains.
Strawberries are sprawling plants and so space adequately to allow room for the runners.
Space the plants 20 inches apart with 4 feet spacing for the rows.
As you get the plant to the soil, ensure you don’t bend the roots. Ensure the crown (which is the central growing bud) stays right on the soil’s surface so it doesn’t rot and die.
Water adequately—after planting to help with root establishment.
Mulch to keep the weeds at bay and ensure the soil stays moist.
Irrigate weekly with 1-1.5 inches of water, making sure not to wet the leaves.
Feed the plants with a continuous-release fertilizer to enhance strong growth and promote excellent fruit production.
Strawberries are typically ready 4-6 weeks after blossoming.
Harvest in the cool of the morning. Pick only the ripe fruits. Cut by the stem to avoid damaging the plant.
Growing Strawberries
| Soil | Loamy |
| Temperature | 60-80℉ |
| Light | Full sun |
| Planting time | Spring, fall (depending on your growing zone) |
| Spacing | 20 inches apart; 4 feet spacing for the rows |
| Soil pH | Slightly acidic to neutral |
| Germination | 7 days-6 weeks (if you start from seeds) |
| Growing zones | 2-10 |
| Harvest time | 4-6 weeks (post blossoming) |
9. Garlic
Garlic is virtually a maintenance-free crop—an easy-to-grow vegetable with varying planting periods depending on your climate.
You can either plant it in the spring or fall.
In warmer climates, plant in early spring—after chilling the seeds to break its dormant state.
You want to consider fall if you reside in cooler climates. It’s one of the best times since it’s the time when garlic heads grow larger.
Garlic loves well-drained fertile soil—loose, loamy soil—with full sun.
Once you get your cloves (preferably from your local nursery or seed company), separate the bulbs into individual cloves—setting apart the healthy and disease-free ones for planting; AND using the smaller cloves for cooking.
Ensure you leave the papery layer on each clove to minimize any risks of damage to the clove.
Plant the cloves two inches (5cm) deep and two to four inches (5-10cm) apart—in their upright position. Make sure the pointy tip faces up, and the basal end faces down.
Cover with soil and pat gently; then water lightly to prevent the cloves from rotting.
Ensure the soil stays evenly moist through the growing season—and not overly wet.
Mulch with hay, straw, swamp grass, or chopped leaves to help balance the soil temperatures and retain moisture—that is, if you reside in hot climates.
Mulching isn’t recommended in wet climates though it may be useful to mulch heavily when there is an imminent frost threat. It helps prevent winter kill.
Consider cutting down on water when nearing harvest time to prevent any likelihood of mold growth on the bulbs. Allow the soil to dry 2-3 weeks ahead of the harvest.
This also helps improve the flavor of your garlic.
Harvest when ¾ or just half of the bottom leaves turn brown—usually around mid to late summer.
Dig out a bulb (first) to ascertain maturity. The bulb should be well-wrapped with the head divided into plump cloves.
Be sure to use a garden fork or spade (when harvesting) to dig out the garlic bulbs rather than pulling them.
Growing Garlic
| Soil | Loamy |
| Temperature | 54-75℉ |
| Light | Full sun |
| Planting time | Spring, fall |
| Spacing | 2-4 inches apart; 10-14 inches apart (rows) |
| Soil pH | Slightly acidic to neutral |
| Germination | 4-8 weeks depending on your climate and variety |
| Growing zones | 3-8 |
| Harvest time | 120-150 days |
10. Kale
This Brassica family member is cold-hardy and can therefore be planted in late summer (for warmer climates) or early spring (for cooler climates).
- You can start them indoors then transplant or sow them directly into the garden.
- Grow them in raised beds, containers, or in the garden; kales will just do well provided the soil is well-draining and is rich in organic matter.
- They need high nitrogen levels in the organic matter to grow healthy leaves.
- Your kales will flourish in full sun and won’t complain much in partial shade.
- For a warm, dry climate, offer some shade, especially in the hot afternoons, to prevent them from wilting.
- Use floating row covers, in the case of cooler climates, to shield your kales in the cool nights when temperatures dip below the 20s.
- Water immediately after planting, and continue regularly to keep the soil moist.
- Feed the plants during planting (by mixing fertilizer into the top layers of your garden soil—3-4 inches) and regularly (using a continuous-release plant food) throughout the growing season.
- Mulch the soil around your kales to keep them cool, contain the weeds and keep the soil moist.
- Begin harvesting when the leaves are approximately your hand’s size.
- Start with the oldest leaves from the plant’s lowest section—discarding any yellowed or diseased leaves.
- Extend your harvest by shielding the kales from the cold. Use row covers.
Growing Kale
| Soil | Loamy |
| Temperature | 60-70℉ |
| Light | Full sun, partial shade |
| Planting time | Early spring, late summer |
| Spacing | 18-24 inches apart |
| Soil pH | Neutral to slightly alkaline |
| Germination | 5-8 days |
| Growing zones | 2-8 |
| Harvest time | 30-40 days for transplants
55-75 days for direct sowing |
Here are the answers to four of the most common seed-starting problems
You might encounter some setbacks–after all, this might be your first try. Don’t give up now. You have come too far.
1. Poor germination
Germination problems can be due to incorrect soil temperature, inadequate moisture, incorrect planting depth, or maybe your seeds are too old.
Follow the steps we talked about earlier on how to check for your seeds’ viability.
Incorrect soil temperature: Different seeds prefer different temperatures. Make sure you check out your seed packet to establish the optimal germination temperature for your seeds.
Some seeds such as eggplants and peppers require high temperatures to germinate and won’t sprout in a 45℉ basement or garage without a heat mat.
Incorrect planting depth: Ensure you’re planting the seeds at the recommended depth. This information is also available on the seed packet.
Inadequate moisture: Water regularly (but moderately) to keep the soil moistened.
2. Mold growth
Mold is simply an indication that your growing medium is overly wet.
The soil should be moist and not wet; therefore, consider refraining from watering until the soil surface dries up.
Also, ensure there is adequate ventilation around the seedlings. You can use a small fan.
3. Leggy plants
Tall and leggy plants are a clear indication of insufficient light. Seedlings require between 12-14 hours of exposure to light in a day to thrive.
You may have opted for the windowsill as your source of light; however, once you notice the seedlings becoming tall, thin, and spindly, move them under growing lights—where you can use a timer to keep track of the recommended hours of light a day.
They’ll use this light until when they’re ready to be taken outdoors.
4. Damping-off disease
Damping-off is a common problem in young seedlings. It is caused by mold and fungi that thrive in cool and wet conditions.
These pathogens weaken and kill seedlings and sometimes destroy the seeds before germination.
Symptoms include failed germination, weak stems, wilted leaves, and root rot. In most cases, affected plants don’t survive.
Contributing factors include low light conditions, overwatering, and cool soil temperature.
To prevent damping-off disease:
- Water regularly, but moderately. The water should be at room temperature, not cold water.
- If possible, avoid reusing potting soil.
- Clean out your seed starting trays and pots (after use) before the beginning of each season.
- Hold on until your soil temperature is ideal for seed germination.
- Use grow lights to offer your seedlings the recommended daily light dose of 12-14 hours.
The Takeaway on Starting Seeds Indoors
Starting seeds indoors is a fairly easy process and a great way to cut down on your expenses, especially if you’re just starting gardening.
For guaranteed success, be sure to use the right temperature, water moderately (but consistently), use the right soil, be keen on the planting depth, and offer sufficient light.
In addition to that:
Begin small
…and keep it simple, especially if it’s your first time trying out the seed-starting process.
Grow just a few varieties starting with the simple and easy-to-grow ones like potatoes, tomatoes, radishes, and many others, as we saw above.
Never hesitate to try out something new.
Even that you’ve heard is difficult to start from seeds—like the discouragements you’ll get with tomatoes—go ahead and give it a shot.
Gardening is all about experimenting, and it’s full of surprises—good ones—in most cases.
Have confidence in yourself and never give up
Seed starting is an experiment—you know—just like everything else with gardening. And so expect surprises.
To set yourself up for success, ensure you follow this no-fail step-by-step guide once you’re ready for the process.
Use the right seed starting materials and begin on time. Feed and water the plants adequately while ensuring they receive the recommended amount of light in a day.
Don’t be discouraged by external factors—which can sometimes be unpredictable—like strong winds or extended heatwaves, or frost. If it happens, pick up yourself and germinate the seeds again.
There are still left-over seeds in that seed packet. Remember? And that wonderful process is the beauty of buying and starting your seeds.

Today, she also serves as a content producer and sometimes editor. Her vast (and often surprising!) skillset enables her to conquer any challenges.
She loves writing about gardening, wellness, and raising healthy children. As a full-time author and parent of two children, Maureen knows a trick or two on these topics.
After gaining valuable experience in blogging and content production with the DIY Home & Garden team, Maureen branched out and started her own publication, as well. Now, she proudly publishes the website: The Perfect Parenting Place.