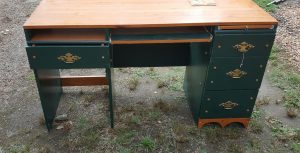
I recently refinished an old wood desk and transformed it into a farmhouse decor style. This desk was sitting in an old barn for over 10 years. The back was removed, someone had decided to run wiring to it and cut a light switch hole in the desktop. As some point, mice had chewed up that wiring, making it useless.
RELATED POST: Antique Child’s School Desk Upcycled Into a Charming End Table
I love the look of white or ivory with warm, rich wood accent pieces. Replacing the top was a great opportunity for me to add in an earthy cherry stain color to warm up the white. I wanted this desk makeover to be a one-time project, and white is so very classic. However, I went with a warmer ivory tone that I had on hand because it adds just a little more polished a look.
TRANSFORMING THE DESK:
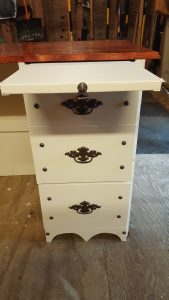
The original desk was constructed from hardwood birch. I left the drawers and structure of the front part of the base exactly how I found it, with no modifications. However, I replaced the back with beadboard panels. I made a fascia of beadboard over the two ends to complete the look and tied it all together with trim painted in the gorgeous cherry tone.
Of course, this desk was a heavy piece. It required more carpentry than I can do. My husband loves woodworking and did the carpentry and I took on the extensive sanding, priming, and painting. It took a whole lot to obliterate that oil-based green paint. It appeared that the green paint/wiring/hole cut in the top occurred sometime around 1990. I say this because somebody scribed a date inside one of the drawers.
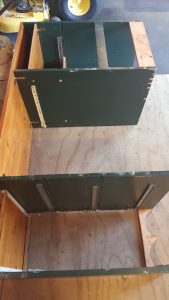
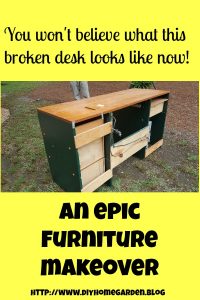
Here are a few images of what the desk looked like when I found it in an abandoned barn:
BREAKING IT DOWN:
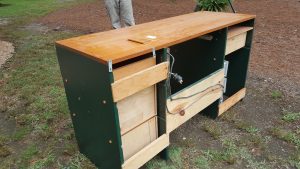
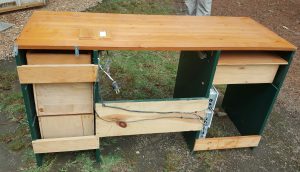
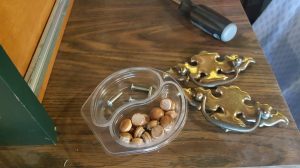
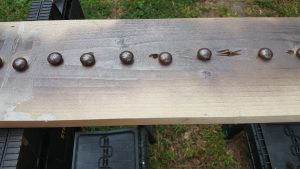
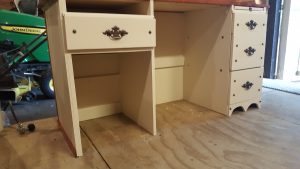
We started by breaking down parts of the desk in order to start over. Firstly, we removed all the drawers. Then we discarded the pullout keyboard tray because it’s obsolete with my laptop. Afterwards, we pulled off the slats that firmed up the back of the desk so we could add the beadboard. Then we pulled off the little wood buttons that cover the screw holes with pliers, then we put them away safely. Lastly, we removed the handles from the drawer. We set those aside so we could spray paint them later.
My favorite part was cutting out all the odd wiring and pulling off the desktop. I decided to rebuild rather than try to somehow fill the gaping hole where they put a light switch. That was a very “unique” feature, to say the least.
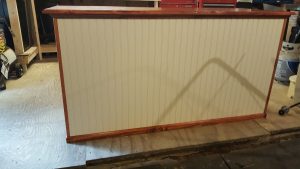
BEADBOARD TO ADD BEAUTY
Because we had laid the desk down onto its front (drawers removed) we had it in the perfect position to add the beadboard.
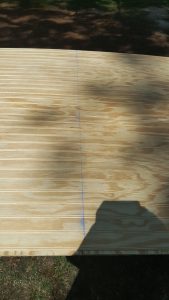
We measured twice for beadboard panels for the back and sides. We snapped a chalk line to cut our panels. They were attached using an air compressor brad nailer which leaves the tiniest of hole to preserve the beauty of the beadboard.
After we attached the beadboard, we stood the desk back up. It was now as sturdy as new.
Here’s a quick little video of my hubby nailing the panel. You can see how he found the back of the drawer supports to nail into, moved his hands away, and nailed it in.
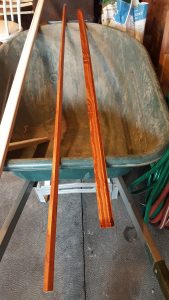
TRIM WORK:
We took careful measurements of all trim pieces. My husband cut them for me. My stepdaughter and I stained them and set them aside to dry as he continued attaching beadboard.
SPRAY PAINTING PROJECTS:
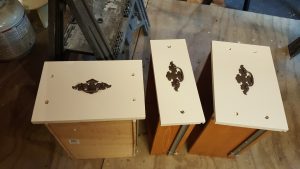
We also had a couple of spray painting projects. Firstly, we sprayed the handles a dark hammered bronze. Then we took the tiny buttons that cover the screws and painted them to match the drawer pulls. The wood tone of the birch was off from the cherry and they just looked wrong.
We also took the tiny buttons that cover the screws and painted them to match the drawer pulls. The wood tone of the birch was off from the cherry and they just looked wrong. Ten minutes of spray paint fixed that problem!
SANDING AND PAINTING (A LOT OF IT!)
I thoroughly sanded the green drawer panels and front sections that were now still exposed. The green paint would not go away. Period.
I had two choices: stripping or stain blocking primer. So I took the easy way and used Zinsser Stain Blocking Primer which completely blocked the remaining ugly green paint…in two coats.
I also sanded and primed the beadboard so that it accepted the paint evenly. It was raw wood and the sanding smoothed out the rough spots.
I used Valspar’s Fossil White paint from my local Ace Hardware store. I chose a flat finish so that it mimics a matte chalk paint effect, without the expense of chalk paint. It took two coats to get a great finish.
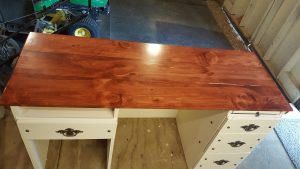
BUILDING THE DESK TOP:
It took two sets of hands to build the new desk top. Firstly, we used pine boards to create the top. Then we joined them with wood glue, clamped them together, and let them dry for an entire day and night.
Next, we sanded and stained the top. To protect it from coffee spills, we gave it three coats of polyurethane. Moreover, we gave it a light sanding between each coat.
Unfortunately, this was such a labor intensive job that I forgot to snap photos. Sorry ya’ll!
ATTACHING THE DESK TOP AND TRIM:
Finally, we attached the desktop to the desk.
We added all final trim back to the desk using the air nailer again.
Finally, we screwed the handles back into the drawers and popped the screw cover buttons back onto the desk panels and drawer fronts.
THE FINAL RESULT:
Finally, I had a desk completely reworked. I am thrilled with the outcome. It was a long project that we did over several days. This was because of all the different parts that needed stained, painted, drying times, etc.
This desk is going with me to my full-time job, it’s not staying to live at my own home office. I know I will get daily use out of it and enjoy it every work day.
I feel like this outcome was worth the effort:
I love hearing reader feedback! If you have any suggestions or tips, please share them in the comments section!
Also, please take a moment to like DIY Home & Garden on Facebook.

She has a B.S.Ed. in Secondary Education/English and a Spanish Minor. In addition, she holds a Certificates in Natural Health and Herbology from accredited programs. She pursued these natural wellness certifications due to her love for herb gardening.
Despite freelancing to make a living, her love is "all things home."
Deborah grew up in a family that grew a large vegetable garden and a fruit orchard, helping her parents pull weeds and can home-grown foods as part of her childhood. In fact, she had no idea that she could purchase veggies and fruits in pre-packed steel cans until she went to college and made a food run.
Today, she lives in Bertie County, North Carolina, an agricultural rural area with more chickens than people. She lives with her husband and two rescue pets a sweet toy fox terrier and a cat who showed up one day and moved into the house. Together, they enjoy DIY projects, furniture refinishing, gardening, and canning.