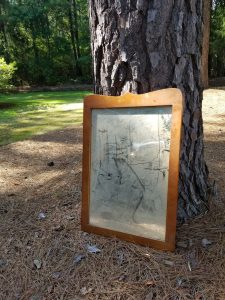
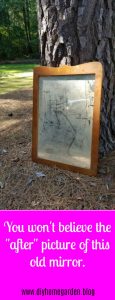
I’ve been away from my workshop for a few weeks, and I was itching to do an easy project last week. I had an ugly 1960-ish old mirror that I had a vision for. I wanted to create a distressed, antique look with a vintage look and feel to it.
I’ve shared vintage mirror makeovers before. In fact, I have advocated taking the mirror completely apart to protect the glass from needing to have paint scraped away after completion. This time, I decided to do something a little bit different.
RELATED POST: How To Refinish Laminate Furniture… It’s Easy To Do!
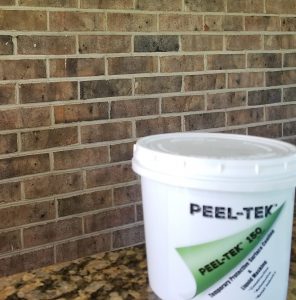
Introducing the Peel-Tek 150
A company called Peel-Tek 150 had reached out to me and offered me a sample of their product. It’s a replacement for painter’s tape that I had read about. The info I had seen claimed that you brush it on, paint, then peel it away leaving the area you had covered clean.
Full Disclosure: Peel-Tek 150 supplied me with their product to try in exchange for a review of the product or featured project on my blog. However, my opinions and observations of the product are fully my own. I will not recommend a product that I don’t love!
This could be a game-changer for my DIY projects, so I decided to give this product a go. Restoring this mirror was a perfect project as it was a short, inexpensive project and if it didn’t work, I would be able to purchase another mirror to insert or re-purpose the frame. No big loss if it was a mess.
Here’s how I went about it.
https://www.youtube.com/watch?v=PnuDD3g95Os&w=560&h=315
By the way y’all, I went way out of my comfort zone to make this video intro. However, I put on my big gal panties and gave you the video content you’ve asked for!
Distressed Mirror Makeover
Cleaned the mirror
This mirror was a mess. I grabbed it from a friend’s trash pile when she was cleaning out an old shed. It had years of grime. I started by using a mixture of white vinegar and water to wipe away years and years of dirt. I even used a screwdriver to get into the corner to pull out an old spider nest. Yuck!
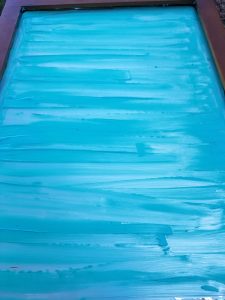
Applied the Peel-Tek 150
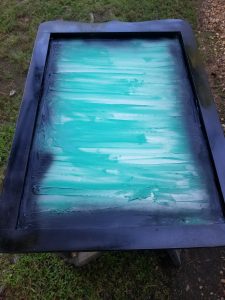
Following the instructions (which I do read occasionally but admit to normally just winging it!), I used a disposable foam craft brush to apply a good coating of Peel-Tek 150. The directions stated to let it cure fully to ensure proper protection. I waited about 30 minutes and it looked pretty good to go. I really liked that it was blue as it made it easy to see while I was applying it to the glass.
Spray painted the frame
Initially, I’d planned to chalk paint the mirror frame and use an antiquing glaze. However, I decided to really put the Peel-Tek 150 to the test and use spray paint instead. The brown wood was actually in decent shape considering the years of neglect, no gouges or large scrapes.
I selected a primer + spray paint all in one product in a matte black finish. Because I felt like the matte finish would add to the aged look instead of a new and glossy look. Then I spray painted with abandon, not worrying about the mirror under the Peel-Tek as I put it to the spray paint test.
It took two coats of black spray paint, each one about 15 minutes apart. Then I let the paint dry for several hours.
Removed the Peel-Tek 150
Did you ever use rubber cement in elementary school? Removing this product took me back to those fun days of art class! I used a scraper to “break the seal” of the Peel-Tek 150 and pulled away most of it into two large pieces.
- One caveat!
I did this project on a day that with a heat index of over 100 degrees and about 85% humidity. The top of the product was cured, but underneath it was still a little bit sticky. Nevertheless, the few little wet bits of product rolled off with minimal effort using my fingers. If you do this project in a drier climate, I don’t believe you will experience this issue. After all, the instructions did say to let it fully cure. However, nothing seems to cure to a dry finish in summer in NC.
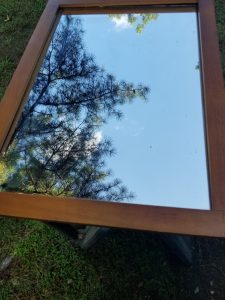
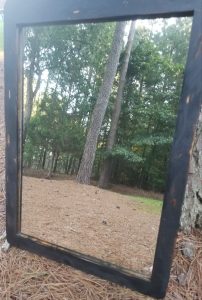
When I was done peeling away the masking product, I was amazed, to say the least!
Even after intentionally messy spray painting, the mirror was perfectly paint-free. Not a sign of black paint anywhere on the mirror itself!
Distressed the frame with the orbital sander
I used an orbital sander to give the frame a distressed look. Then I randomly but intentionally created some swirl marks and chipped back the paint to expose the brown wood under the black paint. I really wanted a randomized look to the distressing.
Coated the mirror’s frame with clear wax
I applied a clear furniture sealing wax to protect the frame. I applied the wax with a soft cloth, waited about 10 minutes, then buffed it out. It left a nice and smooth finish to the frame that will protect it for years to come.
Final clean up
I went over the glass of the mirror with the vinegar and water cleaner one more time to remove any sanding grit or leftover specks of the Peel-Tek. It shined up beautifully!

The Takeaway
I now have a gorgeous distressed mirror project completed. Over the next few months, DIY Home & Garden will be moving out of my spare bedroom and into an office space…in a specially designed barn in my backyard. I plan to use the mirror as decor in my new office space whenever it’s ready.
The final consensus on the performance of the Peel-Tek 150? I give it two thumbs up and DIY Home & Garden readers will see it used on another future project very soon! I hope y’all will give it a try.
Have a happy DIY day!
She has a B.S.Ed. in Secondary Education/English and a Spanish Minor. In addition, she holds a Certificates in Natural Health and Herbology from accredited programs. She pursued these natural wellness certifications due to her love for herb gardening.
Despite freelancing to make a living, her love is "all things home."
Deborah grew up in a family that grew a large vegetable garden and a fruit orchard, helping her parents pull weeds and can home-grown foods as part of her childhood. In fact, she had no idea that she could purchase veggies and fruits in pre-packed steel cans until she went to college and made a food run.
Today, she lives in Bertie County, North Carolina, an agricultural rural area with more chickens than people. She lives with her husband and two rescue pets a sweet toy fox terrier and a cat who showed up one day and moved into the house. Together, they enjoy DIY projects, furniture refinishing, gardening, and canning.